Friday, May 30, 2014

Chocolate peanut butter muffins


Oh my, I love how these muffins are smelling right now. I could eat peanut butter anytime! My favorite cookies around Christmas time is peanut butter cookies. I was thinking of peanut butter fudge last night. It was too late to make fudge, not to mention I don't think I had the ingredients. I do for these delicious muffins so I settled on making this recipe.

Recipe:
2 1/4 cups of flour
2/3 cups dark brown sugar
2 teaspoons of baking powder
1/2 teaspoon of salt
2 eggs
6 tablespoons of melted butter
1/2 cup peanut butter, chunky or smooth
1 cup of milk
3/4 cup semi sweet chocolate, I used chopped, mini would be cute.

Mix dry ingredients in a large bowl, flour, sugar, baking powder, and salt. Whisk eggs, butter, peanut butter, and milk until combined. Add to dry ingredients and mix until almost incorporated and lightly fold in chocolate. Scoop batter into lined muffin tin. Bake in 375 degree Fahrenheit.


I hope you enjoy this recipe as we did!

Thursday, May 29, 2014

June Menu and a Great Veggie Burger Recipe


It's hard to believe we've already reached the end of May - but the calendar rarely lies so here we are.  Our June Menu is pretty similar to last month's, but I did put the homemade lumpia I made on it (woohoo).  The only downside to lumpia is they are 6 points each - and it is impossible to stop at just one (I may or may not have eaten 4 before I looked at how many points they were - oops).   

The other thing I added were cheeseburgers/veggie burgers.  Eric doesn't like cheeseburgers, so for a long time they were my guilty pleasure when I went to restaurants.  However, he does like veggie burgers.  The problem is even though they sound healthy - a lot of the options in the stores have unnecessary ingredients (including caramel color - which is on Eric's "wont eat" list due to reports like this.).  So one day I suggested we make our own - and after looking at a few options we chose this recipe.

Veggie Patties:

Ingredients:
2 tbsps olive oil
3 tbsps diced red onion
2 tbsps diced black olives
2 tbsps diced red bell peppers
1 1/2 tbsps diced garlic
1/2 cup black beans, drained
1/2 cup chickpeas, drained
1/2 cup white beans, drained
1/2 cup rolled oats
1/2 tsp paprika
1/2 tsp chili powder
1 tsp dried oregano
1 tbsp minced fresh parsley leaves
1/2 tsp red chili flakes
1/2 tsp ground cumin
1/2 tsp celery salt
1/4 tsp ground sage
2 tbsps seasoned bread crumbs
1 egg

Combine the red onion, black olives, bell peppers and garlic (Instead of chopping each thing individually, I guessed the amount for each item and used the food processor to dice them).  Heat 1 tbsp oil in a pan and saute the veggies.  Remove from heat and place in a large bowl.

Add all of the beans to the food processor and pulse to the consistency desired (your choice how chunky you want your patties).  You can either add the oats to the beans and pulse, or leave them whole and add after they are done.  Mix the beans, oats, bread crumbs and herbs with the cool veggies.  Add the egg and combine thoroughly.  Form 4 patties and place in refridgerator for 30 min.

Heat remaining oil (plus more if you want/need), and cook the patties until browned on both sides.  Serve immediately.
 
The first time I made them, I followed the instructions and didn't mash the beans.  Eric liked them, but they were super crumbly.  So the second time I made them, I put them in the food processor and they were a lot more like a patty.  I think I might even be able to put them on the BBQ this summer. 

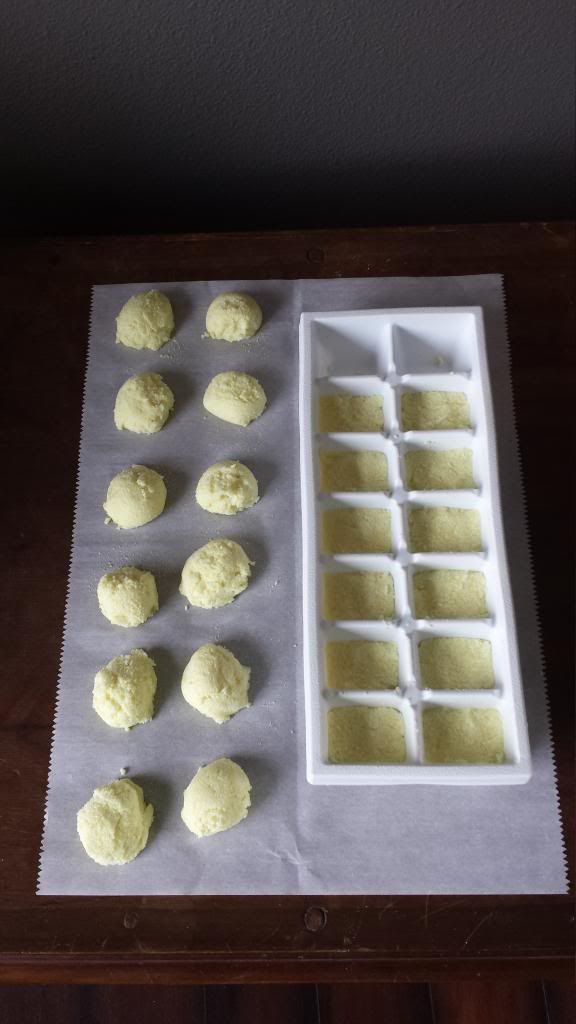
Also, I think I will add the jalapeno's the next time I make them, which wont be for awhile.  After I tried the recipe and got 4 patties, I had tons of beans left (I had to buy cans for all of them and it only called for about 1/3-1/4 of each can).  So I made the recipe again and tripled all of the ingredients - I now have about 12 patties in my freezer for future use :) 

At this point you might be wondering - where's the picture that will make me want to make these right now?  Well, I forgot to take pictures of the first time I made these - then I made them a second time to take pictures (which I still forgot to do!) and now I have kind of been banned from making them until I either find my sandwich grill, buy a new BBQ or have a ventilation system installed.  Since I was only making one patty last time the pan had a lot of unused space, and it took longer to cook because it was frozen, and the oil kind of smoked a lot, and we don't have a fan over the stove (unfinished kitchen, remember?) and Eric's office kind of filled up with smoke since it is upstairs...so yeah I wont be making these for at least a few weeks.  Go ahead and laugh - it's okay.

If you would like to see a picture - follow the link above. Trust me, if you like veggie burgers this is a great recipe to try!!

Wednesday, May 28, 2014

Homemade Pancake Syrup


I keep forgetting to buy our favorite pancake syrup, so I have been putting butter and jam on pancakes and french toast. It's really good, but I sure do love my pancake syrup! For the longest time I was using Mrs. Butterworth's - I knew it wasn't very good for us so I switched to Real Maple Syrup. I really didn't like it, I felt like I was licking a sweet tree! I finally found plain ol' pancake syrup at Trader Joe's and it is so good! However, I have shopped there a couple times and still forgot to pick some up. I thought surely there would be a recipe - so I went on a search and there are so many kinds. I like simple (not just because it's easy, but because I like the flavor of simple). When you throw too many flavors in, you forget what you're eating. This recipe is as simple as it gets.

Recipe:
1 cup of water
1 cup of granulated sugar
1 cup of brown sugar (I used dark, yum)

Flavor:
1 1/2-2 teaspoons of vanilla
1/2 teaspoon of maple flavor extract (this is so good) optional

That's it!

Put the sugar and water in a sauce pan, stir to combine. Bring mixture to a boil and boil for 3 minutes. Take the mixture off immediately, or it will crystallize later on.*. Whisk to add flavor(s) and let cool. Store on shelf.

*You will have to heat it up every time you want some to break up the sugar crystals. Warm syrup sounds great but sometimes we just don't have time!

You can play with the flavors. Next time I think I'm going to swap out the flavor amounts. I really like the maple flavoring. Isn't that funny! I love maple ice cream and maple baked goods but not actual maple syrup!

I hope you enjoy!


Tuesday, May 27, 2014

Jogging?!


Aren't these cute?  Their Felicia's!  (Thank you for the picture save!)
Yep - jogging...I never thought I would find the energy/motivation to be a jogger - not that I think I am yet, but I'm getting there!  I think it was really the combination of several things happening around the same time which came together  - the 'perfect storm' if you will - I have been slowly increasing the amount that I walk over the last few weeks, I REALLY, REALLY want to lose weight by January, and we got new neighbors.  That last reason seems a little weird, but it was actually the one that convinced me to start jogging.  How you might ask - our new neighbors (and new friends) and Eric all jog, but I don't  didn't.  I know it's all in my head, but I felt like the odd man out :).  Most nights after work Michelle & I go walking, and sometimes the guys will go jogging together.  After a few weeks of walking, I decided that as long as we started slow, I would like to start jogging a few nights a week.  I wasn't sure if I would be able to do it long term (and I still don't) but I have gone on 3 jogs and I can still walk - so yay for me!  Now, don't think I just go out there and jog the whole time - there are a lot of walking breaks in-between the jogging - but I am trying to jog a little further and rest a little less each time.  Yesterday I did 2.5 miles of jogging on gravel with (smallish) hills and made it in around 35 min (I forgot to stop my tracker) - which works out to around a 14 min mile.  My goal is to make it to a steady 10 min mile.  Michelle is a great jogging partner because she is enough better than me to challenge me, but not make me feel like I am holding her back!  (She does a lot of circling back to me lol)  

Also, I lost 2 pounds in the last week since I started jogging - let's hope that keeps up! :)  Now I just have to figure out how to stop eating...

Have a great week!


Friday, May 23, 2014

Roast Beef Sandwiches..Yes Please


Oh my does it smell good in my house. I made a slow cooker roast beef. Using a 4 pound roast and 6 cups of water it sure does make a lot of meat and Au Jus. I will have to seal it in bags and freeze the extra. I remember my mom making the most delicious roast beef sandwiches. She would get the packets of Au Jus and roast beef from the deli. She would toast the hoagie buns with butter then make the sauce and when she was ready to assemble she would drop the roast beef in the sauce and then right back out and onto the toasted bun. She would serve it with Au Jus and cole slaw. It was so delicious. I think if I asked my mother for every tasty recipe she's made for me I would probably have a cookbook! But of course - they are all in her head. I'm slowly getting them out of her. She's still making great things! I could go on and on. Let's get back to the recipe. Like I said it's made in a slow cooker so it's super easy to make.

I got the recipe from here.

4 pounds of beef roast (I went for marbled roast, I like the flavor it gives.)
3 bay leaves
2 sprigs of rosemary (or 1 tablespoon of dried)
1 sweet onion quartered
1 tablespoon of minced garlic (I used freeze dried, worked great)
1 cup of soy sauce
6 cups of water

Place your roast in the slow cooker. Bundle with twine or if you have an infuser like this (I use it in my beef stew too) you can stuff your bay leaf and rosemary in this and put it next to the roast. Next add onion, garlic, soy sauce and water. Set your slow cooker for slow 8-10 hours.

When it's done cooking pull the meat out and shred. Discard the herbs and onions and strain the Au Jus. We like toasted rolls. I have toasted grilled cheese with mayonnaise on the outside before so I thought I would try that here. It's so tasty! I top the rolls with the shredded meat and drizzled a little of the Au Jus on top. I served it with salad. The link above suggest peppers and cheese. I'm positive that would be tasty. I might do that with the leftovers. This time I needed some memory comfort food.

I sure hope you like it as much we do!

Thursday, May 22, 2014

How does your garden grow?


Well, it's been a 53 days since I planted my Espalier Apple Tree, which kickstarted my garden for this year.  As you can see it FINALLY started growing leaves and even some flowers!! I was so excited (mostly because I was sooo nervous that it wasn't doing anything) when it finally started showing signs of life 2 weeks ago.  It was a bit of a nail-biter situation up until then - I even made a call to my mom asking her if I should move it - even though I knew I should leave it alone - for some much needed reassurance that I hadn't killed it.  The flowers below appeared almost overnight.


Now I just have to figure out how to care for my apple tree...yikes!

I also have a bunch of other updates for my garden this year.  I created a page of information to put into my garden planning book.  I wanted to have a place I could put all of the information for what I planted, so that each year I could look back and see what worked and what didn't.  Plus, I am horrible at remembering what types of seeds I purchase every year, so I wanted to keep track of that as well.

    
I changed my original placement of what is around my apple tree, but it is all the same items.  The garlic I originally planted on 3/30 isn't doing well - I planted 18 cloves and I think about 4 have survived - so I want to go out and plant more this weekend (if I can find some).  The onions are doing well (if I compare how they look against my mom's - they should be right on track), and most of the strawberry plants are looking good (only a few died).  The chives got planted a little later than I originally planned, but it was really soggy for awhile.  I did see tiny little shoots coming up, but I couldn't get them to show up in the pictures.  (Psst - I originally planned to add some pictures of the onions and strawberries, but they were all blurry - oops)


The asparagus I planted started growing - and they are adorable.  I don't know if they are supposed to do this or not, but they make me laugh every time I see them.  I was supposed to back fill them, but I forgot and now I am scared to do it - what if I crush them or something?! I might just wait until they are fading in the Fall, and fill it in to protect them during the Winter - I need to consult my panel of experts (my mom and mom-in-law).  Next year I will (hopefully) be planting these in a raised bed - this year it just wasn't possible - but they take 3 years to be productive so I wanted to get a jumpstart.  I had 10 crowns to start, but only 7 seem to have survived.  I plan to get 10 more next year so I think it's fine.  This just supports my 70/30 survival rate claims. :)


I also have artichokes, green beans and zucchini coming up.  Now I need to get the courage to thin them out...I hate that part!  I want them all to live, but they wont do well if they don't have enough room.  I was thinking of trying some different things, since this is more of a test year than anything else.  I planted 2 pots of artichokes with 8 seeds each - normally you can only grow 1 plant per pot because their leaves get so big, but I am going to leave 3 plants in one pot and 2 plants in the other.  I want to see if I keep the leaves facing the inside of the pot trimmed, will they still do well?  I am hoping to plant the other plants somewhere in the yard (so I can at least try not to kill them).  The green beans are bush beans and they say they can be grown 2"-4" apart, so hopefully they will just be a big bush of beans for me to can this year.  The zucchini should also be thinned to one, but I think I will leave two in there and see how it goes (I can always take one out if I need to).  I am planning to plant additional pots of each of these in June and July, just to see how long I can extend the growing season. 


Last, but hopefully not least, are these little guys...they are either tomatoes or bell peppers.  They are hard to spot, but there are two plants there - really.  I can't tell what they are yet, so it is a surprise (yes, I forgot to label my containers - I'm sure you're shocked).  I actually have 2 pots that look like this and 1 more that hasn't done anything yet...both bell peppers and tomatoes have a 14 day germination so I have a few days left :) 

I know some of you (Mom, I'm talking to you) think I'm crazy for choosing to start my tomato seeds outside, after the frost, instead of inside a few weeks/months early.  I have never had good luck with transplanting, and I did some reading that says it is ok to do it this way.  The only downside is that they wont be ready until around August - boo.  Next year I will try to do starts, but this year I decided to skip it since we have so much to do and I don't have a Pinky proof area yet (he will not be able to control himself around them once they start growing). 


There you go - an update on how my garden grows :)

Happy gardening!
  

Wednesday, May 21, 2014

Easy White Bread (For the Bread Machine)


I like to make my own bread, so I can control what is put into it. It is also a great way to save money now that some loaves of bread are $5.00 or more. This recipe is very simple and is a nice fluffy white bread. My husband and Dex really like this one.

Ingredients:
2 1/4 teaspoons of dry active yeast
2 tablespoons sugar
1 cup warm water
1/4 cup canola oil
3 cups white bread flour
1 teaspoon salt

In the bread pan add the yeast, sugar and water. Do not mix, but let it sit for 10 minutes.
Add in the oil, then the flour and add the salt on top(make sure not to let it touch the liquid). 
Set the bread machine to basic or white bread. Mine took about 4 hours from start to finish. This is a good bread to make sandwiches, toast or my husband loves to eat it with olive oil and herbs.

Enjoy
J

Sugar, Sugar...


I love dark brown sugar. When I saw this recipe, I really wanted to give it a try. I also love applesauce muffins, but I have never tried apple cake. This recipe comes together quickly, and oh boy does it smell good in my house!

Here's the recipe:

1/2 cup of vegetable oil
4 eggs
3/4 cup of granulated sugar
3/4 cup of dark (or light) brown sugar
2 cups of white whole wheat flour
1 teaspoon of baking soda
3/4 teaspoon of salt
2 generous teaspoons of cinnamon
1 1/2 cups of applesauce.

Pre heat oven to 350 degrees. Line a cupcake pan with papers or grease your tin.

In a large bowl, or stand mixer, whisk oil eggs and sugars. Add flour, baking soda, salt and cinnamon, mix until smooth. Hand stir the applesauce into the batter. Scoop batter into prepared pan and bake for 16-20 minutes. Let cool on baking rack.

To make frosting:

Beat 1 8oz block of cream cheese, 1 stick or 1/2 cup of butter, 1 cup of dark, or light, brown sugar, 1 teaspoon of vanilla and a pinch of salt until smooth.

I put the frosting on with an offset spatula.  I adapted the recipe from here.

Enjoy!


Tuesday, May 20, 2014

Homemade Lumpia...mmmm


One of my all-time favorite foods is Lumpia.  I don't even know when I had my first one, but I will eat them any time I can get them - which is the problem.  I do not live or work anywhere near a Filipino restaurant (the closest one I know about is an hour away!)  So, what is a girl to do when she is craving one of these yummy rolls?  Make them, of course!  I have attempted them in the past and was not very happy with the results (ground beef doesn't work, even if it is half beef and half pork, and wonton wrappers are not going to get you lumpia - they will not taste the same).  I have also seen them in the grocery store every once in a while, but they usually have fish sauce in them (yes, I know that the ones made at a restaurant probably have fish sauce, but I don't know for sure it's in there - and what I don't know wont make me stop eating them).  I have tried eating those, but all I can taste is the fish sauce (again, yes, it's probably all in my head lol).

So, while I may not have a Filipino restaurant - I do have an Asian food store, Uwajimaya, which is close to where I work.  I needed to stop for something else and thought I would check to see if they had lumpia wrappers - and they did!! I was so excited so I bought them for the weekend.  Then 2 days later (on a Thursday) I just couldn't wait and I made them after work.  I would not recommend doing them at the end of a long night because rolling all of the lumpia takes a long time, but they are sooo worth it.

Ingredients: 
1 pound ground pork
2 cloves garlic, crushed
1/2 cup chopped onion
1/2 cup minced carrots
1/2 cup chopped green onions
1/2 cup thinly sliced green cabbage
1 teaspoon ground black pepper
1 teaspoon salt
1 teaspoon garlic powder
1 teaspoon soy sauce
30 lumpia wrappers
2 cups vegetable oil for frying

Over high heat, use a wok or large pan to cook the pork, stirring frequently. Remove the pork from the pan and set aside. Drain grease from the pan, and add the onions and garlic.  Cook for 2 min and add cooked pork, carrots, green onions, and cabbage. Season with pepper, salt, garlic powder, and soy sauce. Remove from heat, and set aside until cool enough to handle.

Place three heaping tablespoons of the filling diagonally near one corner of each wrapper, leaving a 1 1/2 inch space at both ends.  Fold sides and roll - moisten the other side of the wrapper with water to seal the edge. Cover the rolls with plastic wrap to keep them moist. (You should check the filling amount and adjust as needed.)

Heat a heavy skillet over medium heat, and add enough oil to reach 1/2 inch depth, and heat for 5 minutes. Slide 3 or 4 lumpia into the oil. Fry the rolls for 1 to 2 minutes, turning until all sides are golden brown. Drain on paper towels and serve immediately.

These are really easy to make and they taste great.  I only cooked enough for our meal and I froze the rest.  I think I'll go home and make some more for dinner!!


Monday, May 19, 2014

Amish Sugar Cookies and a Double Birthday Party!


This weekend Felicia, X and I went on a little road trip to a very good friends house for some girl time and her 11 year old twins birthday party. Before the party, Abby and I made Amish Sugar Cookies from a recipe that Felicia often uses. They are easy to make (no refrigerator time) and have a nice light buttery flavor.

Ingredients: 
1 cup powder sugar
1 cup sugar
1 cup vegetable oil
1 cup butter (2sticks) 
2 eggs
1 teaspoon vanilla 
4 1/2 cups flour
1 teaspoon baking soda
1 teaspoon cream of tartar

Preheat the oven to 375 degrees.

In the bowl of a mixer add both sugars, butter and oil and mix on medium. Mix in the eggs and then the vanilla. 


In a new bowl mix together the last 3 ingredients (the flour, baking soda and cream of tartar). Add the dry ingredients into the mixing bowl one cup at a time, mixing in between.

Use a small cookie scoop or spoon to drop cookies on to a un-greased cookie sheet. Bake for about 10 minutes, until the tops start to brown.


Happy Birthday Hannah and Abby, we love you!


The cakes were made by their mom and a friend - aren't they great!!

Enjoy
J

Thursday, May 15, 2014

New projects are on the horizon...

I can't believe it's already halfway through May!!  Our goal for finishing Eric's office was the end of May, but since we have both been sick the last few weeks (first me and then Eric) we are not going to meet that goal.  We still have a lot of projects to finish in there - The main ones being the desktop, the drawer fronts and doors, some wall panels and the upper cabinets for above the desk.  So we discussed it and made a decision - if we can get enough things done by the end of May and are on a roll, we will continue the office projects until the end of June.  If we are not able to get any momentum in finishing the projects, we will be moving on to the next room on our list.  We will still be working on the office, but only here and there between other things.  We have a big list of projects to finish by the end of the year, but we are pretty committed to getting it done (or maybe we should just be committed??)

So, what's our next project?  The Master Bedroom!  We plan to do this room in two steps because we have some bigger projects we haven't made all the decisions about yet, but I don't want to go another year without a closet or light fixtures!  So, the first phase is to build the closet organization, install french doors, put up crown molding and install lighting.  The second phase will include a new bed, a bookcase and the rest of the decor.

I am really excited about getting my closet completed - I just do not have enough room right now!  Here is a sneak peak at what I am thinking of doing:

 Obviously this isn't exactly what I will end up with (I still need to take measurements), but it is pretty close to the look I am going for.  I mostly have things that are shorter to hang, so I don't need a huge long hanging sections, and Eric only needs a place to hang his jackets (of which there are many).  The shelves above will be for sweaters, purses and other things.  The shelves below will have pajamas and shoes and other things I can't hang up.  The very bottom is for laundry baskets so they are out of sight.  I am hoping I will be able to have a 4 foot space in the center, but I may have to redesign it if it is too much weight - we will see when we get a little closer to actually building it.  The grey area is where the outer wall covers the front of the closet, the white area is where the door is.  I got the original idea from here.  I love the idea, but I don't have a whole room for my closet so I need to have a little more function in a small area (plus, I own like 12 pairs of shoes so I don't need quite that much shoe space).

I'm going to keep dreaming of my closet - have a great day!
   

Wednesday, May 14, 2014

Oatmeal Banana Coconut Chocolate Chip Cookies


These cookies only have 4 ingredients, can you guess what they are?!
2 mashed ripe bananas
1 cup quick oatmeal
1/4 cup coconut
1/4 cops dark chocolate chips

Mix it all together.

Preheat the oven to 350 degrees and scoop the cookies onto a cookie sheet. I used a small cookie scoop, but you can just use a spoon.


Bake for 15 to 17 minutes, they will still be soft and squishy and almost look the same as they did going in.


These are a quick, easy and very healthy alternative when you're craving sweets. They are not quite like what you would think of as a cookie, but are yummy and they stopped my husband from wanting a bunch of sweets last night.

I made them as a take of these cookies.

Enjoy
J

Summer fun!


I'm super excited for this summer. As I have talked about before my son has had a rough beginning. This year we aren't sending him to summer school. Last year we did because he was only in school for 2 and half months. He has such a great memory that I feel he will be ok without it. We will still have his weekly therapies, but postponing or combining them on other days will work out. I want to take him to the zoo, road trips, museums, and a bunch more things. I have wanted to sign him up for day camps as well, but that was hard to manage with him being in summer school. My son has worked so hard - I would like him to start having a blast whenever we can. I saw this really cool "slip and slide" at a store the other day, I think I will have to get one. He's a total outdoor kid! I wish we had more time to go outside now. When summer gets here it's on! He was riding his scooter the other day, we got him one for Christmas, he was hunched over it. His growing like a weed. I need my husband to raise it for him. I have been having a great time watching him grow and get stronger. Isn't our goal to see our children be happy, healthy and strong? I have to say at one point I wasn't sure I was going to see it.

Let's us know what fun summer plans you will be doing. I'm still figuring ours out!

Have a great day!

Tuesday, May 13, 2014

Apple Cinnamon Cookies


This weekend Eric asked me to make cookies but I was having a hard time deciding which kind to make.  Then I remembered these yummy apple cinnamon ones we get from the store sometimes and decided to try to recreate them.  After looking around online I ran across this recipe.  It was close but I wanted pieces of apple, not shredded apple.  I was worried that if I used chunks of apple they wouldn't have time to soften before the cookie was done.  Eric actually came up with the solution - baking the apples before I put them in the cookie batter.  Well, I have to say the cookies were delicious (you know there aren't any left, right?) - but they do take a little extra time and planning.  Well worth it in my opinion, but I think these would be great for freezer cookies so I can have them anytime (not just when I have an hour to make them).


Soft Apple Cinnamon Cookies

Ingredients:
1 1/2-2 cups cubed apples, small pieces
1 tsp cinnamon
1 tsp butter

1/2 cup butter, salted or unsalted
1 1/3 cup brown sugar (you can also use half brown and half white sugar)
2 eggs
2 cups flour
2 tbsp cornstarch
1 tsp bakind soda
1/2 tsp salt
1/8 tsp nutmeg
2 tsp cinnamon

For the apples:
Preheat oven to 350 degrees.  Combine cubed apples and 1 tsp cinnamon in a baking dish, coating all of the pieces.  Divide the teaspoon of butter into 4 pieces and place on top of the apples.  Bake for a few minutes and stir to combine the butter and apples.  Continue baking for about 20 min, stirring frequently, until apples are tender but not too soft.  Remove from the oven and let cool.

For the cookies:
Preheat the oven to 350 degrees.  Cream butter and sugar in a mixer.  Add the eggs and continue to beat until the batter is uniform.  In a seperate bowl combine flour, cornstarch, baking soda, nutmeg and cinnamon.  Add the dry ingredients to mixer, mix until combined.  Add the apples and gently incorporate.

Place dough on parchment paper, using a large cookie scoop.  If you do not have a large scoop, you can form large balls and gently press to flatten slightly.  Bake for 8-10 min, until lighly golden brown.  Remove from cookie sheet and cool on wire rack (I just move the whole piece of parchment to the wire rack).  I got 18 cookies from this recipe, but I wanted larger cookies.

Eric really liked these cookies, but he said he would like something more like a Snickerdoodle next time.  I will try that out sometime, but I have to stop making treats or I am never going to lose weight!! Lol :)


Monday, May 12, 2014

Banana Cupcakes


My mom called me the other day to tell me what she wanted for Mother's Day......Peanut Butter Frosting! She said she did not care if I made anything to go with it, she would eat it out of a bowl. I thought I would make a chocolate cake with it, but when I went to make it I realized I forgot to buy flour. Now what to do? What else goes well with peanut butter... Bananas! I just happened to have some very ripe bananas and 1 cup of flour and it ended up perfect.

Ingredients:
2/3 cup smashed rippened bananas
1 egg
2 tablespoons soften salted butter
2/3 cup sugar
1/2 cup sour cream
1 teaspoon vanilla extract
1 cup flour
1/4 teaspoon salt
1/2 teaspoon baking soda
Preheat the oven to 375 degrees.

With a mixer cream sugar, butter and bananas. Add in the egg, sour cream and vanilla. Once mixed, add everything else and mix until everything is well blended, scrapping the sides as you go.

This makes an 8x8 cake, but I made 6 heart and 2 clover cupcakes.
Bake for around 22 min for cupcakes, longer for a single cake.

My mother-in-law passed away last July and this was our first Mother's Day without her. Her birthday was on Saint Patricks Day, so I thought I would make a few clover cakes as a way to bring her into our celebration.
 
Happy Mother's Day!

J

Friday, May 9, 2014

Cup fashion


I've been itching to make crafts. My craft room has become a dumping ground. It's on my list to clean.  I decided to make this super easy cup cozy. All it is a top of a sock, 3 1/2 inches, I have button shapes for my son and I've had my eye on the heart since I gave them to him. I found some coordinating fabric and made some leaf shapes. I put them under the button and hand sewed it all together. I made some snowman socks over the holidays. I had some left over socks so I grabbed one for this project. I might go out and pick up more to make some for friends. I had a loose knit sock and I think a tighter knit would work better.  When I made the snow man (different sock) the sock edge rolled up on its own. What I had to do with this sock was spray quilting spray on the frayed edges then roll them up.

I hope you try this out! Let us know in the comments!

Thursday, May 8, 2014

Did I make it?

So tomorrow marks the 30th day of my 30 Day Workout Challenge.  Did I workout every day? Nope, but I did do more than I thought I would.  It's a start.  Now I just have to continue for the next 30 days and do even better than this time. 

Here's a breakdown of my days:

Day 1 - P90X (60 min)
Day 2 - P90X (60 min)
Day 3 - P90X (60 min)
Day 4 - MS Walk (3 hours)
Day 5 - Nothing (Too sore from 3 hour walk lol)
Day 6 - Umm...nothing...oops
Day 7 - P90X (60 min)
Day 8 - Hmm...I might need a new plan
Day 9 - P90X (30 min)
Day 10 - I cleaned - does that count? (2 hours)
Day 11 - Weeelll, it is the weekend...
Day 12 - P90X (30 min)
Day 13 - UUGH - I have to figure something better out!
Day 14 - Four 10 min walks (40 min)
Day 15 - Four 10 min walks (40 min)
Day 16 - Four 10 min walks (40 min)
Day 17 - I'm awful ly tired 
Day 18 - See above
Day 19 - Three 10 min walks (30 min)
Day 20 - Three 10 min walks (30 min)
Day 21 - Three 10 min walks (30 min)
Day 22 - Three 10 min walks (30 min)
Day 23 - Dr Appt, Vet Appt, Sinus Infection...Nope, no workout - took a nap instead.
Day 24 - 20 min brisk walking (at IKEA)
Day 25 - More cleaning - I really think it should count! (2 hours)
Day 26 - Laid down most of the day - worst sinus infection ever! (Well, for me anyways)
Day 27 - HAHA - not happening - still can't breathe...
Day 28 - Umm...No comment
Day 29 - Three 10 min walks (30 min)
Day 30 - Three 10 min walks (30 min)  

19 days of working out - not too bad (Yes, I counted the days I cleaned.) That makes it 63% of the time - I'm gonna try for more like 80% next time.  I also want to try to do P90X on the weekends and walking during the week.  I find it really difficult to get home at 7pm and then spend time working out before having dinner (and after dinner just doesn't happen).  All of my co-workers are trying to be healthier, so we take mini breaks and go for walks during the day.  I have found that in 10 minutes I can walk 5 laps around our building and it is about 1300 steps, which is around 1/2 mile.  By the end of the day I have walked anywhere from 1.5 miles to 2 miles, depending on how many walking breaks I take.

So there you go - more than you could ever want to know about my workout routine lol :).  Does anyone else have a little cheat for getting their exercise during the workday??  I love that it gets me up and moving around during the day.


Wednesday, May 7, 2014

Chocolate Bundt Cake


I needed a chocolate fix, boy I sure got it! I love bundt cakes! I was thinking the cakes that I've made in this pan has mostly been rum. Which is delicious! I'll have to make that soon!  

Here's the recipe. 

Flour mixture:
2 1/4 cups of flour
3/4 cups of unsweetened cocoa
1 teaspoon baking soda
1 teaspoon salt

Milk mixture:
1/2 cup milk
1/2 cup sour cream

Butter mixture:
1 cup butter
1 1/2 cup sugar 

4 eggs 
1 teaspoon of vanilla extract


Butter you bundt pan. Preheat your oven to 320 degrees Fahrenheit. 

Beat butter mixture until light and fluffy. Add eggs one at time. Add vanilla. Mix the flour mixture in small bowl. Mix the milk mixture in a measuring cup. Alternating flour and milk mixture, add to butter mixture, starting and ending with flour mixture. It works best to pour half the flour mix, when it's combined add all of the milk mixture then finish with the remaining flour. Stir until just combined. Pour into prepared pan and bake for 55 minutes or until cake tester comes out clean.

Let cake cool completely. 

Ganache:

In a small sauce pan heat 1/2 cup of heavy cream to a simmer. In a heat proof bowl add 3 oz chocolate chopped. Pour cream over chocolate let sit for 2 minutes. Add  2 tablespoons of butter and wisk until smooth. Let it cool for a bit, whisking every once in awhile until thickened. 

Pour over cake and enjoy right away. If you can stand it, this can be covered and let set at room temperature for 1 day. 

Tuesday, May 6, 2014

A Little Crazy, but Clean!


Winda ready to go home after her teeth cleaning.
This last weekend was a bit of a crazy time for me.  We took Friday and Monday off - so YAY 4 day weekend!  However, we had a crazy schedule of office things to get done, a dinner and game night planned and Winda was scheduled for a teeth cleaning...so, obviously, I got sick.  I have been feeling like I was getting a sinus infection for a few weeks, just a day or two - here and there.  No biggie for me usually - they come and go and I am maybe down a day at most.  Not this time - we took Winda to the vet's on Friday morning, and by the time we got home at 3pm I was feeling pretty bad (I even took a nap, which I never do).  Since I wasn't feeling too good, and Winda was still groggy from the vet, we didn't get any of our projects done but that was okay - we still had 3 days left.  Saturday, I woke up feeling worse - it wasn't until this morning that I finally slept through the night and my face hurts a little less.  

Even though all I wanted to do was stay in bed, I wanted to get some of our things done more.  We managed to get a few things done, like getting a butcherblock counter for Eric's office from IKEA and cleaning the house up for our dinner on Sunday, but nowhere near as much as I was hoping.  On Sunday, we had my brother and sister-in-law (and her brother) over for Tacos and Margaritas - the funny thing is we planned this over a week ago and I totally spaced that Cinco de Mayo was this Monday - happy coincidence.  I was really looking forward to it since it is so rare that we all have time to hang out, so I refused to cancel it.  I'm glad I didn't - it was a lot of fun!!

One of the few things I did manage to get done was making dishwasher tablets.  I have had the stuff to make them for about a month, but I didn't want to make them until I ran out of the ones I already had, which I finally did on Saturday.  I looked around online for a recipe that used lemon juice instead of citric acid - mostly because I didn't want to buy something extra just for this project.  There are lots of different recipes, but they are all pretty much the same.  The ones I made are from here.

Dishwasher Tablets:
1 cup Borax
1 cup Washing Soda
1/4 cup Epsom Salts
Lemon Juice

Mix the borax, washing soda and epsom salts really well.  Add the lemon juice until the mixture is damp but with no extra liquid in the bowl.  I would start with around 7 or 8 tablespoons, and add as needed.  Use a tablespoon to divide the mix into an ice cube tray or to scoop onto a flat surface. 

I tried it both ways and I thought either way was fine.  I was a little concerned that the ones in the ice tray would be too compressed to dissolve correctly, so I like how the scooped ones are more crumbly (Once they dry they don't fall apart unless you try to break them up though), plus they work better for my dishwasher because they are flatter.  The cubes are tidier looking, and they come out of the tray really easily.  Let them dry overnight and then place into a container for storage.         

I have used the round ones twice already and I think they work better than some of the detergents I have tried in the past.  There was no residue on my plasticware, which is a big problem for some all-natural detergents.  I also have a rinse agent that is all-natural (I don't know the brand).  You can use vinegar, but I have heard some people say their dishes smell like vinegar so I am a little wary. 

I think one of the best things about these is the price.  I think that I spent around $12/15 for all of the items, but I will get about 144 tablets out of that.  Also, I will only need to buy more washing soda and I can make around 72 more tablets for only $4.  So (in theory) I can make enough tablets to last all year (doing 4 loads a week), for less than $20.  I have also read that you can freeze them - so I might do that when I get a large freezer - then I only have to make them once a year.

BTW - If you use the scoop option, make sure you put them up high to dry.  I was asked what kind of cookies I was making, so we definitely don't want any kids getting their hands on them!!    


Monday, May 5, 2014

Peanut Butter Rice Crispy Treats


Last week my husband told me that he would really like to have some peanut butter rice crispy treats like his mom used to make him. Did you know people made such a thing? I did not. I set out looking for a recipe, with Pinterest and Google it should be easy right? Wrong! Most of the recipes I found had chocolate on top (he didn't want that) or were made with other things instead of marshmallows (marshmallows were a must). I ended up just going with it and adding peanut butter.

Ingredients:
4 tablespoons butter
1 cup creamy peanut butter (They are very peanut buttery so if you want more of a marshmallow taste, I would add a little less peanut butter.)
6 cups puffed rice cereal
1 1lb bag of marshmallows

It's just as simple as making rice crispy treats, just with one added ingredient.

Melt the butter in a big pot over medium-low heat. Once it is melted add in the peanut butter mixing a few times until it melted. Add in the marshmallows and stir until they are melted and mixed in. Then add the cereal, mix and then press into pan with your spoon. Let cool, cut and serve.


I lined my dish with wax paper for easy clean up.

My husband loved them and now wants me to make them more often. I hope your family enjoys them just as much!

J

Friday, May 2, 2014

ABC's 123's Let's Celebrate Teachers!


I've enjoyed selecting things for my son's teacher for Teacher Appreciation Week.  Thank goodness for Pinterest, I learn so many good tricks and ideas like I'm posting about today.

How am I going to top myself next year. I'm sure Pinterest will have more ideas!

The plate is empty for now, I will fill it with fresh baked cookies on Sunday. Then I'll wrap and tie with the ribbon and tag, which says Thanks a 'Dozen".  I made the tag for the flowers, I will get those on Sunday, which says Thanks for helping our child "Bloom!" I found the jumbo marshmallows, and snack packs of the graham crackers. There are 2 bags that I tied together with a tag saying We need "S'more" teachers like you. I put a tag on the iced cup with a lid that says Thanks a " Latte', " I still need to get a gift card from a coffee bar. The last gift is a key chain that I found and I got a charm with her last initial on it, the tag says You're the "Key" to our child's success.

Each day I will send a gift with my son to give to his teacher. I truly hope she likes it!

I hope you get some good ideas. Let us know if you have great ideas too!

Have a great weekend.

Thursday, May 1, 2014

Happy May Day!

Yep - it's the first day of May, which means it's time for a new menu.  I made a bunch of changes to what we are eating (added some new recipes, took some old ones off).  I also added a (hopefully) helpful tool for myself - Weight Watchers Points.  I have been struggling with losing weight, so I signed up for WW last month.  I have used it before with a lot of success (sadly, once I stopped doing it I gained all the weight I lost back), so I was sure I would be able use it to help me lose weight this time.  Well...I'm pretty good at tracking what I eat during the day - but I am AWFUL about keeping track at night and on the weekends.  I don't want to spend a bunch of time figuring out how many points each meal is - especially if I am just throwing things together.  Also, my biggest enemy is snacking - I do it constantly!!  Even with my spotty tracking I have lost around 5 pounds - so hopefully with better tracking and the 30 min a day exercising I am forcing myself into I will lose more this month!

With that in mind, I spent a little time figuring out the points for the meals on my menu, which will help me plan what to make as well.  I removed some of the higher point meals (but not all - some things are worth the points), and I added some meals from the WW site.  The hardest part will be to stick to the serving size - some of the lower point meals are pretty small so I will double up on those, but most of them are a decent sized servings so I am going to try to stick to them.  Just to give you an idea of how many points I can eat a day - it's around 36 with the daily total and the weekly total averaged out.  Yeah - they go pretty quickly... good thing most fruit and veggies are zero points! 

Fingers crossed!!  
    
Related Posts Plugin for WordPress, Blogger...