Friday, October 31, 2014

Spooky Food...with Recipes!


It's the end of our week long Halloween Pinterest Challenge!! It seemed to go by so quickly!!  We wouldn't be us if we didn't have a food post - and we have some great recipes to share. 


Let's start with dinner - we wanted simple food, that would be fun to make for a party.


Mummy Calzone: 
1 can crescent rolls
4 Tbsp Pizza sauce
1 cup Shredded cheese
1 cup of Toppings (We used salami, red peppers and green onions - but you can use anything you want.  Just chop them into smallish pieces.)
**The amount of toppings, cheese and sauce are estimated - use as much or little as you want.**

Lay the crescent rolls flat, with the large sections touching.  Press them together to form a solid bottom about halfway up.  Mix all your toppings together with the cheese.  Spread pizza sauce along the crust and spread the toppings out.  Tuck the bottom up and crisscross the ends over and then under the next piece.  We used a little of the extra thick sections for the head, and sliced salami for the eyes.  Bake at 350 degrees until golden brown - about 15 min.

Beth:  I love how well this turned out.  The original recipe called for making your own crust, which I didn't have time for.  The crescent rolls were perfect for a fast, easy alternative.  They are ready to eat in about 30 min and are fun for kids of all ages!!

Veggie Graveyard:
Any crust, Baked and Cooled - You can get or make any crust you want to.  We used crescent rolls, pressed together and rolled at the edges.
Ranch dressing
Chopped veggies
Chopped lettuce (We grabbed a chopped salad bag from the store - it had lettuce already cut into small pieces - but you can do it yourself)
Crackers shaped like headstones (We used Annie's Saltines)
Black 'ink' - You can dye ranch dressing, or use gel frosting if they aren't going to be eaten.

Cover the bottom of your baked and cooled crust with ranch dressing.  Spread the chopped lettuce out and top with chopped veggies.  Use the blank ink to write RIP on a few crackers, and place them in the veggies. Ta-Da Done!

Beth:  I'm sure you noticed there aren't any measurements - that's because you can make this in any size, with any amount of veggies.  It's fast, easy and even kids will want to eat their veggies on a 'pizza'.

Jack O'Lantern Cheeseball:
2 - 8oz room temp cream cheese
3 thinly sliced green onions, reserve about an inch of one the tops thick and thin.
1 - 8oz fine shredded cheddar cheese, divided 
1/4 cup small diced red bell pepper
2 slices of pepperoni for face

Mix the cream cheese, green onions, 1 1/4 cup cheddar cheese and bell pepper with a hand mixer.  Put mixture in refrigerator for 1 hour.  Roll the mixture into a ball, then press the remaining cheese onto the outside of the ball.  Take the 2 slices of pepperoni and cut into triangles for the faces, decorate how ever you like.  Use the reserved green onion tops to make a stem.  It's ready to eat! Serve with crackers - bread rounds and vegetables would be great with this too!

Felicia:  If you haven't figured it out yet I like pumpkins...a lot!  When I saw this on Pinterest it got pinned right away.  I actually also have a whole recipe book on cheese ball creations.  This was a perfect match!

Bat Wontons:
Wonton wrappers
Cream cheese - we used chive and onion cream cheese.
Oil for pan frying or deep frying

Scoop about a Tbsp of the cream cheese onto the middle of a wonton.  Wrap two kitty-cornered ends over the cream cheese.  Twist the remaining to corners and point upwards.  Pan-fry or deep-fry the wontons.  Once cooled slightly, dab some cream cheese and use peppercorns to make eyes. 

Beth:  I have to say these were so good!!  They were easy to make ahead of time and took just minutes to pan-fry.  Just be careful - you will want to eat all of the ones you make!!  I was pretty glad we only made 12 Lol...

And now for dessert:


Halloween Bark:
White Chocolate Chips (or really any form of white chocolate)
Orange Oreo Pieces
Candy Corn
Candy Pumpkins
Pretzel Sticks
Candy Eyeballs
Anything else you would like to add

Melt the white chocolate and spread into a thin layer on parchment paper or cookie sheet.  Mix all of the other ingredients together and spread over the chocolate.  Press down so they will stick.  Let it cool, then break it up onto any size. 

Beth:  Super easy and so fun to pick what you want to include.  The eyes were just creepy enough and because they were soft and jelly-ish they were a surprise when you bit into them! 

Witch Hat Cupcakes:
Waffle Cones
Black Food Dye + 2 additional colors
Chocolate Wafer Cookies or similar cookie type
White chocolate chips
Chocolate cupcakes - baked and cooled completely
Frosting

We made the cupcakes and frosting ahead of time.  You can use your favorite recipes.  We recommend these if you don't have a favorite yet - for the chocolate cake and for the frosting.

To dye the cones black you will need something to hang dry the cones.  I used orange peel sticks, but skewers or anything like that would work.  Then I turned a BBQ pan that had round holes over and stuck the sticks through the holes.  It worked great, but you can use anything you have or just set them flat on a piece of parchment paper.  Once you have this figured out, add a small amount of black dye to water in the bottom of a flat dish (I used my 9x9 casserole) - you only want a thin layer of liquid so it doesn't end up inside the cone.  Using the stick, I rolled the cones around in the water until they were the desired darkness.  I then let them dry overnight - the outside gets really soggy so I wouldn't recommend doing this the same day you want to use them.

Dye part of your frosting green and use it to attach the cookie to the bottom of the cone, then add a band around the seem.  Place a white chocolate chip tip end in for the buckle.

Dye the rest of the frosting purple.  Frost the cupcakes and place a hat on top.

Beth and Felicia:  We knew we wanted to make cupcakes and fell in love with the witch hats.  We divided the work up so it wouldn't be too much work for either of us.  Next time we hope we can find larger chocolate wafer cookies, but we are really happy with how they turned out!!

Candy Corn Meringues:
4 egg whites
1/4 teaspoon salt
1/4 teaspoon cream of tartar
1 1/3 cup of sugar

food coloring, orange and yellow
piping bag or plastic bag like ziplock
large round tip

Preheat your oven to 350 degrees Fahrenheit.  Prepare 2 half sheets with silplats or parchment paper.  In a large bowl, beat egg whites until foamy then add salt and cream of tartar.  Continue beating until soft peaks form.  Start your timer for 7 minutes, during that time add sugar slowly. 

Divide into three amounts - large, medium and small.  Tint the largest amount yellow and the medium orange.  These don't expand so you can make them close but not touching.  Pipe the yellow first, then pipe the orange on top of the yellow and repeat with the plain meringue.  They should look like candy corn.  Bake for 2 to 2.5 hours.  I ate mine right away but usually you wait for a day. 
Felicia:  So I rushed this recipe.  If you follow these directions you shouldn't have a problem.  This needs a day to rest as well, if you can wait.  Even though today is Halloween, you can change the shape and colors for upcoming holidays!!
We voted the Wonton Bats as the Tastiest Thing We Made, and the Pumpkin Cheese Ball and Witch Hat Cupcakes tied for Best Looking!! :)
There you have it - the end of our Halloween Week!  We had a lot of fun and are glad we could share it with every one!!
Have a safe and fun Halloween!!
The Three Peas


Thursday, October 30, 2014

Kid's Halloween Crafts


We did a few simple Halloween crafts you can do with pretty much anyone - even the "older" kids.  We are all over 30 and thought they were fun - so we really do mean any age group!


Jamie's Finger Dot Bat Silhouette's:  This is as simple as it seems.  Kids can use any cutout shapes or colors they want.  Just lay the cutouts down on a blank paper and use your fingers to dab paint around and over the edge of the cut out.  Carefully remove the cutout and add eyes or any features you want.  Kids can make as many as they want and it will always turn out different!

Felicia's Potato Pumpkin Stamp:  This craft brings back memories and was super fun!  I cut a potato in half then carved a pumpkin face.  I found that you want to make it semi deep, nothing crazy but enough so that the paint doesn't pool in the holes.  I used my son's finger paint, but any paint will work.  Also, after dipping it into the paint, run it over the edge of the bowl to get most of the paint off.  Mine wouldn't do it so I swirled it around on a plate, which worked great.  The Pinterest post that I saw didn't have stems so I cut out a rectangle piece and stamped it in green paint then on the tops of my pumpkins!

Jamie's Eraser Dot Ghost Silhouette's:  This is just like the finger one, but you use an eraser to apply the paint (You will need one for each color, or will need to wipe the eraser between colors).

Beth's Tape Mummies:  These are fun and easy!  You can use any kind of tape - from scotch tape to washi tape.  I actually used washi tape, and a friend used a roll-on form of white out!  I think they all turned out great.  Start with a blank page of any color and randomly apply your tape all over.  Use a mummy cutout (I just made one from another blank paper) to trace on to the page after you are done.  Cut out the mummy and apply googly eyes!  Kid's can make mummies in any color, shape or size!

There is nothing more fun than doing crafts - at least we think so!!  Share your fun simple crafts - we would love to see what you like to do!

Happy Halloween!
Three Peas Create

Wednesday, October 29, 2014

Porch Showcase


Today we are sharing how our porches turned out!!  This is the first year we (Felicia and Beth) have decorated our porches - and we are both really excited about how they turned out!! 

We hope you enjoy them as much as we do...we both agree they make us smile when we come home.

  
Felicia:
I'm so grateful we decided to have a Halloween Challenge!

I kept seeing these beautiful glass lanterns on Pinterest. One filled with pumpkins or leaves and the other had a candle. So I set out to find them - boy they were expensive! Luckily after searching I found a buy one get one free deal. So they ended up being $20 apiece. Pretty good deal! Then I went to Target and I happened to walk by there candle section and found plastic lanterns with LED candles for $12 apiece. I ended up taking the others back...someday I will have the large and medium glass lanterns of my dreams, for now this makes me happy!

I also made a pumpkin tower. I removed the stems on my big and medium pumpkin and ran a dowel through the bottom of the large pumpkin and all the way through the medium one and then I pushed the small one on top. I used a saw on my dowel in the beginning. At first I made it a little too long so I used my gardening clippers and took a little off the top. That worked so much better and was less risk on my part! I found the wooden craft box, painted it black, filled it with straw and leaves to hold the pumpkin tower up.

I didn't make a sign, but I really wanted to make a pumpkin sign just like the one on my porch. My husband doesn't have time to help make me make one - and I didn't think it would be safe for me to use a saw to make this by myself. Someday I will make one! This is actually a lawn sign, so when I make one I will move this one to the lawn.
My table and door were a little too far apart for a good picture, but I am happy with how it turned out!!


Beth:

I was so excited when we decided to do this challenge - I knew it would give me the incentive to do some of the decorating I have wanted to do since we bought our house 3 years ago.  I am really happy with how it turned out, and I am looking forward to adding new things every year!  (Have I said how excited I am yet Lol)

What's even better - all I have to do is turn the Boo pumpkin around and remove the sign post and I'm all set for Fall and Thanksgiving!!  Although I may find something fun to make and add (maybe a Thanksgiving sign instead).

The only thing that may/may not stay is the wreath - I love it, but Eric not so much.  For now it has stayed, but I hear about how annoying it is EVERY time we leave or come home.  Lol - I'm hoping he'll get over it if I just leave it up, but we'll see. :)

Woohoo!  Our porch finale is done.  Tell us what you think!  Any suggestions for next year?

Happy Halloween!
Three Peas Create

Tuesday, October 28, 2014

Crafty Decorations

 
Welcome back for our second day of our Halloween Pinterest Challenge!!  (We are assuming you came back, after reading yesterdays post on decorating pumpkins.)  Today, we have a few non-pumpkin decorations to share.

 
In clockwise order, starting from the top left:


Beth's Sign Post:  I love how this turned out.  I am excited to see it get worn down from use every year, so it will be even better!  My only regret is that I have not used any purple anywhere else - but next year I will definitely have to find ways to add purple in my decorations.  I found the boards and stake at Michaels, painted them and hand painted the letters.  There is no bad paint job - if the letters are wobbly it just adds to the effect!! (Side note - I had to stop myself from adding glitter - but maybe I'll add it next year since I'm still thinking about it)

Beth's Wreath:  I love the burlap wreaths I see everywhere.  I have made a few, but none for the front door.  They are always a little tough to get started (how am I wrapping the burlap again?) - but they are completely worth the effort.  You can't see in the picture, but I added copper glitter to the edge of the C.  It looks pretty cool up close, and gives it a little glamour.  Maybe that should be my theme 'Rustic Glamour' - I am digging the burlap and glitter combo! Lol

Beth's Lantern:  Seriously - this was the best find ever!  I got this lantern for $13 at Fred Meyers on clearance.  Best...Find..Ever!!  I just layered burlap ribbon and fake pumpkins together.  I really want to put some orange lights in there too, but I have to figure out how to power them.

Felicia's Wreath:  I found this adorable wicker wreath.  I was going to individually pick each flower, but then I found a cute bouquet.  At first I was going to just use a few of the big flowers and one or two of the extras.  As you can see - I ended up using the whole thing.  I'm glad I did!!

You might have noticed a theme from yesterday and today - we will be showing off our decorated porches tomorrow!!  We hope you'll stick around and tell us what crafts or projects you've done for your Halloween and Fall decorations.

Happy Halloween!!
Three Peas Create 


Monday, October 27, 2014

Pumpkin Decorating


Welcome to the first day of our Halloween Pinterest Challenge!! We are super excited to share the projects we did from our always overflowing Pinterest boards!! 

We want to start off with the different ways we decorated our pumpkins.  We decided that we wanted to use fake pumpkins so we could use them every year, and save the carving for the night before Halloween (which was a little too late for this weeks' posts). 


In clockwise order, starting from the top left:

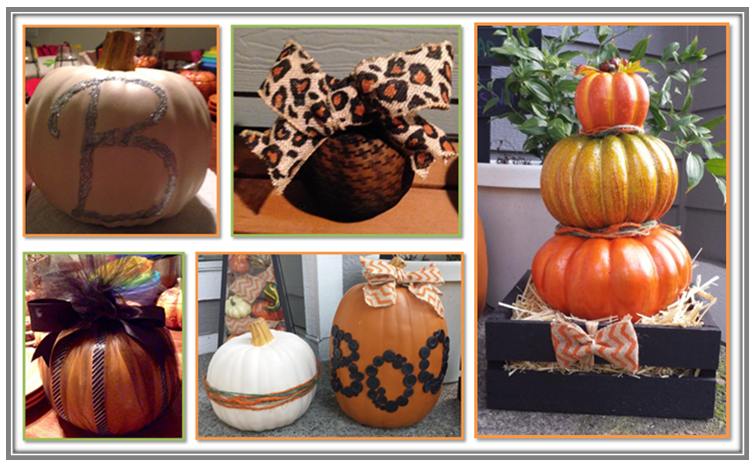
Felicia's Glitter Pumpkin: I drew a big "B" and traced it with glue then glitter. I wished I had gold glitter. So I might change it out by washing it and using different glitter. I do really like it though!

Felicia's Leopard Pumpkin: This one has printed tights pulled over the whole pumpkin and tied in a knot.  I added a burlap leopard ribbon to finish it off.

Beth's Pumpkin Tower:  I really wanted to do one of these!  I didn't add the BOO letters that most of the ones I saw had because I also wanted to do the button pumpkin, but I am still pretty happy with how it turned out.  I used a dowel to stabilize it, and course twine and burlap ribbon to finish it off.  The crate I painted black and distressed, but I think I might dry brush brown over it.
 
Beth's Button Pumpkin and Twine Pumpkin:  I love how these turned out.  For the button one, I laid out the buttons first, then dipped them in glue and placed them on the pumpkin.  I did one letter at a time, letting it dry in between.  At first, I wasn't sure how I wanted to finish the white pumpkin, but I had twine in natural, green and orange so I wrapped it around the pumpkin to see and decided to keep it that way - it's simple but I think it helps pull things together.  

Felicia's Tulle Pumpkin:  I wrapped the pumpkin, until I liked it, with washi tape. Then gathered the tulle and tied it with a rubber band. I found a smooth ribbon, the kind that doesn't bend, and tied a big bow around the top.
 
There you go!!  We really enjoyed making all these different types of decorated pumpkins, and can't wait to add even more next year to our collections!!
 
Did anyone else decorate a pumpkin - for inside or outside use?  Add your pictures in the comment section - we would love to see them!!
 
Happy Halloween!
The Three Peas


Thursday, October 23, 2014

Can't help it!


I'm off to get fake nails. I keep stoping thinking my nails will become strong and beautiful. Then I look down and see where my fingers got smashed in a van door and then I want to cover it up because it doesn't look pretty. I just can't help it I need to have fake nails they make my big hands look feminine. So I'm off to have some mama time! I hope your day is wonderful. Check back next week we are going to have a full week of Halloween!

See you then!

Wednesday, October 22, 2014

My New Favorite Thing


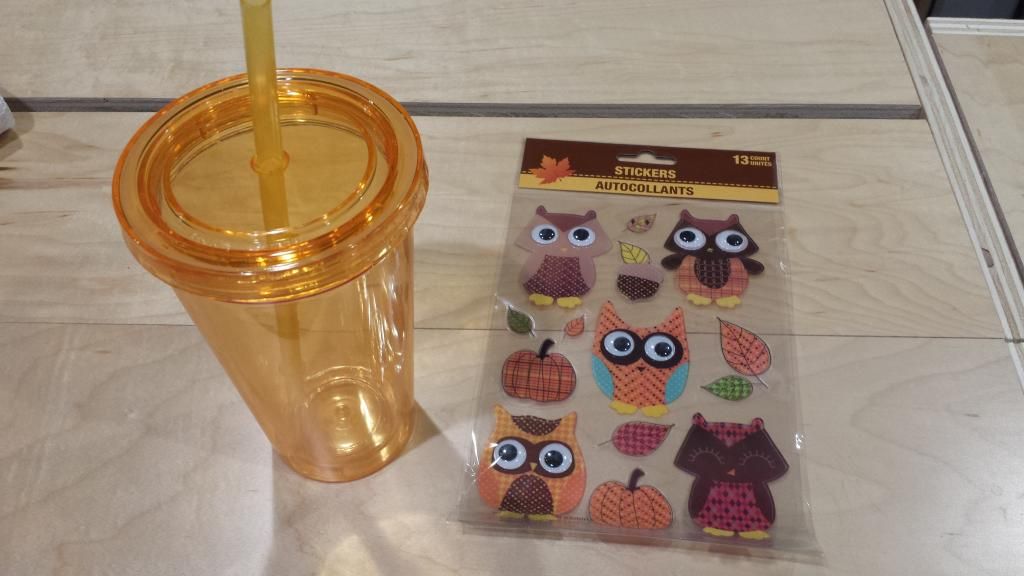
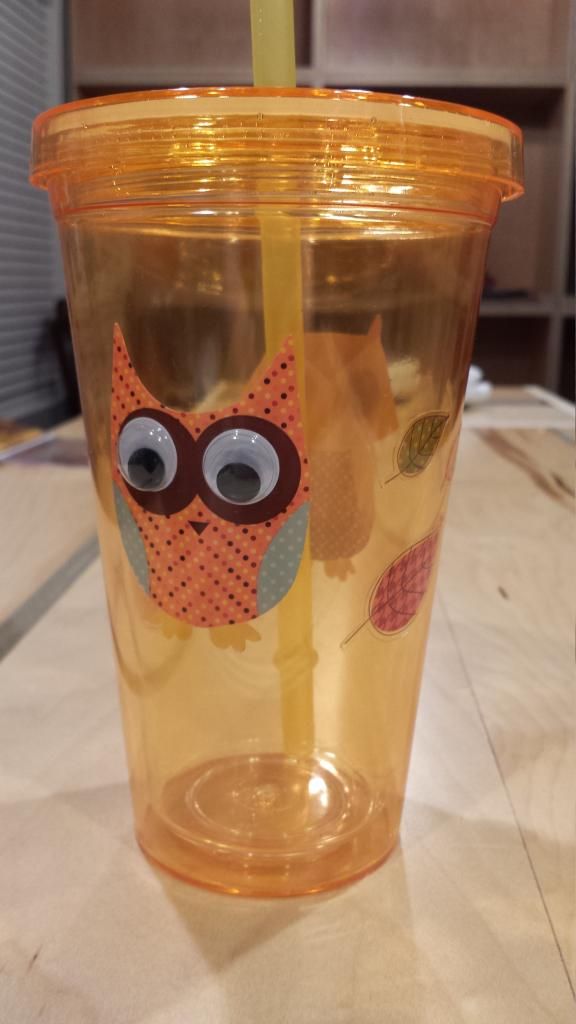
What do you do when you're obsessed with owls and you see super cute owl stickers (with googly eyes!) at the dollar store??  You find something to stick them on of course!!  Luckily, they also had this matching orange water cup - for a dollar :) So I bought them and made this...


I think I may start doing this for every season and holiday.  The $2 price tag is pretty reasonable  and I think they would be fun gifts or kids crafts.

Have a great day!
Beth

Tuesday, October 21, 2014

Dutch Butter Cake


I saw this simple baked good and had to make it. This is so simple you could throw this together when you have company coming over that you didn't expect to! It's just 4 ingredients. The name does say butter, you will be using 2 sticks (1 cup) in this recipe.

I thought I should make something for the teachers, helpers and bus drivers. I try to send baked goods throughout the year. My son goes to a developmental preschool and the bus drivers come right to our door which is so helpful. I know Xander loves going to school. I'm sad that he won't be going there when he begins grade school since he is already familiar with it.

Here we go...

I got the recipe here.

Preheat your oven to 350 degrees Farhrenheit. Line a 8 by 8 with foil.

Ingredients:
2 cups flour
2/3 cup sugar
2 sticks of butter, melted, no need to let cool.
1/4 teaspoon salt

In a large bowl mix all of the ingredients together until just combined. Just like brownies don't over mix! Press into your prepared pan and bake for 30 min until golden around the edges.


You can see that I didn't do the foil, I greased my stoneware and the squares popped out easy for me.

This reminds of a shortbread cookies. It's so delicious! I will be making these again!

Enjoy!

Monday, October 20, 2014

Stuffed Pepper 'Pumpkins'


I saw these on Pinterest, and I just had to do it!  I actually used the Arroz con Pollo I had in the freezer to stuff the peppers.  It turned out okay, but I would recommend doing it the next day with unfrozen leftovers.  I thawed the rice overnight and then stuffed the peppers, but I thought it was a little mushy this way. 

The peppers were really easy - cut the tops off, carve a face and stuff.  I cooked them for around an hour at 350 degrees.  This is a really easy, fun dinner - you can use any type of stuffing you would like, and the peppers just need to be softened to your liking.  We all enjoyed playing with them before we ate them, so I imagine kids of all ages would like it too!!

Have a great day!
Beth

P.S.  Sorry that picture on the right is so blurry - but I couldn't leave it out - it's the funniest one!!

Friday, October 17, 2014

Cleaning the Craft Room

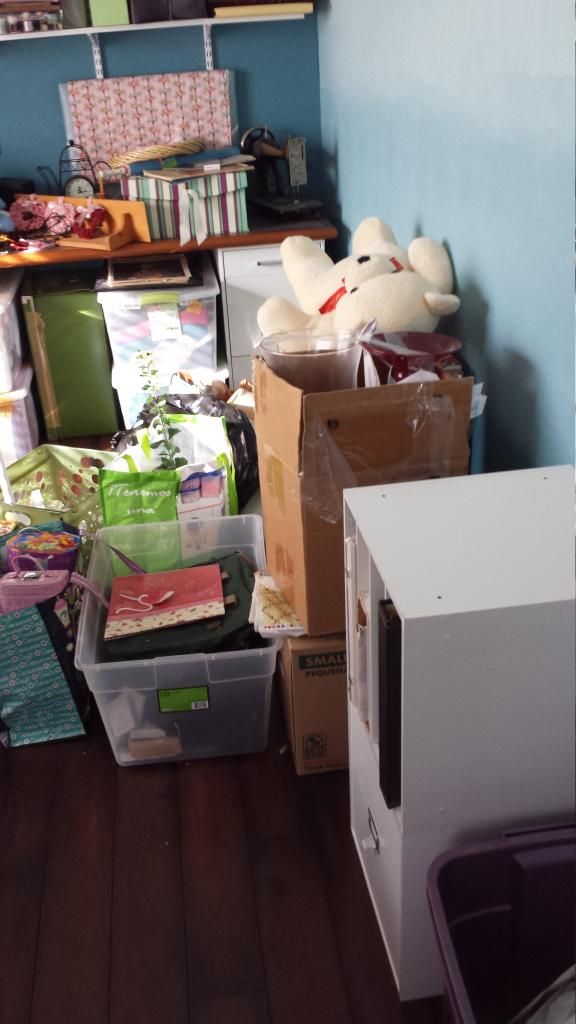
It's been awhile since I have had the time to do 'just for fun' projects, but with all of the Halloween and Fall projects I have been working on it's been really great to get creative again.  It's really inspired me to finally get my craft room in order - a pretty big project all on it's own!!  It is definitely not done, but I can finally see all of the walls and most of the floor :)
 
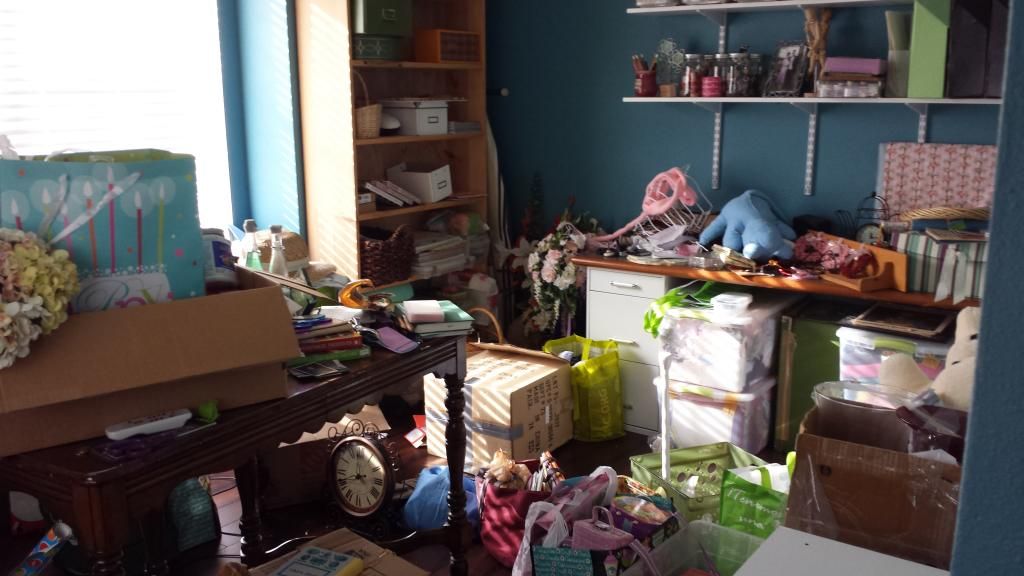
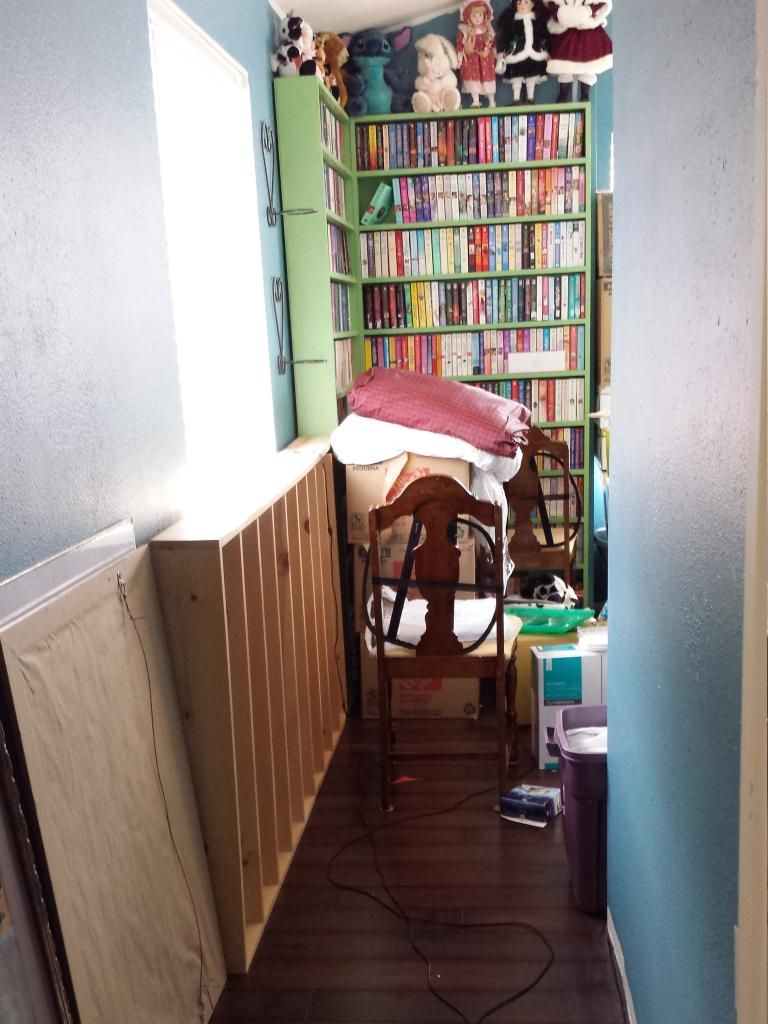
I have made a few decisions that are unusual, and I hope that when I am all finished it will turn out the way I hope.  If not, I can always change it.  Here are some pictures of my 'messy, but progress is being made' craft room... 


 I have always been an 'It gets worse before it gets better' cleaner - and this is a great example of just how bad it has to get.  Everything is actually sorted in general piles, but I still need to make several passes through to sort it even more.
 
I love the blue I ended up using - I love using bright colors when I want to be creative and calmer colors when I want to relax (which is why I have light grays and darker colors in the rest of our main areas).  You can see that there is a lighter wall in one of the pictures - I have the first coat of an ombre wall done.  I am excited to get the rest of the wall unburied so I can finish painting the second coat.
 
You can also see that one of the bookcases is sideways - that's on purpose.  I don't have a great place to put that third bookcase standing up, but I kind of like having it on it's side - it's different but still usable.  Originally I wanted to put it down the length of the hallway, but then I wouldn't be able to have a door - and I need a door (Mostly so I can stop hearing how awful my green bookcases are, and why would I put a bookcase sideways?!)!! (I also need that third bookcase - I have enough books still packed to fill it up). 
 
The area with the white shelves and file cabinet desk is changing - I am planning to add three more file cabinets under the countertop and one more shelf on the wall.  This will (hopefully) be enough storage for my fabric, I always need more shelf space and I am planning to store my sewing machines on the countertop under the bottom shelf (I may have 3 sewing machines, an embroidery machine, a serger and a clothes press to find a safe place to store).
 
I will still have a desk area to work on though.  I recently bought scrapbooking storage when it was on sale - and I am planning to buy/build some kind of countertop across the two stacked cabinets (you can see one set in a picture above).  It will be going on the ombre wall and I am happy that I have enough room in there to support so many different work areas.
 
There you go, a new room to work on...because I don't have enough ongoing room projects LOL
 
Have a great weekend!!
Beth
 
P.S. Anyone have any suggestions how to part with wedding flowers?  I keep deciding that I need to take them apart - and then I get all sad about it and put it aside for later...twelve years seems like long enough to put something off!! (They are hiding next to the desk in the top picture)

Thursday, October 16, 2014

Pinball Kind Of Day


Sorry for the late post. I had planned on coming home after my son's therapy sessions and making a cream scone with chocolate glaze. I saw it as a Pin on Pinterest. It's one of Ree Drummond's new recipe from her cook book. It looks delicious.

My morning was ok, I somehow turned on my alarm in my sleep. Luckily my kiddo wakes up like clockwork. I woke up on time so my morning wasn't totally lost. I was able to make breakfast before we had to leave for his therapy.

I go to Starbucks on Thursdays before our trek out to North Bend which is about 45 min. I went through the drive thru and someone paid for my drink. That was so nice! We have a lot of "pay it forward" people in my town. I got to enjoy my drink free and go through a lot faster. I have to remember to do that some time. It's a nice treat when someone takes care of your drink.

I stayed in my car while Xander had his therapy, that was about 2 hours. It dawned on me about 20 till that I didn't have lunch prepared for him. I went in to get him and talked to his therapist and then used the potty. He and I needed to use the potty. TMI coming :) he pooped. It's been a regular thing for him now for awhile. I have started to take away toys and special TV shows when he hasn't been using the potty. This seems to work. He can read, he loves to read, when his toys and TV are taken away. I tell him every time that he needs to listen to his body. He is so cute he will say "I need to listen to my organs?" I love that he learns about new things and then talks about them regularly. That took awhile so I called the dispatch for his bus and let them know he wouldn't be home for the pick up. We decided to get hot dogs from Costco. We got on the road and then we stopped. It was backed up from construction. At that point we had a little over an hour to get food and get to school.  We were in traffic for a half hour. So I quickly stopped at a fast food place and started to drive back to school. We ate in the car, which isn't ideal but he had to eat. We got to school a little before it started.

I haven't been thinking well these last couple of days. I can't remember the things I'm talking about and forgot to go to the store and get stuff for Xander's lunch today. Absent minded lately, head in the clouds.  I'm hoping it's just that I need more sleep, or maybe I since I have been catching up that my body is taking it all in and not paying attention.

I hope you have a great day like I will for the rest of the day! (fingers crossed)


Wednesday, October 15, 2014

Apple Butter or Spicy Applesauce...

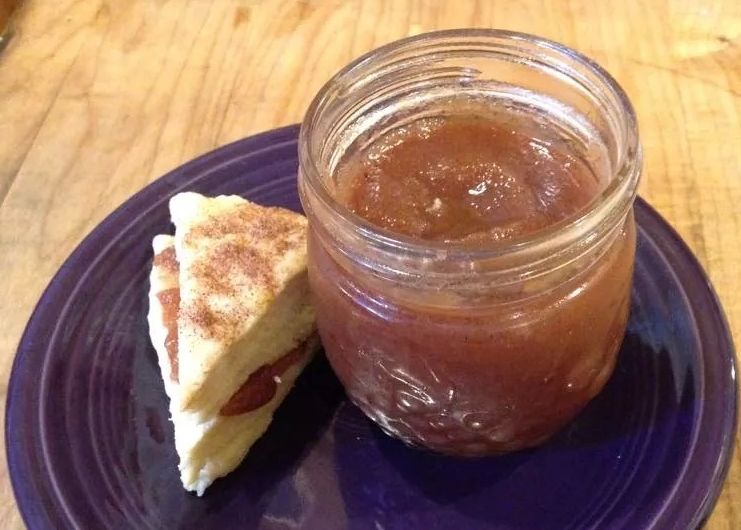
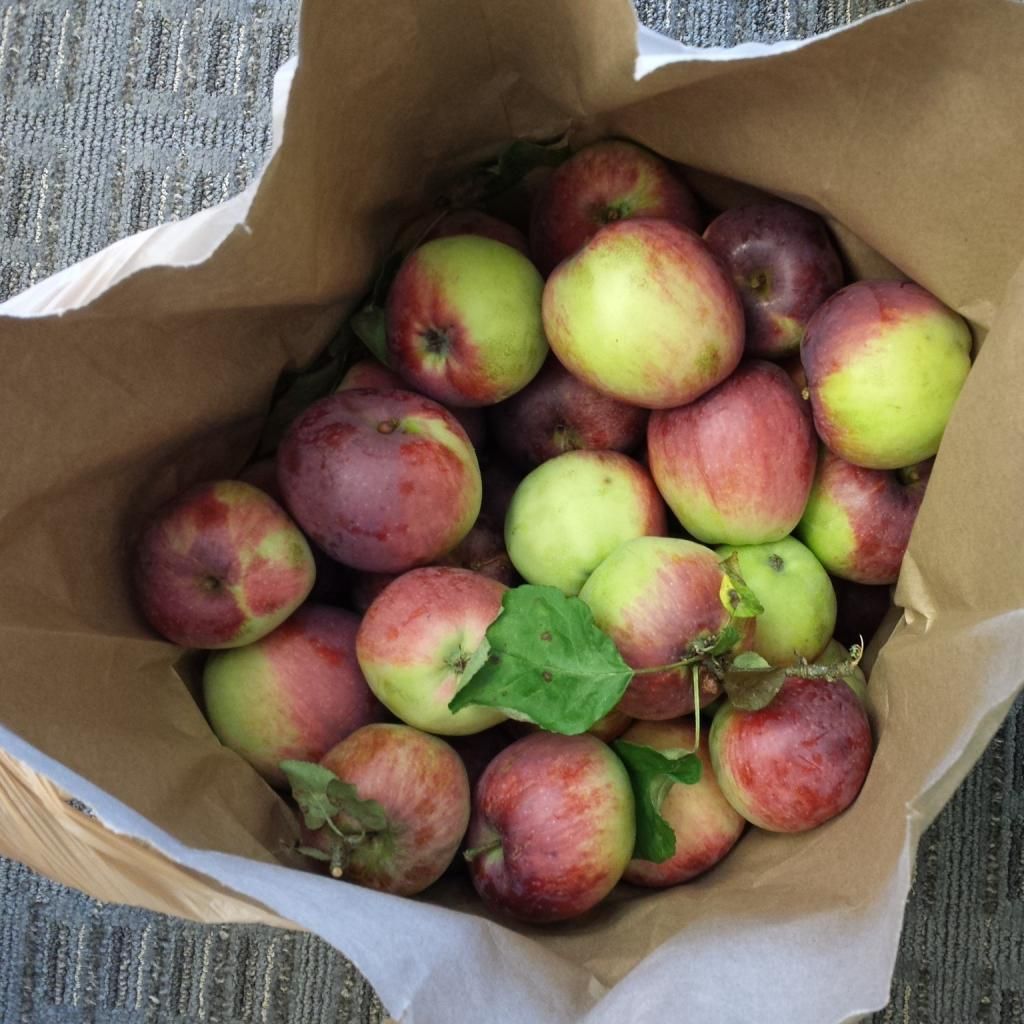
I recently got a whole bag of apples from a friend - 11 pounds worth of apples required some quick thinking about what I was going to do with them.  I decided I wanted to try making Apple Butter - I did it several years ago and it was pretty easy and yummy.  The first thing I did was ask my mom if she had a recipe - which she did but it turned out it wanted me to do a few things that weren't included in the directions :/ So instead I did a quick search for a recipe and came up with this one.  It was simple and seemed easy enough.  So I started peeling, coring and slicing my apples...If you ever need to do more than a handful of apples I would recommend one of the handy tools that does all 3 at once - Best Thing Ever!!  Even with the tool, it took my around 45 min the get through all the apples (they were on the smaller size).  I split them into 2 pots since I didn't want to drag my huge pot out, which turned out to be a good thing since I found out I only had 2 cups of sugar...what?!  After searching my cabinet I confirmed I was out of regular sugar, but I did have brown sugar - well that sounded like a good option to me.  Since I had two pots I made one with white sugar, cinnamon, cloves, and nutmeg (I always leave the ginger out, but the original recipe does call for it) and the second one had brown sugar, cinnamon and allspice.  They tasted fantastic, the regular sugar one was actually spicier to me than the brown sugar one.  I figured it would be the other way arounf because I used allspice, but I think it was the cloves that added the hint of extra spice. but I thought they were a little more like spicy applesauce in consistency than what I thought apple butter would be like - I'm sure I just didn't let it simmer long enough (it was around 2 hours).  I also chose to not can them - I was too lazy lol.  So instead I put them in jars and put them in the fridge. 
They can last 2-3 weeks in the fridge or up to a year in the freezer. 
  
Traditional Apple Butter:

1 pound any variety apples, washed, quartered and cored
1/2 cup water
1/2 to 1 cup sugar
3/4 teaspoon cinnamon
1/4 teaspoon ginger
1/4 teaspoon nutmeg
1/8 teaspoon cloves

Brown Sugar Apple Butter:

1 pound any variety apples, washed, quartered and cored
1/2 cup water
1/2 to 1 cup brown sugar
1/2 teaspoon cinnamon
1/2 teaspoon allspice
 
Combine apples and water in a large pot and bring to a boil.  Reduce to a simmer and cook until apples are broken down and look like applesauce, stirring occasionally.  Put the apple mixture through a strainer or food mill.  Mix the apples and spices, return to a simmer.  Let simmer until the mixture thickens and sticks to an upside down spoon.  Either can the hot apple butter, or allow to cool and place in the fridge or freezer.
 
 
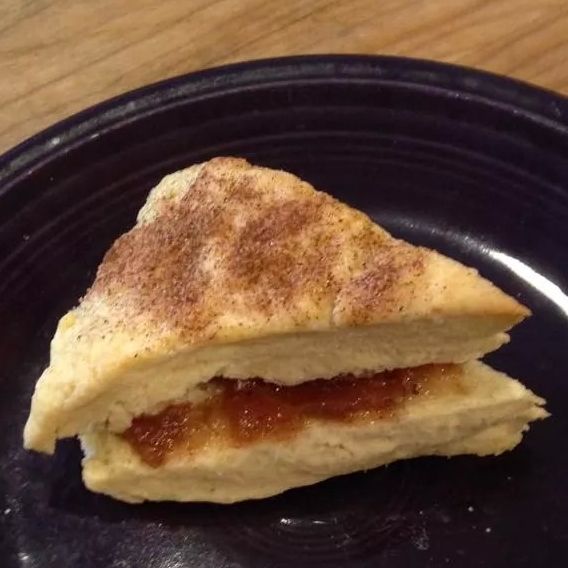
I hope you try making this.  It really is simple, and if you don't make it thick enough - it is REALLY tasty applesauce!!  It's also good on just about anything you want to put it on - like the yummy scones Felicia made me :)
Have a great day!
Beth

Tuesday, October 14, 2014

Pumpkin Crunch Cake


This is going to be a Fall through Holiday's must for me. You can eat this cake warm with ice cream or whip cream or you can eat it cold just the same. It's so perfect. This reminds me of a dump cake.

Here's the recipe

1 can pumpkin puree 15oz
1 can evaporated milk 12 oz
3 eggs
1 1/2 cup sugar
1 1/2 teaspoons cinnamon
1/2 teaspoons salt
1 box french vanilla (butter, yellow, or white work too) cake mix
1 cup chopped pecans
1 cup butter melted
2-3 Tablespoons of brown sugar optional
whip cream or ice cream
sprinkling of cinnamon

Pre-heat your oven to 350 degrees Fahrenheit. Grease a 9 by 13 inch pan.

In a large bowl whisk together eggs, pumpkin puree, milk, sugar, cinnamon and salt. Pour into pan. Evenly distribute the dry cake mix on top of pumpkin mixture. Sprinkle pecans on top and pour butter on top of pecans and lastly sprinkle brown sugar on top of pecans, this will caramelize the pecans while baking. Bake for 50-55 min or until golden brown. Let cool for at least 10 min. Serve with whip cream and sprinkle the whip cream with a little cinnamon.


Enjoy!

Friday, October 10, 2014

Taco Soup


Hello wonderful readers! Did you miss me, because I have missed all of you! I have not been around for awhile due to health reasons, but today seems like a good day to hijack Beth's post day. :)

I am so excited that Fall is finally here! I love Fall for so many reasons: the leaves, pumpkins, apples and the crisp air are a few. As it gets colder we start to seek food to warm us, so the other night I made Taco Soup. I have had it in the past, when a good friend use to make it for me, but I had never made it myself. I was feeling really sick and Taco Soup was the only thing I wanted to eat (I know random right?!). So I went on Pinterest found a recipe, changed it up (because I can never leave a recipe alone lol) and in about 35 minutes dinner was done. This soup is very tasty and as a bonus your house will smell amazing!  

Here is what you need:

Olive oil
1lb ground meat  (I used beef, but I think this would be good meatless too)
1 large onion chopped
A few cloves garlic chopped
2 (14.5oz) cans of Mexican stewed tomatoes 
1 1/2 (15oz) cans of tomato sauce (I used a 15oz can and a small 7.5oz can)
1 can of corn, drained and rinsed  (I am sure I have said this before, but I always rinse all canned veggies, it helps reduce the sodium)  
1 can of black beans, drained and rinsed
1 can of navy beans, drained and rinsed
1 can of pinto beans, drained and rinsed
1 pack of taco seasoning (I used two tablespoons of homemade taco seasoning)
Cheese, sour cream and avocado chunks for optional toppings 

Here is how you make it:

I used a French Oven, but you could also use a big pot.

Brown the meat and then drain it. I did this step in the French Oven and then removed the meat to drain it while I started the onion and garlic.
Saute the onion and garlic in the olive oil for about 5 min, stirring a few times. Add the meat in and then everything else. Cook on low with a lid for 20 min or more, stirring occasionally.

Ladle into bowls, add toppings and enjoy!
J

Thursday, October 9, 2014

Great Pairings...Pretzels and Cheese


I was going through our snack cupboard and I saw that I have a box of Pretzel thin crackers. So I set out to find a dip for them. I knew I wanted a warm dip. I was looking at bacon and cheese I wasn't sold. I do like that dip it just wasn't sounding perfect. Then I saw a 3 ingredient dip, beer, cream cheese and pepper jack. My husband loves pepper jack, me not so much. I picked up Colby jack instead. I'm hoping it turns out wonderful! Here we go!

Beer and Cheesey Dip

12 oz beer (Pale Ale)
8 oz cream cheese, cut into cubes
1 lb Colby Jack cheese, shredded

In a medium size pan heat beer at medium heat, bring to a simmer. Reduce heat to medium low add cream cheese and slowly add shredded cheese in small handfuls keep storing until all of the cheese is melted. Serve with Pretzel crackers or bread, pita crackers or apples. I cut up an apple it's so delicious with it!

Enjoy!

Wednesday, October 8, 2014

Halloween...Pinterest Challenge

 
We are so excited to get ready for Halloween!!  It's such a fun holiday - everything from the decorations to the food can get someone in the mood to enjoy the day.  We decided to make it a little extra fun for ourselves and we will be featuring different Halloween projects and food during the entire week of Halloween.  We are in a flurry of planning and doing even now :)  Even though it isn't the most original idea, we thought it would be fun to do all of our projects from things we have found on Pinterest!  I don't know about you but I want to make the things I pin, not just forget about them!  Now, we want to invite anyone who creates something for Halloween to share it with us during that week - October 27th - 31st.  There will be 5 categories: Pumpkins, Decorations,
Porch Decor, Food and Costumes...
 
Just to share a sneak peek, here is the first project I plan to do...
 
Find it here!
We hope you decide to share, we love seeing the things people create!!
 
Have a great day!
Beth
 

Tuesday, October 7, 2014

Log Cabin Quilt


Isn't this gorgeous! I started to search for Log Cabin quilts. My mom told Christie and I, my BF, that this is the quilt new comers make first. Neither of us did. We were cracking up. I started off on a panel that you add borders and squares. It turned out great, it was for my son. Christie somehow when from being a simple panel to an eight point star. No worries though, there is this great tool called a "Flying Geese" that made her points look like she is a pro!

Back to my point! Get it...point! Anyways I found this quilt on Pinterest and now I want to make one. In fact I was thinking I would make one [log cabin] for every holiday. If you click on the link you can see more pictures. The way she put the blocks together is so neat! I would like to make something similar. Even though I have already started quilting I'm really excited about making this. The Christmas fabric is out so I better start collecting!

I hope you all have a great day!

Monday, October 6, 2014

Holy Nasturtiums!!


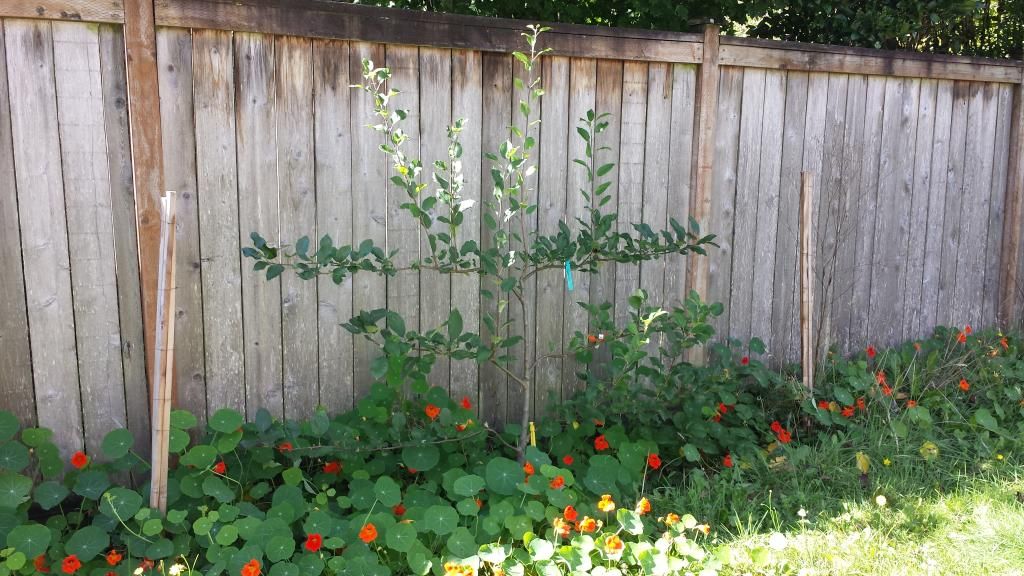
A few weeks ago, I went to check on my apple tree and found this!!  The apple tree was (and is) growing like crazy, and so were the nasturtiums...they were growing a little too well.  I couldn't even find the strawberries anymore lol.  Before I planted them, I read the packet and it said they would grow 12"-16" tall and to plant them 6"-12" apart...what I got was quite a bit more!!  They are around the correct height, but the runners are more than 15' long in some areas (You can see the orange flowers reaching all the way to the far post it the picture, and they went that far in every direction) - this is only 4 plants!!
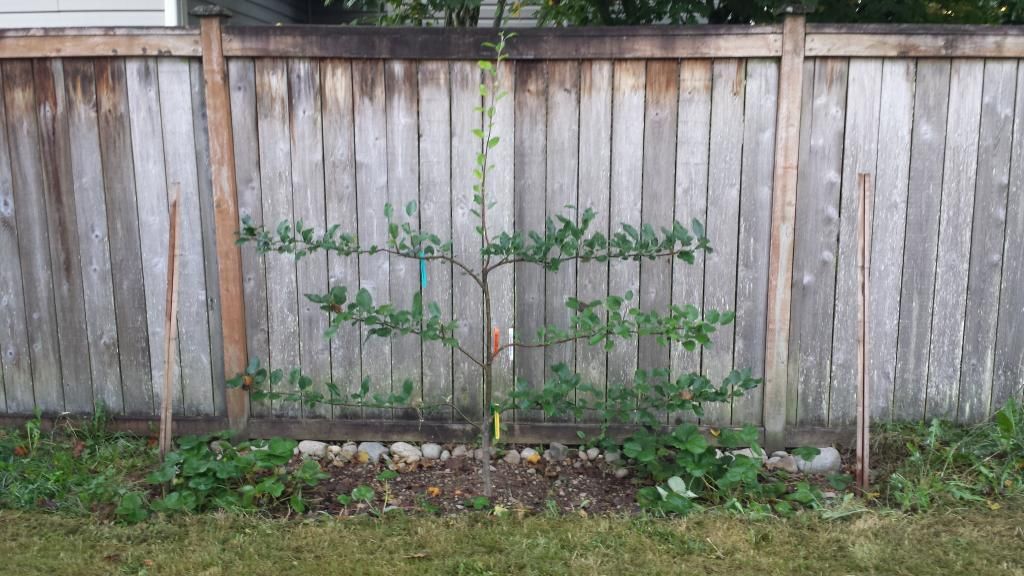
Unfortunately, as pretty as they were, I needed to be able to get to my strawberries and onions.  I also needed to prune my apple tree and plant more onions and garlic for the fall.  So I spent about an hour pulling all of the nasturtiums out :(  Then I pruned the apple tree (after a few How-To videos on Youtube and a little anxiety) and pulled all of the surviving onions (I only got 6).  So now I'm all ready to plant Fall onions and garlic in this bed.  I also need to go out and add an additional wire guide - that top branch is in the center and grew so well that I decided to train it into a new row (hopefully another branch will grow and I can have it go the other direction to even the tree out).


I really liked how well the nasturtiums did as companion plants - they helped keep the soil cool and kept unwanted bugs away - so next year I might try growing them on a trellis or maybe find a dwarf version.  As you can see, the strawberries really liked them too!!  Sadly, I forgot you can eat them - and they were already ruined before someone reminded me.

Anyone else getting ready for Fall?  I missed out on planting some of the things I planned to this year - there was just too much going on!  Luckily, Spring planning starts in 4 weeks - according to my Week-by-Week Vegetable Gardener's Handbook!!

Have a great day!
Beth


Friday, October 3, 2014

Oh Boy....

Purple flowers make me happy!

Sorry I'm putting this out late, had a hard morning.

My son kicked me on the forehead. It was during his therapy, he was getting anxious and I know he didn't mean it, boy does it hurt. Other than that I'm so proud of all of the hard work he does. We just came from the park and our neighbor's mom said that "he is one of the good ones." We hear that a lot, it's so nice to hear every time. He is communicating so well now. I remember the first day I got a response out of him, I cried, now I can't keep him quite. I'm so grateful for everyone of his therapist and family/friends that have encouraged him. He is an amazing boy.

It's great to see all this hard work he is putting into himself. I was told it's going to be a lot of dedication and hard work, but it will pay off. It sure did. I just have to say, if you have a little one out there and you're wondering if Autism therapy, OT/PT, and speech/feeding is the right choice. If you have the insurance to support it, I say at least give it a try. Especially in Autism therapy do as much as your little one can take, the more the better in this instances. I've heard that the best years for learning are up until 6 years. Pack as much as you can by the time they are 6. I can see the desire for Xander to learn as much as he can is there in his eyes. I'm so glad he loves to learn.

I just have to say that when I sat down to Blog. I was just going to talk about getting kicked in the head and say that I'm tapped out. My thought's kind of just exploded here. I sure hope you have a great weekend!

Thursday, October 2, 2014

Lights, Camera...Bad Pictures!!

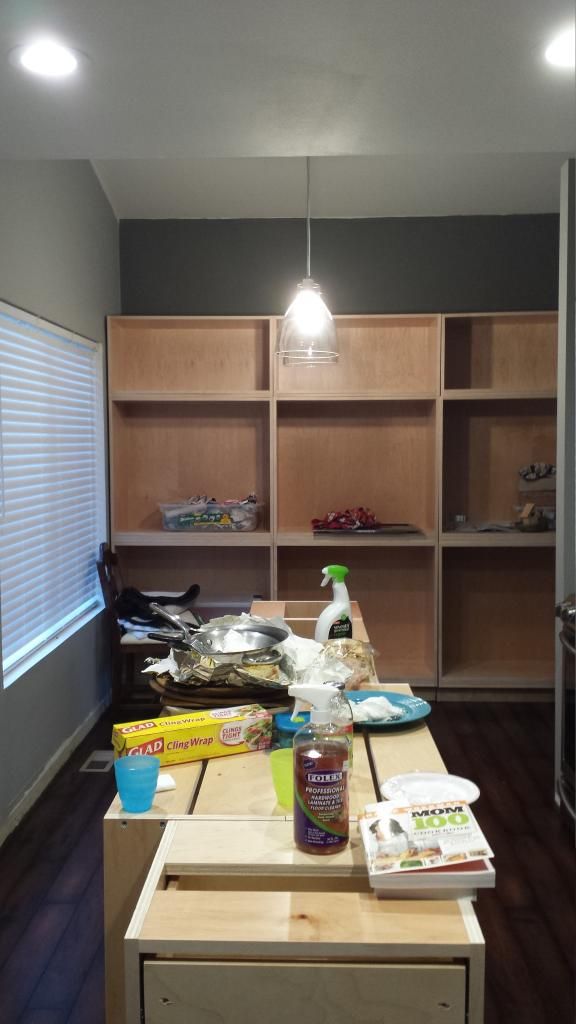
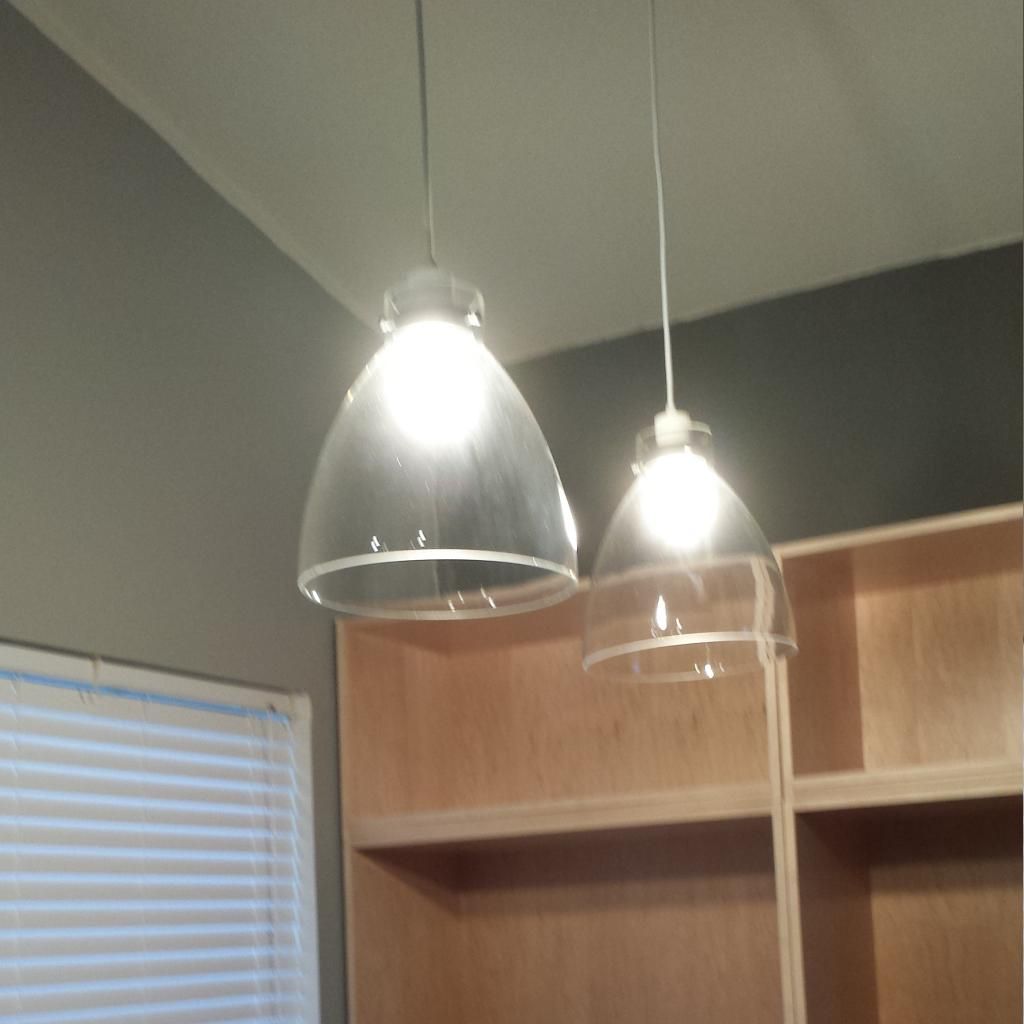
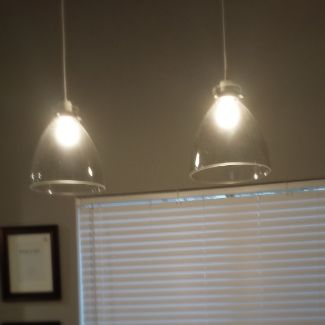
Let's be real - my kitchen is pretty much always dirty.  So when we got the new lights hung, I planned to clean it before taking a picture.  However, I have been really lazy busy, yeah busy.  I snapped this picture the first morning after they were installed and I still haven't gone back and taken a new one!  So ignore the mess and concentrate on the lights - look at the  lights!!  I am really happy with the lights we got!! 


These pictures just don't do the lights justice!!  We are waiting for the cords to relax and straighten out, then we are going to readjust them to be even, wash them and get some fancy bulbs!  I was worried they would be too small but I was surprised at how big they were in person. It was a ton of work to install them - just to figure out where they should go took awhile!!
 
I can't thank Eric enough for working so hard on this after the busy work schedule he has had recently!!  It was a great birthday present to get these installed :)
 
Have a great day!!
Beth


Wednesday, October 1, 2014

White Chicken Enchiladas


I have been on a hunt for this delicious recipe of White Chicken Enchiladas. The company that I used to work for would have wonderful potlucks. We celebrated Cinco De Mayo and every year I would be sure to be in the front of the line to get some White chicken Enchiladas. They were so perfect! One of my coworkers and his wife would stay up the night before and make them. They would bring in 2 huge foil pans and they would be gone in no time.  I could never get the recipe from him. I think a lot of love when in to it. I've got the love built in, now I just need to figure out the rest.

I keep falling for the cream of chicken soup recipes thinking that has to be it! They all taste the same in my opinion. It needs to be creamy and cheesy with out being mac and cheese. I wonder if it had cream cheese or perhaps Mexican Crema.

This recipe I'm posting today isn't the one I'm looking for. It's good in it's own way, just not the best.

4 chicken breast cooked and shredded
1 can of cream of chicken soup
1 cup milk
2 cups shredded Mexican cheese, divided
1/2 cup of sour cream
salt and pepper to tast
8 large flour tortillas

Preheat the oven 350 degree fahrenheit. I pulled out my big glass baking dish 15 inch by 10 inch.

In a large bowl add your shredded chicken. In a 2 cup mixing bowl combine soup and milk. Divide the mixture in half and add 1 half to the chicken. Add 1 1/2 cups of the shredded cheese and sour cream to the chicken mixture and stir until combined. Add salt and pepper if using. Lay out tortillas and add some of the meat mixture, around a 1/4 cup, and roll then place into pan. Continue until all of the meat mixture is used up. Tip: I divide the mixture right in the bowl to get a general idea of what I should use. Pour the remaining milk mixture over the rolled up tortillas, last top with remaining cheese. Cover with foil and bake for a total of 30 minutes, remove foil at 20 minutes to make the cheese brown a little.

Enjoy!


Related Posts Plugin for WordPress, Blogger...