I have finally gotten my act together enough to get my seeds started and now I just have to wait...well for 2 weeks and then I have to do it again :) I decided that since this is the first year I am doing starts, I wanted to try out a few different ways of doing it for comparison.
The first way was how I would do it 'traditionally' - I used the small plastic containers my dog food comes in (I have about 100 of them since this was the way I originally planned for and I have been saving them for the last year). We drilled four holes in each container (Another win for the Drill Press - we were able to do them six at a time in under a minute), and then I planted two seeds in two spots in each container. This way I can thin them for the healthiest ones and each container will only have two plants.
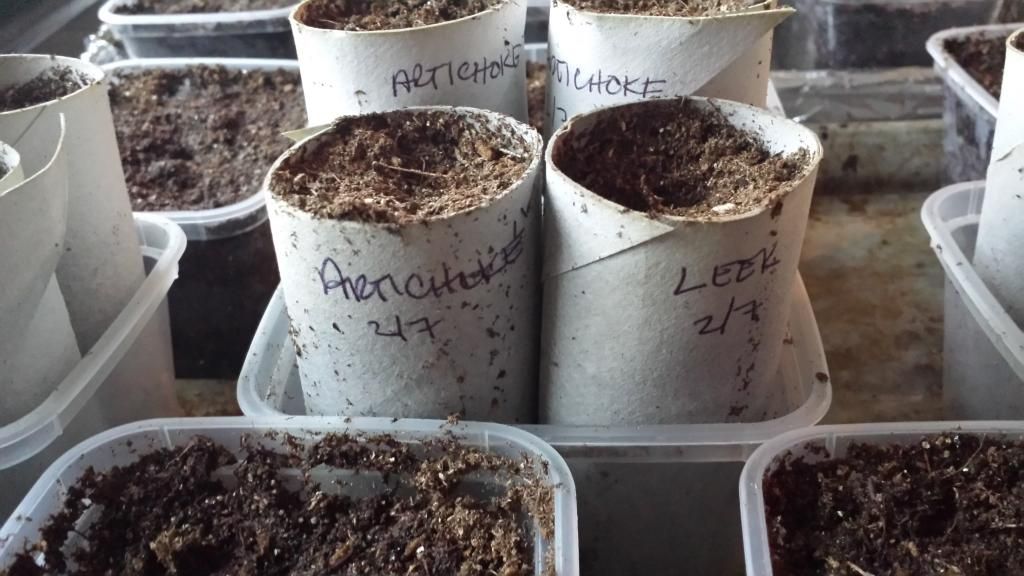
The second way I tried is with toilet paper rolls. I read about this in one of my gardening books and it sounds like a great idea - but I'm still not sure about the outcome. The idea behind it is that instead of removing them from the containers, you can plant the rolls directly in the ground and they will disintegrate. This will hopefully be a smoother transition for the plants (I always lose about have of my transplants from shock) and the starters will be able to grow longer roots. Fingers-crossed that it will work!! I also put two seeds in each of the rolls, for thining later - you never have a guarentee that every seed will sprout so I always plant at least two. I was a little nervous that the rolls would just flop over after the first watering, but the next day they were dried and only a little deteriorated. I'm also hoping I'll still be able to read the type of plant once I'm ready to put them in the ground lol...
 |
| Yes, they're dirty and messy but let's be real - so is gardening!! |
By now, I would be wondering what was planted so here you go...
Imperial Star Artichokes
Sweetie Tomatoes (Cherry Tomato Type)
Stupice IPB Type Tomatoes (Early 2-3" Type)
Early Roma Tomatoes
Red Scallions
White Scallions
Early Jalapeno Peppers
Cal Wonder Red Pepper
King Richard Leeks
Nautic F-1 Brussel Sprouts
Early Snowball Cauliflower
Broccoli
I currently have at least 4 starters for each type of veggie above...plus two more once I do the winter sowing...which is way too many for this year. I just find it impossible to only plant one or two of anything - what if it doesn't grow?! I wont have enough room for all of them (if they all survive), but that's what friends are for right? :) I will share them among a few friends, so they wont go to waste.
I should also mention those two larger containers - I planted lettuce in one and carrots in the other. I wont be transplanting the carrots (they for sure would not survive), but I wanted to see how they would do grown in a smallish container. The lettuce can be transplanted and it will give me a little jumpstart this year since I don't have the beds ready yet.
Anyone else get their starters done it time? I barely made it at 7 weeks before the last frost date - yikes! I was a little late on a few of the plants, but I'm hoping it wont make a huge difference...only time will tell :)
Happy Planting!
Beth


No comments:
Post a Comment