Wednesday, December 31, 2014

End of the Year - How did I do?

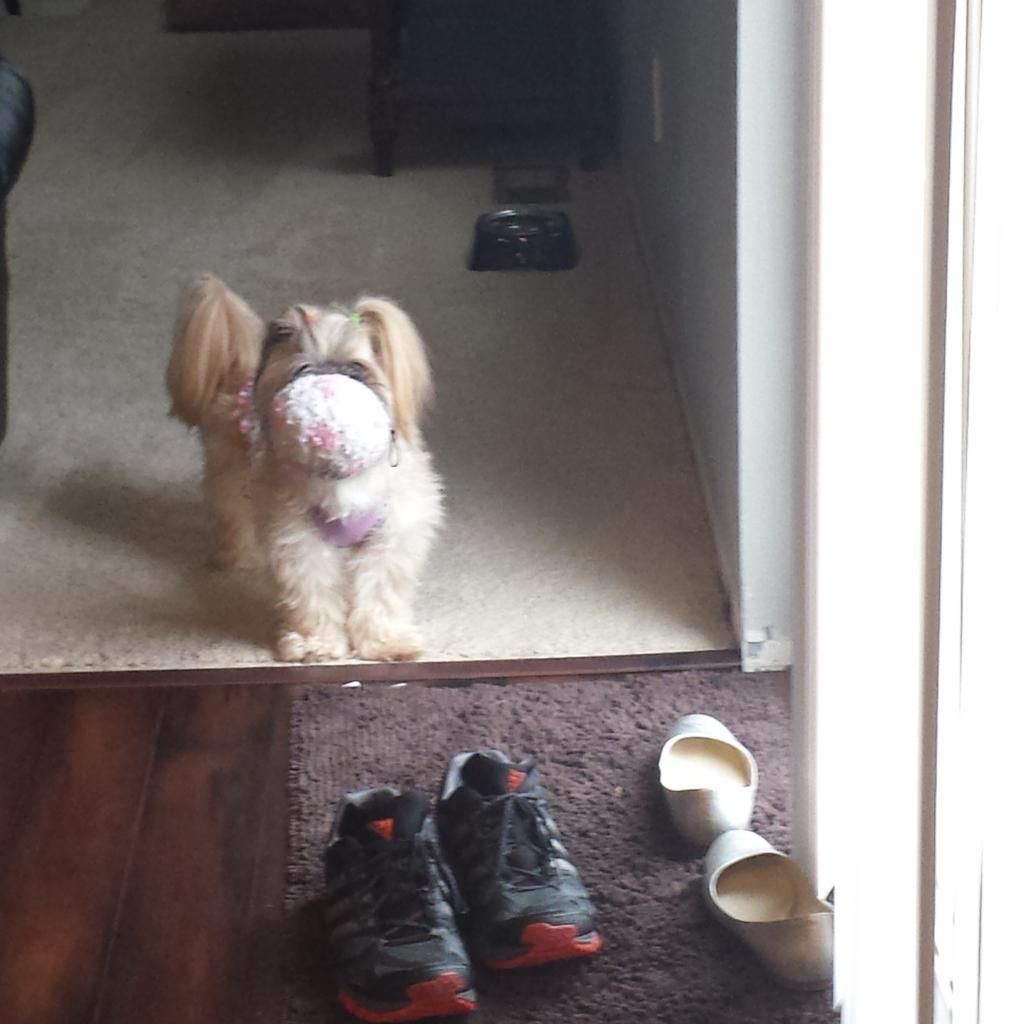
Winda says: Bye 2014 - Can we go play now?
Wow - I can't believe it's the last day of 2014!!  Of course this means I have to decide how successful I was at my 2014 New Year's Resolutions...yikes! 

Here is a recap of what they were:
My 2014 Resolutions:

1. Start Blogging! - It's been far too long that we have been talking about doing this blog - we are doing it!

2. Get in Shape! - This is the year. I have to start working out and eating better. I am not expecting miracles, I would just really like to lose some weight and create a better eating habit.

3. Finish Projects! - We have so many things going on all the time, but this year we agreed we would finish all of our outstanding projects before starting any new ones.

I think I can say we were pretty successful with the first resolution - we have 243 posts published (well, 245 after tomorrows post lol) and over 8,500 pageviews in 2014!!  That seems pretty amazing to me - who knew we could follow through so well!  We are looking forward to adding new resolutions to this beginning, but we will cover those tomorrow.

The second resolution is a little harder for me to decide if I was successful or not.  I did (finally) find a workout that works for me (after trying a few different types/combos) and while I have managed to workout more often than not this year (I managed to workout unless I was sick, hurting too much or on vacation) - I still feel let down.  I have not lost a single pound - at all!  I did lose some inches, and the fatty areas seem to be moving around and thinning, but still - that stupid scale is my enemy!!  I get the whole fat to muscles, muscles weigh more blah blah blah...but I want the scale to say I weigh less!!  (Yes - I am pretty much a toddler throwing a fit about it.)  Lots of people have told me I am looking slimmer so at least that is a plus :)  I have been a little less successful finding a better eating habit - that's something I am working on for next year.

The final resolution is mostly a success.  We haven't started any more large projects this year - but we also didn't finish as much as I was hoping to.  We did have one project that we had to do - replacing our hot water heater - but it was finished in one weekend.  We have finished Eric's office and are continuing to work on the kitchen.  The kitchen is such a large project, but I am hopeful we are making good progress on it.  I just recently realised I never did an actual post on the finished office so I will see what I can do about getting some pictures together for that.  I thought the hot water would be neat too - but Eric says he can't see why it would interest anyone else.  We did some kind of cool upgrades so I may still convince him to share :)

So there you go, I feel like I did a pretty good job with my resolutions this year.  I definitely did better than I ever have before!  Comment and share your success or failure with your resolutions - we would love to hear them!

Have a great day!
Beth

Tuesday, December 30, 2014

Cheesecake for Christmas


I really enjoyed making this cheesecake. Not because of the recipe but because my husband helped me. He is a great a sous-chef. In fact he was too good, I'm going to need to step up my game. He meticulously made the crust. My cheesecake came out perfect because of it.

Cheesecake, in my opinion, is so easy to make. It's usually really hard to remember to take the ingredients out to come to room temperature.

Recipe

32 chocolate wafer cookies about 1 1/2 cup crumbs
1/4 cup melted butter
2 Tablespoon sugar

4-8oz block of cream cheese at room temperature
1/4 cup sugar
1 can 14 oz sweetened condensed milk
1/3 cup heavy cream
2 Tablespoons flour
2 teaspoon vanilla
3 eggs at room temperature

3/4 cup heavy whipping cream
1 1/2 cup semi-sweet chocolate chips

Crushed peppermint candies

Preheat oven to 350 degrees Fahrenheit. Set aside a springform pan. Heat around 4 cups of water to boiling. Set aside a big baking pan like a roasting pan.

Let's first make the crust. Crush cookies in a large plastic zip bag. You can use something heavy like a rolling pin or a can of food. When the crumbs are all crushed fine mix with sugar and butter. Press mixture into the pan and up the sides a little. Bake for 10 minutes then reduce oven to 300 degrees Fahrenheit. Let the crust cool for 10 minutes. Wrap pan with foil make sure it is pressed in real well so that water doesn't get inside from the water bath

In a large bowl beat cream cheese and sugar until fluffy. Slowly add sweetened condensed milk until just combined then add the heavy whipping cream, flour and vanilla. Add eggs one at a time beating after each addition. Pour cream cheese mixture over cooked crust.

Place pan in the roasting pan and carefully pour boiling water into the pan, not getting any on the cheesecake. Place roasting pan into the oven and bake for 1 hour and 15 minutes. Turn oven off and open the door at least 4 inches and let sit in there for 30 minutes. Pull out and let rest for 30 minutes on counter. Remove foil and wrap the top with plastic wrap. Now it's ready to go into the refrigerator for 6 hours.

When you're ready to serve make the ganache. Heat heavy whipping cream in a microwave safe bowl for 1 minute add chocolate chips mix until smooth about a minute.

Release collar of pan and pour ganache over the top smooth with an offset spatula or butter knife. Last sprinkle with crushed peppermint candies.

Finally it's ready to eat. This is a great base recipe you can easily adapt from here. For instance you can top with fresh raspberries and also heat up some raspberry jam and then pour on the cheesecake before the ganache.

Have fun and I hope you enjoy this as my family did!

Monday, December 29, 2014

Sourdough Rolls

 
I was pretty excited to make these rolls - I even called my mom at midnight to tell her I was making them and how much I liked how the dough felt (if you make bread from scratch you know what I mean lol) and to thank her for giving me the sourdough starter.  I'm not sure where it all went wrong, or if it even did.  I made them for Christmas dinner and every one loved them - except me...What?!  I am hoping my tastebuds were just out of whack because they tasted like dirty socks to me, but everyone kept telling me they really liked them!!  Besides the taste - I was pretty disappointed with the texture - they were more like a dense bread instead of a fluffy inside with a crunchy shell.  This was mostly my fault - I knew they weren't going to turn out the way I wanted about halfway through the recipe but I didn't have time to find a new recipe and start over and I was fine with a more dense roll - but then I over-proofed them!  ( I thought I would use my bread proofing function on my oven, which made them rise a lot faster than I expected)  Erg...Well, I decided to share them anyways - maybe someone else will have better luck than me :)
 
Since I was home and I knew I wanted to make sourdough rolls, I pulled my starter out of the fridge 4 days beforehand.  I fed it around 1/2 cup each of flour and warm water every other day, and added just the 1/2 cup of flour the other days.  It seems like a lot, but I needed to double the recipe and needed to use 2 cups of starter.
 
Ingredients:
1 cup fresh sourdough starter
¼ cup brown sugar (I used white sugar)
¼ cup warm water
¼ cup melted butter
1¼ teaspoons sea salt
2-2½ cups all-purpose flour
1 egg
1-2 tablespoons water

In a mixing bowl combine starter, sugar, warm water, melted butter, and sea salt. Add flour slowly, mixed with a fork or spoon until it is thick and then switching to using your hand.  Knead the dough for around 10 min - until it is smooth and elastic.  (Every recipe will tell you to knead the dough on a floured surface - I actually use an extra large bowl to mix the dough and knead it right in the bowl - it seems to cut down on the amount of extra flour that is needed and it is not as messy).  Oil a bowl and place the kneaded dough into it, turning it to cover the dough.  Cover the bowl and place in a warm space to rise until doubled in size, 4-8 hours, or overnight.  
Divide the dough and roll into small balls.  Place into a buttered dish.  Cover and let rise until double, 4-8 hours (unless you use the bread proof function - then it's less than 2).  Preheat oven to 375ºF.  Make an egg wash by beating egg with water and brush the mixture evenly over the rolls.  Bake 20-25 minutes, or until golden brown.

Here is the link for the original recipe.
 
I hope you have better luck than I did - I will definitely be trying more sourdough recipes! :)
Beth

Wednesday, December 24, 2014

Christmas No-Bake Cookies


We were having a hard time deciding on what type of cookies we wanted to have for our cookie exchange this year - both of our favorite cookies have already been talked about!!  Then we came up with the idea to do No-Bake Cookies.  We have both been so busy, much like most people this time of year, and these are a great option if you are short on time!!  (You know - like if it's Christmas Eve and you have to make cookies for tomorrow and you just don't have the time ;)!!)


Felicia's No-Bake Chocolate Peppermint Cookies : 

1 stick (1/2 cup) butter
2 cups sugar
1/4 cup cocoa
1/2 cup milk
3 cups quick cook oats
1/2 - 3/4 cup crushed peppermint candies
1 teaspoon vanilla

In a large pan melt the butter, sugar, cocoa and milk over medium heat until it boils. Add oats, peppermint candies and vanilla - mix thoroughly.
It will look soupy but it will set after 20 minutes. Drop rounded spoonfuls on to a baking sheet lined with parchment or wax paper, I have non stick liners for my pans and that worked perfectly. 
I put in 3/4 cup of crushed peppermints, but I now think a 1/2 cup will work better - and I might put in a smidgen peppermint extract next time.

Beth's No-Bake Butterscotch Peanut Butter Cookies:

1/2 - 1 bag of butterscotch chips
1 cup peanut butter
6-7 cups corn flakes

Measure the corn flakes into a large bowl before starting.  In a double boiler (or in a bowl over a boiling pot of water), melt the butterscotch chips completely, stirring until it is smooth.  Add the peanut butter and continue to stir until the mixture is melted enough the pour off the spoon.  Carefully pour the hot mixture over the cornflakes and mix until they are evenly coated (I used 2 spatulas to toss the corn flakes).  Spoon the coated flakes onto parchment paper into cookie mounds - or spread it out and break it up after it has cooled.

We hope you enjoy these as much as we did!

Merry Christmas and Happy Holidays!!
Three Peas Create

Tuesday, December 23, 2014

Our Christmas Trees

Here is a look at our Christmas Trees this year.  We had a lot of fun using new decorations!!

Beth's Tree:


I am so excited that I actually got to put my tree up this year!!  I wasn't able to get all of our ornaments out, but I did have fun making ornaments (even if they didn't turn out).  I wanted to keep it simple - and I think I did a pretty good job!  The angel doesn't really go with the rest of the tree, but I didn't want to buy a new one - I may own a few (like 3 or 4) and this was the best match.  I hope everyone had as much fun as I did getting their trees ready this year!

Felicia's Tree:


 This year we put up our little tree. Other than the skirt I had nothing to decorate it with. So I went to the store and found these cute battery operated low heat lights. I found a box of small ornaments in several colors and the other red and green. I let Xander pick which one. I let him decorate it too. Then I had to rearrange them, the cat has been playing with them and biting the strings until they break. Luckily they came with one whole extra string. So Hopefully I have them high enough or I will have to break out the twine if she gets them again. I have always like this little area, but now the tree has really made it my favorite spot!

Merry Christmas and Happy Holidays!
Three Peas Create


Monday, December 22, 2014

Making Our Own Ornaments

One of the best things about the holidays are all of the fun ornaments you can make!!  Here are the ornaments we made this year:

Felicia's Ornament:

I saw these on Pinterest and I had to make them! I shop at a local craft store in Redmond, and I've been there a lot recently! They have so many fun things to do right now. I wasn't sure if I could find the caps but luckily they had a bag of 50. I grabbed some paint, Mod Podge and brushes. I originally was going to cut out paper for the eyes, mouth and nose. I instead painted them with paint and nail polish. I also wanted them to sparkly so I found some chunky glitter. I'm so happy I got them! For the post I just used glue dots to stick them to the ribbon but when I mass produced them I want to use a hot glue gun. This one is going to be a gift for someone. The others will hopefully go on trees! 


Beth's Ornament(s):

I actually made around 40 ornaments - but they were all made the same way.  I bought the clear ornaments from the craft store and used metallic and glitter paint to color them.  It was easy - just pour some paint inside the ornament and shake, smack and shimmy it around until the entire thing was coated (about 5 min each).  Then I left them to dry - I started them out right side up for a few hours, then flipped them over in cups for 24 hours.  Some still seemed wet so I left them right side up for an additional 24 hours.  They were really nice looking!!  I hung them all on the tree and I was really happy with them...anyone else hear the but coming?...I looked at them the next night and noticed a few were crackling.  I wasn't too worried about it - I just figured they must not have dried all the way.  Then I looked at them a week later...and most of the ornaments are either crackled or the paint just pooled on the bottom...almost a complete fail.  I was so bummed out!!  I don't know if it was because I used glitter paint and metallic paint, or if it is the temperature change since the tree is in the corner of outside walls, but I'm going to try it again with regular paint and see how it turns out.  Here is a small sample of what they ended up looking like:
 
 Not cool...not cool at all!
 
Has anyone else made ornaments this year?  Please comment and share your ideas!!
 
Merry Christmas and Happy Holidays!!
Three Peas Create
 

Thursday, December 18, 2014

Range Hood Decision

Range Hoods...not the most exciting topic today, but we are getting ready to work on our stove area and we are ordering the range hood tonight!  Yikes - I still have to decide between these two!!  I'm hoping someone has had experience with one of these brands and can tell me something about them.  If you have an opinion, leave a comment - I would love to hear what you think...


The one on the left is from GOLDEN-VANTAGE and the one on the right is from AKDY.  It was hard to find hoods that met the top two requirements - they needed to be convertible from ducted to ductless (just in case we can't run the ducting) and I wanted them to have LED lighting (so it would match the rest of our appliances).  I also didn't want to spend too much - I don't want to cheap out, but I don't want to sell a body part to afford it either.  They also both recieved decent reviews (I don't count the ones that give less stars because they couldn't figure out the directions - that is just lame). 

Both of these hoods fit my requirements - so now we just have to choose between them.  It was really hard to find straight front pictures of both - but the mock ups at least give us an idea of how they will look.

There you go - this what I've been working on inbetween getting ready for Christmas.  Are you ready?  I'm not!! (deep breathes)

Have a great day!
Beth 

Wednesday, December 17, 2014

Carrot Muffins

I finally made the recipe I talked about last week. I hope it works out. I'm not sure I will use Greek yogurt again. It was so thick, maybe I will put some honey in next time.

Recipe:

1 3/4 cup all purpose flour
1/2 cup sugar
1/2 teaspoon salt
3/4 teaspoon baking soda*
2 teaspoon baking powder
1 teaspoon cinnamon
1 cup plain Greek yogurt
4 Tablepoons melted butter, cooled.
1 large egg
2 cups of shredded carrots

Preheat oven to 375 degrees Fahrenheit. Grease or line a cup cake pan.

In a large bowl add flour, sugar, salt, baking powder and cinnamon, whisk to combine and make a well in the bottom. In a small bowl combine yogurt, butter and egg. Pour into well of flour mixture. Mix until just combined add carrots. Again mix until combined then scoop batter into cupcake wells. Bake for 30 minutes.


It did not work out! Plus they didn't brown, I'm thinking Baker's error! *I first forgot to add baking soda. Then I didn't see that the recipe called for banana which would have given it more body with the Greek yogurt. I added more yogurt but I'm thinking my honey idea will work. When I was mixing the batter it was like sand. So I added more yogurt and that resulted in over mixing which is a no-no in muffin batter. I hope that you have better luck than I did. Here's the Pin I used.

Tuesday, December 16, 2014

Panettone...I made it!!

Panettone is probably one of the top three items on my husbands favorite food list - he can eat an entire one himself and still ask me if I have more.  So every year I wait for it to be available and buy a few.  This year we were going to a Christmas Party and I offered to bring one for the party, but then I couldn't find them anywhere!!  So two days before the party I finally decided to see what it would take to make my own - I had no delusions that I would be able to make it taste as good as the real thing, but maybe it would still be tasty...

The first Panettone recipe I found seemed easy - a little too easy - but I thought why not?  So I threw it together the night before...it was beautiful, it looked good and had the fluffy flaky consistency I was hoping for...
 
...and it tasted like ham.  No joke - it really tasted like ham - what the ?!  Well - it was still warm, maybe that would make a difference - nope, it still tasted like ham several hours later.  I did add a bunch of different fruit instead of just the raisins (like the recipe called for) - maybe I made a bad combination?  I blamed it on the dried apricots, but it turned out it wasn't them (see below)...

Instead of giving up I decided to go ahead and make the second Panettone recipe, which called for a biga (where the yeast rises overnight - similar to a sourdough starter but not as developed).  I set the biga to rise overnight and then completed the recipe the next day.  This one was much better - it was close to the correct taste, but not as fluffy and flaky as the original Panettone would be.  I'm pretty sure that it was my fault because I forgot to add the additional yeast until the very end of the kneeding, so it didn't rise as well as I think it could have.  I will definitely be making it and continuing to tweak it until I get it right - especially since Eric knows I can make it any time of the year now!! 

I also made a second batch of the first recipe (you know - the one that tasted like ham...).  This time I just used the golden raisins the recipe called for and it still tasted like ham - I have no idea what the problem is!!

Luckily, I also finally found the store Panettone on Saturday morning and I bought three...One for the party and two for Eric.

Here is a comparison:


The one on the left is the one that tasted more like the real thing, but see how much smaller it is.  The middle one is the one that tasted like ham, I give up on that one.  The one on the right is the store bought one.  I think I will try to find the wrappers to make itrise taller, my pans just aren't made to let it get that tall, so hopefully next time I can get the right consistency!

Here is my last thought on it: If you like to bake and experiment - definitely give this recipe a try!  There are so many variations, and it is easy - it just requires time to rise a few times.

Have a great day!
Beth

Monday, December 15, 2014

Veggie Macaroni and Cheese


Here's a quick stove top macaroni and cheese. I added peas and carrots too! I don't normally use recipes from Alton Brown. They always seem complicated. Now I can't say that any more. I found this Pin and decided to give it a try.

Recipe:

8 oz elbow macaroni
1 cup frozen peas and diced carrots
6 oz evoprated milk
Siracha sauce to your liking
3/4 teaspoon dry mustard
Pinch of salt
Pepper to your liking
10 oz cheddar cheese shredded

Bring a medium pot of water to a boil. Add macaroni cook as directed. My peas and carrots took 5 min so I added those in with the pasta and added a minute to the timer so that in can get back up to a boil. Mix milk, seasonings and hot sauce together set aside. Drain pasta and veggies. Turn heat down to low pour milk mixture and in little bunches add the cheese and stir until melted. Serve and enjoy!

I noticed I didn't add butter (I know I'm as shocked as you are) after draining but it worked with out it. If you want you can add 4 tablespoons of butter after you drain (per original recipe) the pasta and veggies.

Have a great Monday!

Thursday, December 11, 2014

What's my deal!


I don't know what my deal is lately! I have forgotten to post here a couple times now. I had an idea to make carrot breakfast muffins. I think I will leave that for next Monday. My day got away from me today. I have been dealing with some stuff that makes my mind wander. Head in the skies! We found out a wonderful lady that works at my son's therapist office is leaving for a new job. We would see her smiling face every time we came in. She shared a love of baking with me. Among other things I have started driving Xander to school and picking him up. Having him ride the bus gave me a big chunk of time during the day. I don't mind one bit, we get to talk and sing back and forth. Plus there's enough time for lunch now. I'm learning to make quick work of my time! It's definetly keeping me on my toes!

Tonight we are to have a crazy storm. I'm hoping it doesn't leave much damage (knock on wood.) I say this because we have an appointment in the morning for ABA therapy. We are having to say goodby, at least for a little bit, to Xander's BI (behavioral interventionist,) she is going on maternity leave to have a little boy of her own. We've grown attached to her. Tomorrow will be sad and fun. We are going to make sugar cookies and laugh and cry..a lot! She has been with us for almost a year now. My son has improved so much with her help. We'll miss you Ms V!

I'm hoping to update here with pictures of our decorated cookies!

I hope you have a wonderful weekend. 

Wednesday, December 10, 2014

It's Officially Christmas

I have been working on some fun things for Christmas - unfortunately I can't share any of them since I am using them for a few future posts with the other Peas - and there may be a few christmas presents mixed in too.  I don't want to ruin the surprise!! 

Since I have been focusing on those projects I don't have anything fun to share except this...

  
This probably isn't as exciting for you as it is for me - it is the first time since we bought our house that we have gotten our big tree out to decorate!!  I am so excited!!  One of the things I have been working on this week is making ornaments - we got the tree out of the black hole, but the decorations may be lost forever...
 
I can't wait to get it all decked out - maybe tonight?!
 
Have a great day!
Beth
 
p.s. The top is all smooshed so the angel will fit - it looks funny but it's temporary. :)
 

Tuesday, December 9, 2014

Chicken & Wild Rice Soup


Best soup ever!! I really like soup, I could eat it everyday! This morning I almost had some for breakfast! I ended up making eggs. Come lunch time I will have a bowl of soup. I Pinned it awhile ago, it kept popping in my head. Especially since the colder weather! Prep wasn't too bad either. I did do some short cuts and some upgrades.

Recipe

1 onion diced
2 medium Carrots diced
2 celery diced
2 tablespoons butter
1 clove garlic minced
Fresh thyme, a few stalks put in cheese cloth and tied or remove from stalks and thrown right in!
4 1/2 cups of chicken broth (I use better than bouillon)
1 pound chicken breast cut into cubes about 1 inch
1 box quick cook wild rice mix with seasonings
6 tablespoons butter
1/2 cup flour
1 cup milk
1/2 cup heavy cream

Prepare you rice mix as instructed. I went even easier and made mine in the microwave, I have a pretty good microwave cooker. It took about 8 minutes to finish.

In a large pot melt 2 tablespoons butter at medium heat. Add onion, carrots and celery cook for about 4 minutes. Add garlic and let cook for about 30 seconds add broth. Turn up the heat to med-high bring broth mixture to a small boil then cover and reduce back down to medium. Let cook for about 8-10 minutes until chicken is cooked. While that is cooking in a small pot melt 6 tablespoons butter over medium heat, add flour and contiue to whisk about a minute. Slowly add milk to the flour mixture continue whisking for about 5 minutes or until thickened. Add both rice and milk mixture to the soup. Last add heavy cream and serve with garlic French bread!


My husband doesn't usually like soup so when I find one he does I get really excited! Now this will not replace his favorites but I can definitely throw this in now and then! I hope enjoy this recipe let us know if you make it!


Monday, December 8, 2014

Sourdough Bread from a Bread Machine


I am so happy that my mom gave me some of her sourdough starter - I have already used it twice and will hopefully be making bread every weekend with it!!  At first, I thought I was crazy to think about using the starter in a bread machine, but I was pleasantly surprised with the results.  It isn't as strong of a sourdough taste as some people would like, but since it is mild it is slightly more versatile.  The other 'odd' thing is that you still add yeast so it will be able to rise in the time frame your bread machine uses - traditionally it can take up to 'all day' for handmade sourdough bread to rise using only the starter.  I actually have 2 recipes to share, the first one is the one I prefer (the picture above) and the second is Eric's favorite (as he reminded me several times when eating the one above lol).  Follow the links for the original site information.

Plain and Simple Sourdough Bread

3/4 cup warm water (110 degrees or so)
1 cup sourdough starter (already proofed - see below)
2 2/3 cup flour
1/2-1 tsp sugar (I added this to the recipe, it will feed your yeast and rise better but it isn't necessary)
1 1/2 tsp yeast (in center of flour mound)
1 1/2 tsp salt (sprinkled around the outer edge of the flour mound)

Crusty Sourdough Bread

1/2 cup warm water (110 degrees or so)
1 cup sourdough starter (already proofed - see below)
3 cup flour
2 Tbsp sugar (I added this to the recipe, it will feed your yeast and rise better but it isn't necessary)
1 tsp yeast (in center of flour mound)
1 1/2 tsp salt (sprinkled around the outer edge of the flour mound)

Add the ingredients in the order listed to your bread machine. Choose White, Light Crust, Rapid and Small Loaf as your settings. 

As a side note:  I wasn't sure I would be able to take care of my starter as well as it needed, so I opted to put mine in the fridge.  This allows me to feed it once a week instead of every day - I don't even feed myself every day!  So when I want to use it I have to proof it before hand -  this definitely takes time and requires planning.  When I know I want to make bread, I pull my container out of the fridge and add 1/2 cup each of warm water and flour.  Stir the starter until well combined (don't use a metal utensil).  Let sit in a warm area for 12 hours (yep - 12 hours), stir in an additional 1/4 cup of warm water and flour, and let it proof for at least another hour.  Once you see lots of happy bubbles you are good to go.  Remove the amount needed and put the container back into the fridge for another day.

Have a great day!
Beth


Wednesday, December 3, 2014

Chicken Parmesan


I'm So glad I tried this recipe. The family loved it. So it's going in my dinner rotation.  I don't have too many of those. My husband likes a handful of recipes so when I find something that works I get excited. This recipe is pretty quick. You can even prepare it the day before or the morning of. While it baked it gave me time to cook pasta and steam broccoli.

There's something to be said about simple recipes. That's probably why it taste so good. I used jarred pasta sauce, I would like to make my own next time.

Ingredients:

4 thin chicken breast
Panko bread crumbs
1 egg
2 Tablespoons milk
oil for frying pan
1 jar tomato sauce
Shredded cheese, mozzarella and Parmesan are standard but I used a Swiss blend.

Preheat oven to 375 degree Fahrenheit. Set aside a 9 by 13 baking dish.

You will need two bowls or plates which ever you prefer. In one bowl pour the bread crumbs in the other break the egg and pour in the milk and mix it around. I like really thin so I laid out the chicken breast and put a piece of plastic wrap over them. Then I got a tenderizer and flattened them more. Now that everything is prepped, heat oil in a large pan. Back to the chicken, first put the chicken in the egg mixture then in the bread crumbs and last into the pan. I have a huge family pan I was able to cook three if you have a standard I would do two at a time. When all the chicken is browned on both sides then add them in the baking pan. Pour the tomato pasta sauce over the chicken spinkle cheese on top! Bake for 40 minutes, next time I'm going to check on it about 30 minutes. You want the cheese melted and the sauce bubbly. I served it with pasta and broccoli which I made while the chicken was baking.

I hope you enjoy this as we did!

Tuesday, December 2, 2014

Friendsgiving!

A note from Beth:  Well, I have to apologize.  I fully intended to post this on Wednesday - BEFORE Thanksgiving - but I had a hectic day and just never managed to get it finished.  Then I got sick, and the next thing I know it's Tuesday!  So, it's a little late - but at least it's finally here - our Thanksgiving Luncheon (otherwise known as Friendsgiving)...

We wanted to stick with traditional flavors, but make things more fingerfoodish.  We had a few things that were hits, and a few things we want to impove for next time - but overall it was a fun and yummy time!

The top two items are Turkey Meat Pies, which don't have a gravy like a Pot Pie.  We made some with pie crust and some with puff pastry - just to see the difference.  They were equally liked so you can choose your favorite!!  Inside they have turkey, mashed potatoes and sauteed onions, celery and carrots.  We layered the three ingredients one side then folded the other side over to make a pie.  We brushed them with an egg solution and baked them at 350 degrees.  Since everything inside was already cooked, we just cooked them until the outside looked golden.  The great thing about these is there is no set recipe for what you use inside - they are great for leftovers after the 'big' day.

The next tray has a combo of Yam Bites, Stuffing Bites and Cranberry Wontons. 

The Yam Bites were a huge hit - all the kids wanted more - and even a few adults said they tasted like candy!  We left some plain (with salt & pepper), but the ones with melted marshmallows went fast.  They were easy to make ahead.  Place uncooked yams in water on med-low for 20, then cool to the touch.  Slice to any size, brush with butter and sprinkle with either brown sugar or salt and pepper.  Bake for 20-25 min.  Once you are ready to serve, top the sweet ones with a mini marshmallow and bake until metled and browned.  Use a toothpick for easy eating. 

The Stuffing Bites are super easy too - make your favorite stuffing, scoop into balls and bake at 350 degrees until browned.  We cooked these a little too long, so they were a little dry, but still yummy. 

The Cranberry Wontons were an expirement - I was craving the yumminess we had when we made the Wonton Bats for Halloween.  These didn't turn out as well as I was hoping.  We mixed cranberry sauce and cream cheese, but it was a little too liquidy.  They tasted good, but most of the mixture oozed out when we cooked them.  I definitely want to try it again - I think if the cream cheese mixture was more solid it would be a lot better.

Finally, we have Mini Pumpkin Pies.  These were so good!  It's also the only thing that needs a recipe!!  They're a little more work than making one big pie - but soo worth it!

2 pie sheets store bought or homemade
1 cup pumpkin puree
1/3 cup evaporated milk
1/4 cup sugar
2 eggs
1 teaspoon cinnamon.

Preheat oven 375 degrees Fahrenheit.
Cut pie dough with 2 2/1 inch circle cutter. Place in the wells of a mini muffin pan. Use a shaper that helps push dough down, or you can use your fingers just be gentle to not tear the dough. In a small bowl mix the remaining ingredients and use a tablespoon to fill your dough with the pumpkin pie mixture. Bake for 20-25 minutes. Let cool before eating.
*I had remaining dough so I cut out mini leaves and baked them separately until browned. I placed them on top after the pies had cooled. Also the pies are delicious with whip cream!  (Felicia)    
There you go - our Thanksgiving Luncheon (Finally!)
We hope you had a great Thanksgiving with your families and friends - we did!!
The Three Peas

Monday, December 1, 2014

Croissant Breakfast Pudding


I bought some mini croissants so that I can make a breakfast casserole. Awhile ago I would make this wonderful sweet breakfast casserole it was so perfect. Of course I can't find the recipe and everyone I made it for doesn't have it either. I'm still searching for it! This one is pretty good in the mean time.

I didn't let it sit in the refrigerator like the recipe instructed and I think I prefer it this way. I know traditional bread puddings come out like one congealed piece hence the pudding name. I like having the bread be defined in each bite.

Pretty simple instructions and my favorite part is that it has a crumb topping!

Instructions
6 small or 3 large croissants
3/4 cup half and half
3 Tablespoons plain Greek yogurt
1/4 cup sugar
1 Tablespoon vanilla
3 eggs
Pinch of salt
3 Tablespoon of butter cold and cubed
1/4 cup dark brown sugar
1/2 teaspoon cinnamon (you can add more or less to your liking)
3 Tablespoon flour

Preheat oven to 350 degrees Fahrenheit

Grease a small baking pan with butter. Tear up croissant into small pieces in the pan. In a small bowl whisk half and half, yogurt, sugar, vanilla, eggs and salt. Pour over croissants and push down the floating pieces to help soak them in. In a small bowl mix sugar, cinnamon and flour, add cubed butter and work it in with your fingers into smallish crumbs. Bake for 30-40 minutes. I checked mine at 30 and added 6 minutes, I like my topping to be a bit crunchy!


Serve with fresh fruit if you like!

I hope you enjoy this!
Related Posts Plugin for WordPress, Blogger...