Friday, April 10, 2015
Lasagna with a new twist!
I was shopping at Trader Joes, I will post next week about my prepping food, I picked up a no boil lasagna noodles and it had the recipe. I picked up the other ingredients to make it. I'm so glad I decided to make it. It called for marscapone cheese instead of the norm ricotta. My husband actually liked it. He doesn't care for ricotta so I was going to use cottage cheese instead, I took a chance and I'm glad I did.
I stopped by my local bakery and got a whole wheat loaf to go with it. It was so good! If you're ever in Duvall WA check out Grateful Bread Bakery.
You will need an 8 by 8 baking pan or if you're like me a 9 by 9. You will need to preheat the oven to 350 degrees Fahrenheit after you have assembled the Lasagna. Which will need to rest for 30 minutes.
Recipe
1/2 box of no boil lasagna noodles, which is where you can find the recipe.
1 pound uncooked sweet Italian pork sausage
1 jar of tomato sauce, I used pomodoro pasta sauce
10 oz marscapone cheese
1/2 cup 2% milk
1 1/2 cups shredded parmesan
Lightly grated nutmeg, I have the whole nutmeg, this is where the recipes differ, I didn't grate 1/2 teaspoon I like a light flavoring. If you have ground you can use 1/2 teaspoon.
Salt and pepper to taste
In a skillet cook sausage at medium heat, breaking it up into smaller pieces as it cooks. When it's browned add the jar of tomato sauce and heat through and remove from heat.
In a big bowl mix marscapone, milk, 3/4 cup Parmesan, and nutmeg. Pour a little bit of the mixture into the prepared pan.
Now to assemble, you should have 4 layers. Dip a pasta sheet into the cheese mixture and place in pan. I had 3 layered, then add a little bit of a the sauce mixture, start over with the pasta sheets. On my last pasta layer I poured the remaining cheese mixer on top then the remaining sauce mixture. I topped it with the other 3/4 cup of parmesan.
Now you let it rest for 30 minutes before baking. This would be a great recipe to prepare in the morning and bake in the evening. Preheat the oven to 350 degrees.
Bake for 40-50 min and let rest for 10 minutes before slicing.
Enjoy!
Thursday, April 9, 2015
T-shirt Redesign
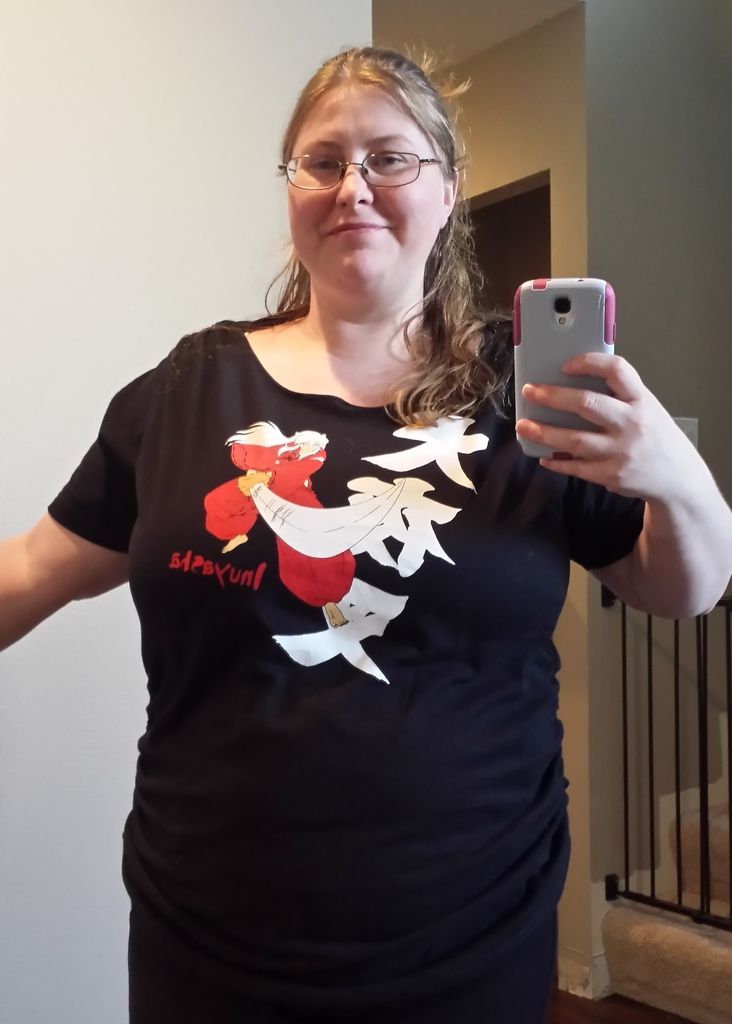
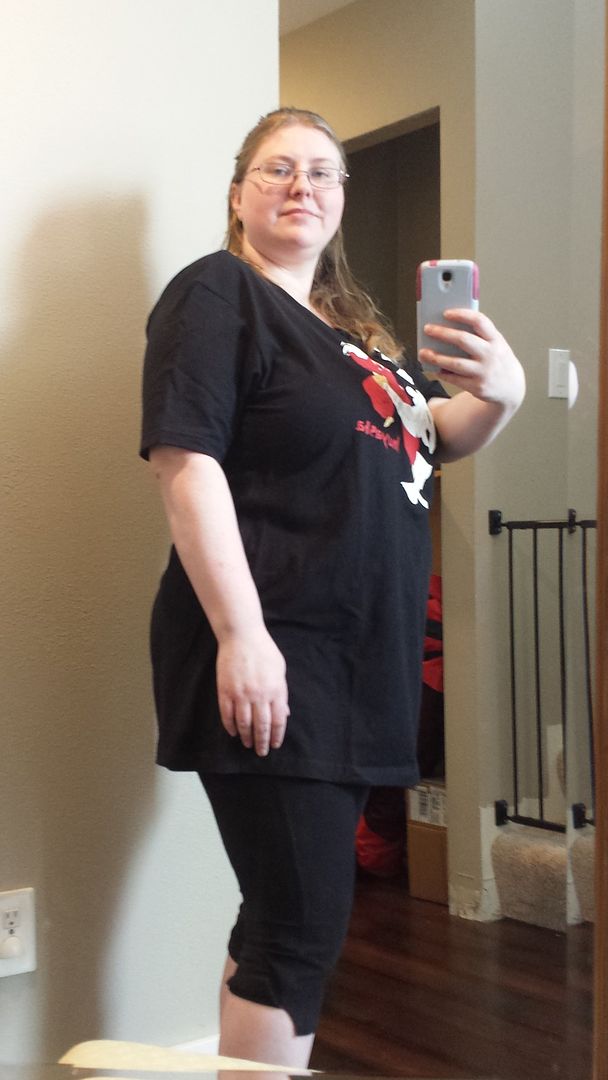
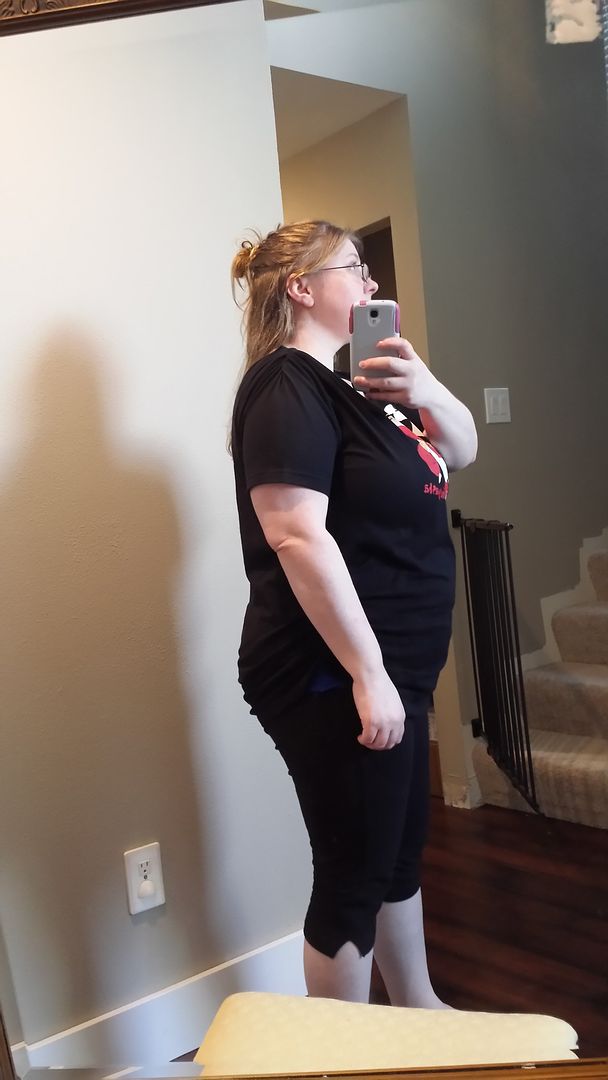
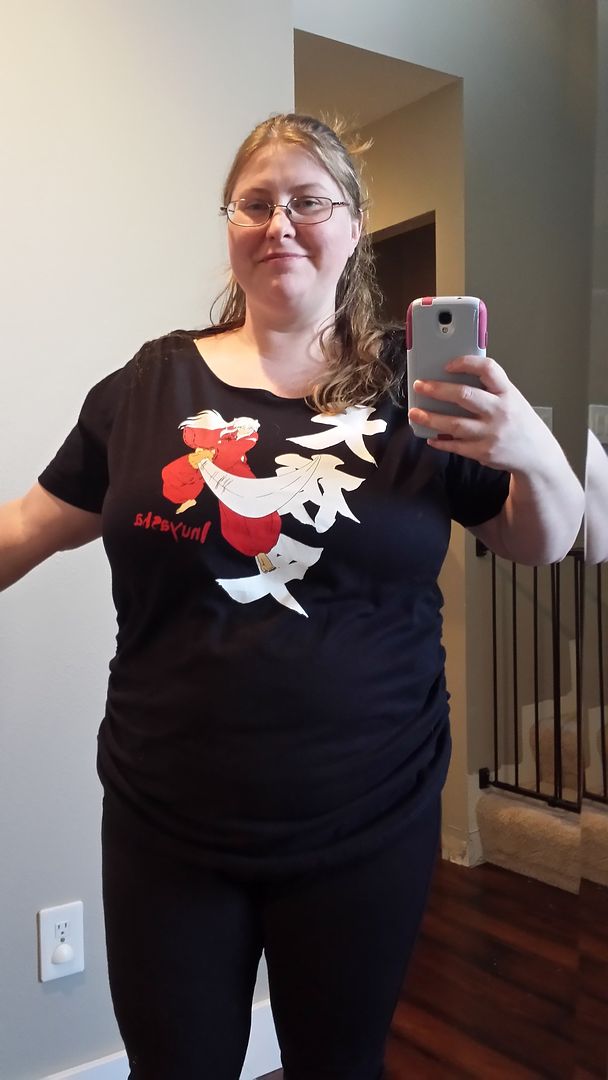
I feel like I am the Queen of Worst Selfies Ever, but I definitely wanted to share this great t-shirt idea (and Winda is no good at taking pictures!). So ignore the weird faces, funny arm poses and (why oh why did I wear) black pants...and hopefully you can find an easy t-shirt solution that will work for you. It does require some sewing, but it is very easy so anyone can do it!
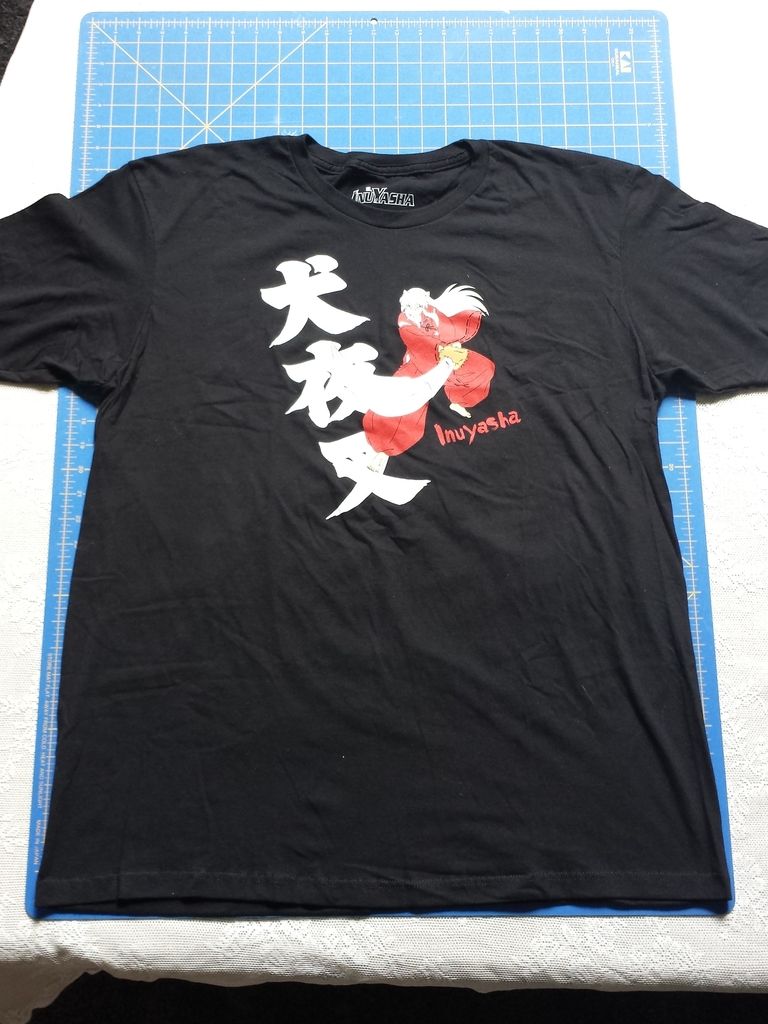
Last weekend at Sakuracon I was really excited to find t-shirts of some of my favorite anime (there was one I really wanted but the 'adult' women sized would have fit a teenager so that was a no-go). Unfortunately, I have never been able to comfortably wear t-shirts - the necks are too small and in order to fit across my chest I have to buy at least an extra large, which was huge every where else. But I really wanted those t-shirts - so I decided to find a way to fix my problems.
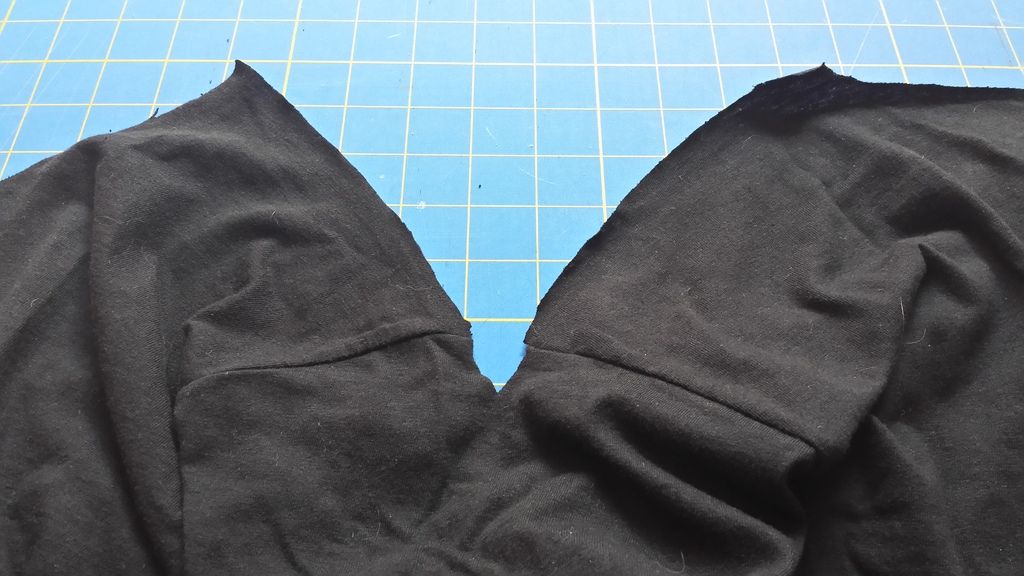
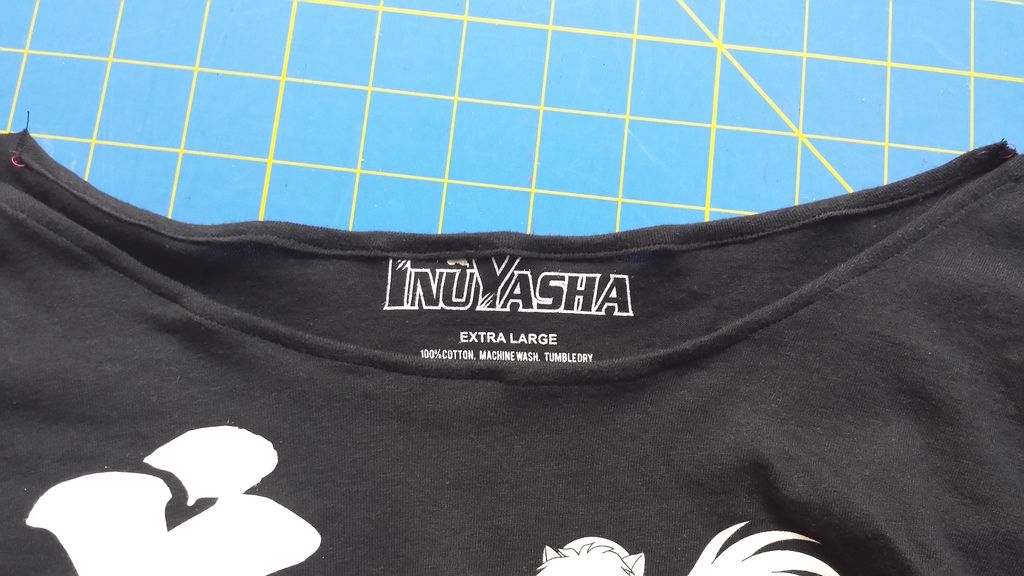
So my first step was to carefully cut out the neck and shoulder seams. Make sure you cut right along the seam so you get the correct shape, and so it wont end up falling off your shoulder. I cut about 3/4" past the hem of the sleeve as well.
Next, I made a new neckline by folding under the edge twice and stitching it. You can do a large hem than I did, but it will make the neck larger.
Once the front and back of the neck is hemmed, stitch the shoulder seams with the wrong sides together (this will seem wrong but keep going). I put the edge of the fabric at my machines 3/8" mark, and had the needle to the right so it would sew as close to the edge as it could.
Turn the t-shirt inside out and stitch the shoulder seam again. I used the 1/2" mark this time, keeping the needle to the right. This will encase the raw edge of t-shirt inside the seam, leaving a cleaner seam on the inside.
![]() |
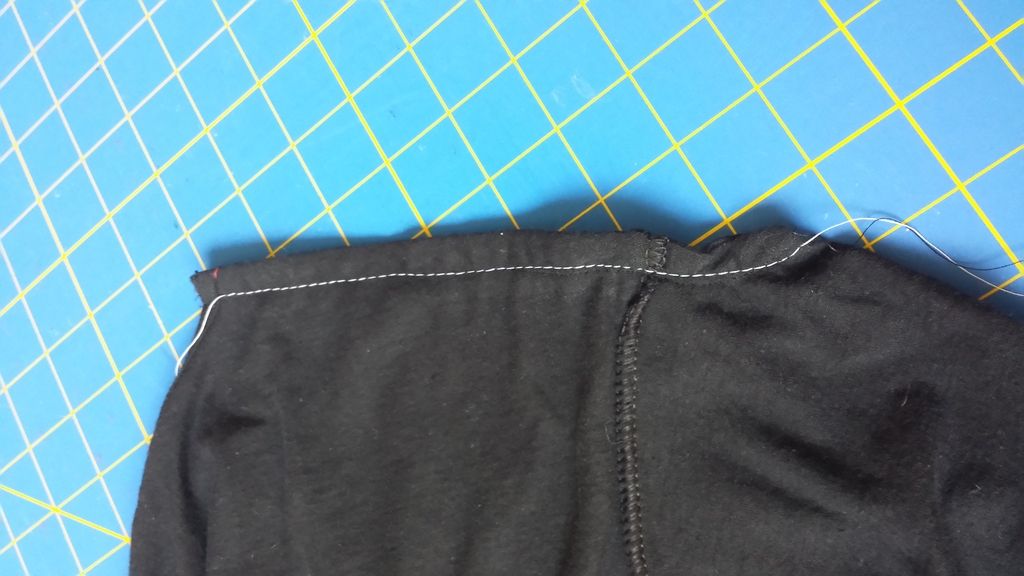
| The white thread is to demonstrate the large gathering stitch, if it is easier for you to see than you can use a different color as well, but it isn't necessary. |
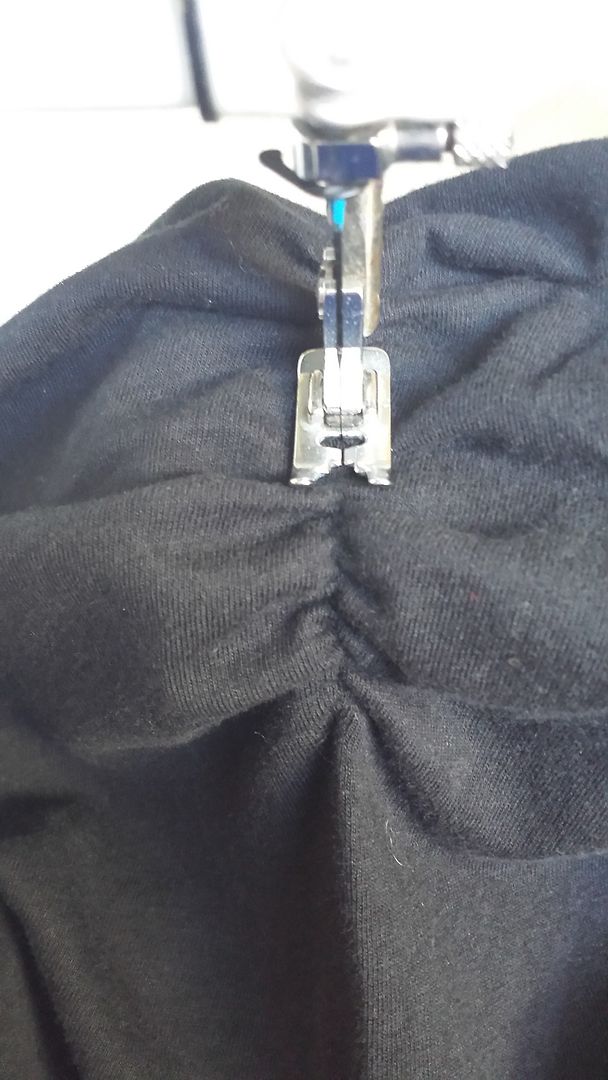
Leaving the needle to the right, change the stitch length to the largest size and sew along the same 1/2" seam to make the gathering stitch (don't stay stitch this or you wont be able to gather it). Tie the two strings at one end together, and pull one of the strings on the opposite side. Once it is all gathered, tie the two strings for that side together. Be careful when you gather to not break the string - you will have to take it out and redo it if it breaks.
Once the sleeves are complete, find the sides of the t-shirt. Iron the edges for a nice clear line to follow. Find where you would like to have the gathering end and place a pin on either side as guides. Using the iron line, sew a gather stitch from the bottom hem to the pin on both sides. Gather the t-shirt the desired amount (it wont be the same amount as the shoulders - so you will need to look in the mirror to judge where you want it to end up). My waist is very short so I did about 12" up the sides and gathered it to about 6". Once you are satisfied with all of the gathering, the last step is to sew over the gathered sections to reinforce them. Just lay the seam flat under your arm and stitch over the top. Be careful that you have evened out the gathering because it will not move anymore.
TA-DA all done!! Now go take some weird selfies like these:
Have a great day!
Beth
Wednesday, April 8, 2015
A Fun Outing!
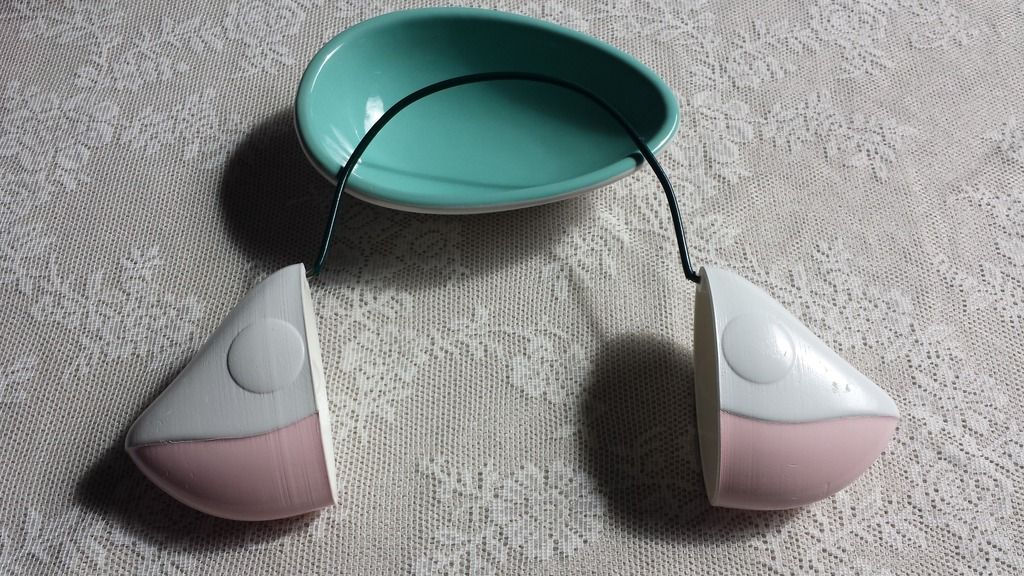
This last weekend I was able to go to an event that I have been wanting to go to for awhile - and it was even more fun because I was able to go with my mom and youngest siblings. Sakuracon is an anime convention held in Seattle each year. We had a blast - and I looked dorky in every picture lol. Oh well - I look dorky in most pictures I am in :). We made costumes and that was a lot of fun - but also a lot of work (it took 3 patterns and my own design to put mine together). Another part of my costume was 3D printed by Eric - the ears and hairpieces for my character. It was a bit of a rush job but they still turned out pretty cool. Here is the link to see the original character Chii from Chobits.
Tuesday, April 7, 2015
Bread Machine Rolls
I have this recipe in my "use constantly" board on Pinterest. I made a couple of batches for Easter too and they were a hit. I just wished I got up early and made them the day of. To tell you the truth reheating them taste really good too. For QA purpose I had to try one to make sure they were tasty. I did that with each batch that came out.
Makes 24 rolls
You will need 2 baking sheets or 1 9 by 13 inch glass baking dish. I like them both ways. I lined my sheet pans with silpats. I would butter the 9 by 13.
Recipe
1 cup milk, at 70-80 degrees
1/2 cup butter softened
1/4 cup sugar
2 eggs
1 1/2 teaspoon salt
4 cups bread flour
2 1/4 teaspoon or 1 packet active dry yeast
1/2 stick of butter melted for hot rolls
Place ingredients in bread machine in same order as recipe. Select dough setting. Remove from bread machine and knead 5 times. Separate dough in half, then each half into 12 sections. Roll each into a ball and place in pan or on sheet pan. Cover with a clean towel and let rise for 30 minutes. Preheat oven to 350 degrees Fahrenheit. Bake for 13-16 minutes. Brush will melted butter and enjoy!
My favorite way to have these roles is splitting them open adding more butter and spooning a little raspberry jam. It's so amazing! I have a roll pictured with some compound butter, I mixed butter and raspberry jam and mixed until combine. You can do that with so many things, crushed pineapple is my all time favorite, other jams, bacon would be awesome, and herbs is also wonderful.
Let us know how you like them!
Wednesday, April 1, 2015
Pasta Primavera
I was thinking over the weekend how nice a pasta primavera sounded. So I grabbed what I wanted and threw it together. I can't believe it's spring! I'm not completely ready to let go of winter evidently. I grabbed butternut squash and an eggplant. We have butternut squash here all year long and it I love what it does to pasta dishes. So of course that being said this doesn't look like a normal pasta primavera. It came out a little orange. Still wonderful though.
I have several moments where I crave veggies, I almost could be a vegetarian. This hits the spot and it doesn't take much to put together. By all means you can add what ever veggies you want! Asparagus, peas, carrots, bell pepper, onion and squash are very common in this dish.
Here we go...
2 tablespoons butter
1 tablespoon oil
1 pound asparagus
1/2 red onion chopped
1 carrot diced (peeled if you like)
1/2 butternut squash
3 garlic cloves minced
1/2 cup heavy cream
1/2 cup water (chicken broth would be so yummy in this, I just didn't have any)
salt and pepper to your liking
1 cup shredded parmesan cheese
1/2 box (8 oz) pasta I used elbows
In medium pan bring water to a boil for the noodles. Cook as directed.
In a large skillet heat oil and butter at medium heat. Add asparagus, onion, carrot, and butternut squash. Cook for about 8 minutes add garlic and cook for 1 more minute. Add cream and water or broth if using. Bring to a simmer and cook for 5 minutes or until thickend. Remove from heat and let sit for a minute, add cheese and stir until melted. Add in cooked pasta and spoon into bowls
Enjoy!
Subscribe to:
Posts (Atom)