Wednesday, May 21, 2014
Sugar, Sugar...
I love dark brown sugar. When I saw this recipe, I really wanted to give it a try. I also love applesauce muffins, but I have never tried apple cake. This recipe comes together quickly, and oh boy does it smell good in my house!
Here's the recipe:
1/2 cup of vegetable oil
4 eggs
3/4 cup of granulated sugar
3/4 cup of dark (or light) brown sugar
2 cups of white whole wheat flour
1 teaspoon of baking soda
3/4 teaspoon of salt
2 generous teaspoons of cinnamon
1 1/2 cups of applesauce.
Pre heat oven to 350 degrees. Line a cupcake pan with papers or grease your tin.
In a large bowl, or stand mixer, whisk oil eggs and sugars. Add flour, baking soda, salt and cinnamon, mix until smooth. Hand stir the applesauce into the batter. Scoop batter into prepared pan and bake for 16-20 minutes. Let cool on baking rack.
To make frosting:
Beat 1 8oz block of cream cheese, 1 stick or 1/2 cup of butter, 1 cup of dark, or light, brown sugar, 1 teaspoon of vanilla and a pinch of salt until smooth.
I put the frosting on with an offset spatula. I adapted the recipe from here.
Enjoy!
Tuesday, May 20, 2014
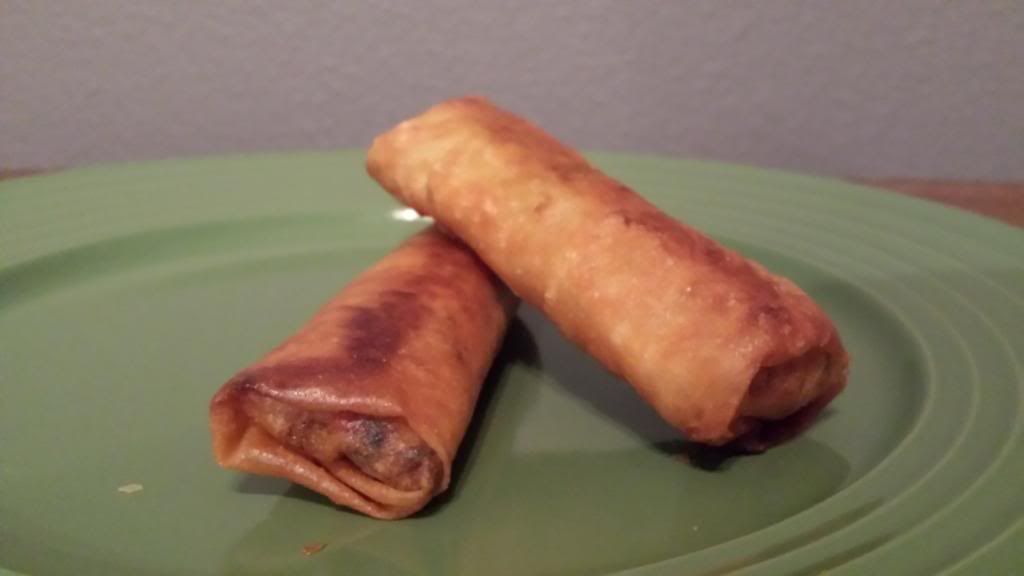
Homemade Lumpia...mmmm
One of my all-time favorite foods is Lumpia. I don't even know when I had my first one, but I will eat them any time I can get them - which is the problem. I do not live or work anywhere near a Filipino restaurant (the closest one I know about is an hour away!) So, what is a girl to do when she is craving one of these yummy rolls? Make them, of course! I have attempted them in the past and was not very happy with the results (ground beef doesn't work, even if it is half beef and half pork, and wonton wrappers are not going to get you lumpia - they will not taste the same). I have also seen them in the grocery store every once in a while, but they usually have fish sauce in them (yes, I know that the ones made at a restaurant probably have fish sauce, but I don't know for sure it's in there - and what I don't know wont make me stop eating them). I have tried eating those, but all I can taste is the fish sauce (again, yes, it's probably all in my head lol).
So, while I may not have a Filipino restaurant - I do have an Asian food store, Uwajimaya, which is close to where I work. I needed to stop for something else and thought I would check to see if they had lumpia wrappers - and they did!! I was so excited so I bought them for the weekend. Then 2 days later (on a Thursday) I just couldn't wait and I made them after work. I would not recommend doing them at the end of a long night because rolling all of the lumpia takes a long time, but they are sooo worth it.
Ingredients:
1 pound ground pork
2 cloves garlic, crushed
1/2 cup chopped onion
1/2 cup minced carrots
1/2 cup chopped green onions
1/2 cup thinly sliced green cabbage
1 teaspoon ground black pepper
1 teaspoon salt
1 teaspoon garlic powder
1 teaspoon soy sauce
30 lumpia wrappers
2 cups vegetable oil for frying
Over high heat, use a wok or large pan to cook the pork, stirring frequently. Remove the pork from the pan and set aside. Drain grease from the pan, and add the onions and garlic. Cook for 2 min and add cooked pork, carrots, green onions, and cabbage. Season with pepper, salt, garlic powder, and soy sauce. Remove from heat, and set aside until cool enough to handle.
Place three heaping tablespoons of the filling diagonally near one corner of each wrapper, leaving a 1 1/2 inch space at both ends. Fold sides and roll - moisten the other side of the wrapper with water to seal the edge. Cover the rolls with plastic wrap to keep them moist. (You should check the filling amount and adjust as needed.)
Heat a heavy skillet over medium heat, and add enough oil to reach 1/2 inch depth, and heat for 5 minutes. Slide 3 or 4 lumpia into the oil. Fry the rolls for 1 to 2 minutes, turning until all sides are golden brown. Drain on paper towels and serve immediately.
These are really easy to make and they taste great. I only cooked enough for our meal and I froze the rest. I think I'll go home and make some more for dinner!!
Monday, May 19, 2014
Amish Sugar Cookies and a Double Birthday Party!
This weekend Felicia, X and I went on a little road trip to a very good friends house for some girl time and her 11 year old twins birthday party. Before the party, Abby and I made Amish Sugar Cookies from a recipe that Felicia often uses. They are easy to make (no refrigerator time) and have a nice light buttery flavor.
Ingredients:
1 cup powder sugar
1 cup sugar
1 cup vegetable oil
1 cup butter (2sticks)
2 eggs
1 teaspoon vanilla
4 1/2 cups flour
1 teaspoon baking soda
1 teaspoon cream of tartar
Preheat the oven to 375 degrees.
In a new bowl mix together the last 3 ingredients (the flour, baking soda and cream of tartar). Add the dry ingredients into the mixing bowl one cup at a time, mixing in between.
Use a small cookie scoop or spoon to drop cookies on to a un-greased cookie sheet. Bake for about 10 minutes, until the tops start to brown.
Happy Birthday Hannah and Abby, we love you!
The cakes were made by their mom and a friend - aren't they great!!
Enjoy
J
Thursday, May 15, 2014
New projects are on the horizon...
I can't believe it's already halfway through May!! Our goal for finishing Eric's office was the end of May, but since we have both been sick the last few weeks (first me and then Eric) we are not going to meet that goal. We still have a lot of projects to finish in there - The main ones being the desktop, the drawer fronts and doors, some wall panels and the upper cabinets for above the desk. So we discussed it and made a decision - if we can get enough things done by the end of May and are on a roll, we will continue the office projects until the end of June. If we are not able to get any momentum in finishing the projects, we will be moving on to the next room on our list. We will still be working on the office, but only here and there between other things. We have a big list of projects to finish by the end of the year, but we are pretty committed to getting it done (or maybe we should just be committed??)
So, what's our next project? The Master Bedroom! We plan to do this room in two steps because we have some bigger projects we haven't made all the decisions about yet, but I don't want to go another year without a closet or light fixtures! So, the first phase is to build the closet organization, install french doors, put up crown molding and install lighting. The second phase will include a new bed, a bookcase and the rest of the decor.
I am really excited about getting my closet completed - I just do not have enough room right now! Here is a sneak peak at what I am thinking of doing:
Obviously this isn't exactly what I will end up with (I still need to take measurements), but it is pretty close to the look I am going for. I mostly have things that are shorter to hang, so I don't need a huge long hanging sections, and Eric only needs a place to hang his jackets (of which there are many). The shelves above will be for sweaters, purses and other things. The shelves below will have pajamas and shoes and other things I can't hang up. The very bottom is for laundry baskets so they are out of sight. I am hoping I will be able to have a 4 foot space in the center, but I may have to redesign it if it is too much weight - we will see when we get a little closer to actually building it. The grey area is where the outer wall covers the front of the closet, the white area is where the door is. I got the original idea from here. I love the idea, but I don't have a whole room for my closet so I need to have a little more function in a small area (plus, I own like 12 pairs of shoes so I don't need quite that much shoe space).
I'm going to keep dreaming of my closet - have a great day!
So, what's our next project? The Master Bedroom! We plan to do this room in two steps because we have some bigger projects we haven't made all the decisions about yet, but I don't want to go another year without a closet or light fixtures! So, the first phase is to build the closet organization, install french doors, put up crown molding and install lighting. The second phase will include a new bed, a bookcase and the rest of the decor.
I am really excited about getting my closet completed - I just do not have enough room right now! Here is a sneak peak at what I am thinking of doing:
Obviously this isn't exactly what I will end up with (I still need to take measurements), but it is pretty close to the look I am going for. I mostly have things that are shorter to hang, so I don't need a huge long hanging sections, and Eric only needs a place to hang his jackets (of which there are many). The shelves above will be for sweaters, purses and other things. The shelves below will have pajamas and shoes and other things I can't hang up. The very bottom is for laundry baskets so they are out of sight. I am hoping I will be able to have a 4 foot space in the center, but I may have to redesign it if it is too much weight - we will see when we get a little closer to actually building it. The grey area is where the outer wall covers the front of the closet, the white area is where the door is. I got the original idea from here. I love the idea, but I don't have a whole room for my closet so I need to have a little more function in a small area (plus, I own like 12 pairs of shoes so I don't need quite that much shoe space).
I'm going to keep dreaming of my closet - have a great day!
Wednesday, May 14, 2014
Oatmeal Banana Coconut Chocolate Chip Cookies
These cookies only have 4 ingredients, can you guess what they are?!
2 mashed ripe bananas
1 cup quick oatmeal
1/4 cup coconut
1/4 cops dark chocolate chips
Mix it all together.
Preheat the oven to 350 degrees and scoop the cookies onto a cookie sheet. I used a small cookie scoop, but you can just use a spoon.
Bake for 15 to 17 minutes, they will still be soft and squishy and almost look the same as they did going in.
These are a quick, easy and very healthy alternative when you're craving sweets. They are not quite like what you would think of as a cookie, but are yummy and they stopped my husband from wanting a bunch of sweets last night.
I made them as a take of these cookies.
Enjoy
J
Subscribe to:
Posts (Atom)