Wednesday, April 30, 2014

Regrowing Green Onions - Part 2


It has now been 11 days since I started regrowing these onions, as you can see they are starting to get big. They are a little skinner, but they taste just the same.  They are even growing new roots!


If you were to buy a few bunches a couple weeks in a row, you may never have to buy green onions again (well at least for awhile).

J

Crafty Bird


I have confessed to having a small obsession with birds...but I really couldn't tell you when it started.  One day I just realised that I have an unusual amount of bird decorations - and now I have one more :)  I got this guy at Michaels a while back and I finally gave him a paint job.  I have a few ideas of where he could live but I haven't made any decisions yet. 

I wanted to keep it simple, but with a little flair, so I painted a bright green around the edges and a soft tan/cream for the front and back.  I almost left the bare wood since the color was so close, but he has been floating around for a few months and he was pretty dirty. lol

The painting job isn't perfect - I can't draw a straight line with a ruler so the edges are a little wavy - but I think it just adds to his charm.

Have a great day everyone! 

Tuesday, April 29, 2014

Giving Thanks...

Next week is Teacher Appreciation Week. I have something picked out for each day. I was shopping for most of it today. It will be so much fun putting it together and giving them to my son's teacher.

I had this wonderful idea when I was pregnant that I would have more babies and I would home school them. Things change and you learn what's best for your child and sometimes you have to go the old-fashion route. We are not planing on having more children, and my kiddo needs more socializing anyway. We are very happy he's in school and doing so well.  His teacher is very caring. I have noticed this about several of the people in his corner. It's so nice to have that kind of care these days. I could tell since he was in the NICU that he would be one of those kids that would surround himself with caring people.

I have found a wonderful site with a bunch pun sayings. I plan on using them when I make my gifts. I will be completing most of the gifts on Friday, which I will post. I will be baking cookies and getting the flowers Sunday night, so those will be the only items you won't see. I will show the tags that I will be making for them though.

Let us know what cool things you have done in appreciation!


Monday, April 28, 2014

Open-faced Turkey Pot Pie


Today, I was cleaning out the freezer to fit all of the free Rice Dream ice cream I got from Whole Foods (they have a coupon and a sale that makes them free with no limit), and found a pie crust from Pi Day. I also had a lot of leftover turkey that we have been eating for days and needed to finish up, so I thought I would kill two leftovers with one dish (hahaha). I just started throwing things together as I went along making this pot pie. This recipe is more hearty and less creamy or saucy. It turned out very well - my sometimes picky husband even love it.

Open-faced Turkey Pot Pie:


Ingredients
1 cup chopped mix of carrots and celery (I usually have a bag of this in my fridge that I make once a week to throw in salads and dishes)
1/2 of a large onion
1/2 cup frozen or canned peas (I used frozen)
1/2 cup of frozen or canned corn (I used canned)
1 can of cream of anything soup (I used chicken)
3/4 to 1 cup of milk depending how thin you want it (I used 1 cup)
4 tablespoons butter
2 cups cooked and chopped turkey
1 pie crust

Prepare the pie crust as directed on the package.  Then preheat oven to 375 degrees F.

Melt butter over medium heat and add onions, stiring a few times. After about 2 minutes add the carrots and celery mix and turn up the heat to medium high. Cook for 2 more minutes while occassionally stiring. Mix in the can of soup and milk until well blended. Add the turkey, corn and peas (this shows how much I love my husband, I cannot stand cooked peas and he loves them). Pour the mix into the crust.

Bake on a cook sheet in the oven for 20 minutes. Let sit for 10 minutes before cutting into it.


Enjoy
J

Friday, April 25, 2014

Banana split cheesecake dip, oh my!

I really enjoy a blended ice cream, I order a banana split when I go to an ice cream restaurant. This recipe is a banana split cheesecake dip. I got the recipe from one of my wonderful best friends. She made it for a book club get together. I only had a low fat cream cheese block, so it came out thinner than if I used full fat. It still is very delicious. I first threw the ingredients together with out the maraschino cherries at first and it looked boring. Then I kept thinking of a banana split and there's cherries on top so I chopped some up and put them on top. You can mix it in, I just thought this looked prettier for presentation.

Here's the recipe.

1 8oz cream cheese, room temp
1/2 can sweetened condensed milk
1/2 teaspoon of almond extract
1 tablespoon of lemon juice
2-3 tablespoons of mini chocolate chips
1/4 cup of crushed pineapple, drained
2 strawberries, puréed
1/3 of banana, mushed
5-7 maraschino cherries, finely chopped

Blend all of the ingredient except the cherries, top with the chopped cherries and serve with Nilla wafers.

Enjoy!

-F


Thursday, April 24, 2014

We bought a car!!


Yep - that's dorky me behind the wheel of our (my) brand new car (seriously, it had 7 miles on it and it had arrived the night before!).  This is probably the most thought out, spur of the moment, planned for, impulse buy ever!  We planned to buy a car in a year or so, then my current car started having issues and we decided we might as well look at our options - then we decided we should just go for it.  So we ordered the car we wanted with all the options we wanted and voila...here it is!!  I am super excited!!

We bought a 2014 Subaru Crosstrek XV:


This is a picture from the Subaru website - although I wish I could take a picture with that pretty blue sky behind lol!  I can't wait for summer - hopefully we can fit in a few road trips this year!! 

Wednesday, April 23, 2014

It's a Numbers Game!


This is what we did for Easter this year - we cut the drawer boxes out for Eric's desk.  I know, I know - my life is filled with super exciting stuff! Lol...While usually I would just say "Hey, we built these boxes" and move on, I thought it would be fun to breakdown what we did - mostly because I think it is crazy how much we had to do just to get 8 drawer boxes.

We started with 1 4'x8' sheet of 3/4" plywood and did all this for the sides:
 

You know I can't resist showing off my mad excel skills!
 4 strips cut to fit into the car (3 – we didn’t cut these but I’m counting them because they took forever)
4 strips cut twice for accuracy to the correct widths (8)
32 cuts to make 32 boards (32)
16 boards routered at both ends – 32 ends w/2 passes (64)
32 boards routered along the bottom for insert – 2 passes each (64)

Then, for the bottoms we used 1/4" plywood.

4 strips cut once (4)
8 cuts to make 8 bottoms (8)
8 recuts because somehow they were too long (8)
8 more recuts because they were too wide as well (8)

Total number of times we cut/routered on Sunday: 199 (Ok - 196, but I'm still counting the ones done at HD - They really did take forever to make 3 cuts)

Eric wanted to keep working on them so on Monday he drilled all of the holes needed to assemble them. 

4 holes per board on 16 boards (64)

2 extra holes on the 8 front boards to attach the drawer face (16)
Counter sinking every hole so it lays flat (80)

Total number of holes drilled: 160

Eric also sanded every board on all 6 sides.

Total number of sides sanded: 240

So, we have handled the boards to make the drawers 599 times...seems like a lot for such a small pile :)   

We are crossing our fingers the weather is decent on Saturday so we can clearcoat them, so it is a bit of a sprint this week to finish them up.  We just have to finish assembling them, add edging to the tops, sand them again, clear coat them and install them.  Then we need to cut and paint the face fronts...It never seems to end lol  

Side note:  I seriously thought about adding an extra cut somewhere - that odd number is driving me crazy :)

A Healthy Side...


I've been dreaming of salads like this for awhile - it is so refreshing! Beth, Jamie and I go to a small mall to shop and sometimes eat. There's a pretty tasty Italian restaurant in the food court and they have this Chop Chop Italian Salad, and it is so delicious! I think the recipe I made here will eventually turn into something like theirs. My husband doesn't care for cucumbers so I picked those out - I'm glad I did since he said he really liked it. That means it can go into rotation for dinner sides, which makes me happy!

I have to tell you a quick funny while I made this recipe. I got everything diced and went to open the can of beans and I thought I grabbed the garbanzo's, but actually I grabbed the cannellini's. So now I need to find a recipe to use them in tomorrow. I was thinking, of course, I could just throwing them in instead, which I might do someday. I wanted to keep somewhat true to the original recipe this time.

Here's the recipe I adapted from Pinterest:

Greek Chopped Salad
1/2 red onion finely diced
1 english cucumber, chopped
4 roma tomatoes, chopped
1-15.5 oz can of garbanzo beans

Dressing:
3 tablespoons of red wine vinegar
1/4 cup of light olive oil
2 teaspoons of oregano, I used fresh and I put in 1 sprig finely chopped.
1/4 teaspoon of salt
Pepper to taste

Lettuce and parmesan (grated fresh) for each serving (optional)

Toss all of the salad mixings in a large bowl. In a small bowl whisk olive oil, vinegar, oregano and salt and pour over salad mix. Toss to combine. Add pepper if your using and lightly toss again. Add lettuce to bowls and top with salad mixture and add freshly grated Parmesan to serve.

I could have added the lettuce to the mixture, my plan is to eat this for a couple of days and the lettuce would wilt!

I hope you enjoy!

Tuesday, April 22, 2014

Peep Cupcakes...and an Awesome Vanilla Cupcake Recipe!


Look! It's a Peep family!
 
On the drive home Friday night, I decided I wanted to make cupcakes for Easter.  (For some reason I have been really into baking lately.)  After a quick stop at the store to get Easter cupcake liners (yes, I had plain ones at home but what fun is that?), I was ready.  I knew I wanted to make vanilla cupcakes because I saw some cute Peep cupcakes and I wanted to copy them.  I also planned to add coconut on the frosting for 'grass', so I thought vanilla cake would help tone down the sugary-sweetness.  I have never really found that awesome vanilla cake taste and texture combination - most are fine, but I really wanted to find awesome!  So after looking around online I stumbled across this recipe, and I decided to give it a try - I was intrigued by the oil instead of butter switch.  It definitely fit the bill for awesome - not too sweet, great texture and I am pretty sure I could put anything on or in them and it would be good. (It even tastes good 4 days later and counting...).

Vanilla Cupcakes:

Ingredients:
1 1/4 cups cake flour or all-purpose flour
1 1/4 tsp baking powder
1/2 tsp baking soda
1/2 tsp salt
2 large eggs
3/4 cup sugar
1 1/2 tsp pure vanilla extract
1/2 cup oil (any oil can be used, I used sunflower oil, but canola, light olive oil or vegetable works as well)
1/2 cup buttermilk or 1/2 cup milk plus 1/2 teaspoon white vinegar or lemon juice- add acid to the milk then set aside for 5 minutes before using

Preheat the oven to 350 degrees F and line a cupcake/muffin pan with cupcake liners.  In a medium bowl, whisk together the flour, baking powder, baking soda and salt.

Beat the eggs with an electric mixer on medium speed to combine, don't over mix.  Add sugar and combine, then add vanilla and oil.  Add half of the flour mixture and the buttermilk.  Mix, then add the rest of the flour mixture.  Beat until just combined and smooth, scraping down the sides of the mixing bowl. The batter should be thin.

Pour batter into a lined muffin pan - between 1/2- 3/4 full.  Bake for 12 -14 minutes at 350 degrees F.  Let them cool in the pan for a couple minutes, then remove.

Once they are completely cool, frost with your favorite frosting.  I used a coconut milk frosting and I thought it went great with the coconut grass and peeps, but it was not as "fluffy" as some that I have used in the past.

Coconut Frosting:

1 cup (2 sticks) unsalted butter, room temperature
2 1/2 - 4 cups powdered sugar
1/3 cup coconut milk (from the can not the stuff you use for cereal)
1 1/2 teaspoons vanilla extract

Cream the butter and 2 1/2 cups of sugar, add the coconut milk and vanilla.  Whip until well combined, then add powdered sugar until it is the correct taste and texture that you would like.  Usually I will add sugar until I am happy with it, and then whip it on high speed until it changes to a lighter shade and fluffs up.

Frost, decorate and enjoy!


Monday, April 21, 2014

Regrowing Green Onions

On Saturday, I went to the store and bought a bunch of green onions. As I was chopping them up I thought about the tip I have seen on Pinterest and thought I would see if it works. According to Pinterest, if you put the ends of the green onions into water they will regrow. I put all of them into a glass of water, took a photo and the left it alone. I thought for a moment that I would blog about it in a week or two and let everyone know if it works or not - and then went back to chopping veggies.


I'm sorry that this photo is not every good, but you can see where I cut them

Sunday evening I went into the kitchen and just happened to glance over at the onions. I was so excited and amazed at what I saw. It had only been a little over 24 hours and they were already growing.... a lot.


I will post again as they grow more. I was just too excited not to share!
Also, yesterday was Easter and I wanted to share a photo with everyone.

Dexter with an Easter Basket I found outside my door. The basket had a card in it from the Easter Bunny and was filled with things at are so me and I love them all. This basket was so special to me and the person who left it is even more special. Felicia - thank you for being amazing, for always knowing what I need to feel better and for being an Easter Bunny this year!!

Happy Easter!
J

Friday, April 18, 2014

Easter Treats


I wanted to make a little treat for my kiddo's class for Easter. I found a cute egg mold baking sheet. It is for making whoopie pie's, but I thought that was a little too much for preschoolers so I left them as small cakes.  I made the recipe on the pan package, then I glazed the cakes with a powdered sugar recipe and topped with sprinkles.  They were delicious!

Here's the recipe - I hope you enjoy them!

Ingredients:
3 large eggs
1 cup sugar
1 1/2 teaspoons of vanilla extract (the original recipe says 1 teaspoon vanilla 1 teaspoon almond extract, but I didn't) 
2 cups all purpose flour
2 teaspoon of baking powder
1/4 teaspoon salt
1/2 cup of unsalted butter, softened
2/3 cup of milk
sprinkles or food coloring

Preheat the oven to 350 F degrees. Grease and flour your mold, if you're using a baking sheet and will be making traditional whoopie pies you can use parchment paper.


In a small bowl beat eggs, sugar, and vanilla (and almond if you're using) until light and fluffy in color. In a large bowl combine flour, baking powder, and salt. Beat in the egg mixture and milk until smooth and well blended. Fill wells or pan with about 1 1/2 tablespoons of batter. Bake 8-10 minutes until cakes spring back when lightly touched. Cool 5 minutes in pan then inverts cakes onto cooling rack and cool completely. Makes 24 halves.

Powdered sugar glaze:
1 1/4 cup of powdered sugar
3 tablespoons of milk
1/2 teaspoon of vanilla extract

Mix powdered sugar and milk, then add vanilla.

Dip the tops of the egg's into the glaze. Sprinkle with colored sugars, or if you're ambitious you can divide the glaze and dye different colors and decorate the cakes. I was planning on doing just that but the lines, polka dots and zig zags were not defined very well so I skipped that and went straight to the sprinkles and I'm so glad I did, they turned out great and the kids liked them!


Just in case you wanted to make the whoopie pies, here's the recipe for the filling.

Ingredients:
1 cup vegetable shortening
1 1/2 cups of powdered sugar
2 cups marshmallow cream
1 teaspoon of vanilla

In a medium bowl, combine all filling ingredients. Beat on low speed for 1 minute, until combined. Beat on medium speed for 2 minutes, scraping bowl often until light and fluffy. To finish, add a generous dollop of filling and slightly press to halves together.

Have a great weekend and Happy Easter!

Thursday, April 17, 2014

Coconut Banana Bread


I don't usually make two recipes at once, but last Saturday I had both zucchini and bananas that needed to be used - so I decided to make both Chocolate Zucchini Bread and Coconut Banana Bread.  It wasn't a lot of work, but it did take a long time because they took so long to bake.  Originally I had planned to make regular banana bread, but I did not have the sour cream the original recipe called for.  Since I am always looking for good substitutes for dairy products I thought maybe coconut milk would be good - then I thought I might be crazy - so I decided to Google whether this was normal or not.  Turns out LOTS of people use coconut milk in banana bread. Huh - who knew?

So I threw it together - not quite sure if I would like it (I'm not a huge coconut fan), but Eric loves it so I knew someone would eat it.  Turns out you can't really taste the coconut at all, but the bread was really moist and dense (but not heavy).  I definitely recommend it to everyone.

Coconut Banana Bread

Ingredients:

2 sticks butter
1 1/2 cup + 2 TBSP sugar
3 whole eggs
1 1/2 cup mashed ripe bananas
4 cups + 2 TBSP flour
1 teaspoon baking soda
1 1/2 teaspoon baking powder
1 14 oz can coconut milk

Preheat oven to 350 degrees.  Grease and flour your pan, or use baking cups.

Cream the butter and sugar, then add the eggs (I just add them all at once, but you can add them one at a time if you want).  Add the mashed bananas and combine, but don't overmix -you want the banana lumps. 

Combine the dry ingredients and mix half into the banana mixture.  Stir the coconut milk to combine and add to the mixture.  Add the rest of the dry ingredients and beat until well incorporated. 

You can add anything you want at this point - nuts or chocolate chips or both.  I think shredded coconut on top or mixed in would be good as well.

Evenly distribute the batter between your pans and bake for 15-50 minutes. The size of your pan will determine how long it needs to bake - so if you are using cupcakes or baking cups start checking it at 15 minutes and determine how long it needs to cook. If you are using 2 bread pans, you can probably go for about 40 minutes before checking it. It is done when you can pull your tester (or knife) out clean.


You can serve it hot or wait for it to cool.  If you serve it hot it will be a little extra crumbly.  I usually store mine in the fridge, it will be good for about a week or so - if it lasts that long!  You can also freeze it if you want to make it ahead of time, just take it out the night before you serve it.  
I got the original recipe from here

Enjoy!


Wednesday, April 16, 2014

MS Walk 2014


On Sunday, April 14th, we (the Three Peas) and some other great friends walked 4.6 miles to help raise money and awareness for MS.  Instead of writing separate posts, we decided to combine it into one post with each of us adding our 2 cents.  We all had a great time and we look forward to doing this walk and more in the future!     

Jamie:
With being sick with a cold (yes again) and having complications with my foot because of the MS, I wasn't sure if I would be able to make it. I did and wanted to go again after! I love walking and hiking and the thought that someday I may not be able to sucks (a lot), but let's focus on the positive - I can now and I did!

I did it with my two peas who are amazing. No matter what I am going though (or what crazy idea I have) these two girls are always right by my side and for that I am very thankful for them. Thank you both for always supporting me and having my back, I love you both!

I also got to hang out with some other dear friends, 10 month old twins I adore and I met a new friend who also has MS. I can't wait to do it again next year! :)


 J

Felicia:
On Sunday we did a walk in support of our Jamie who has MS. It was a beautiful day! Jamie and I got there and went to a bunch of booth's and picked up supplies and info for MS fighters. 

They had a banner there that we signed.


To tell you the truth I wasn't sure if I could make it. I'm not exactly in the best shape. We walked 4.6 miles! I couldn't believe it. I'm so proud of Jamie for getting out there and walking on a hurt foot.

We learned a lot about what we will do next year - like I need to bring a hat! I sunburned my scalp! I think we made good time. We were not first to get back but we were not last either!


This is us, I'm taking the picture, at the finish line!

Jamie wants to start doing more walks for charity. Now that I know I can handle it, I say bring it on! I hope you all had a fantastic weekend like we did!

F

Beth:
This walk was a lot of fun!  We didn't realize just how many people would be there though.  It was less of a walk and more of a stroll for most of the time, but either way I was feeling it by the time we were done!  The weather was perfect, everyone was in a great mood and (hopefully) a lot of money was raised.  I was really glad we were able to go out and show our support for Jamie.  There are lots of times when there is nothing we can do to support her, so it was great being able to do something.  Jamie says she wants to do lots more walks, and I am looking forward to doing as many as I can with her.

Now, here is a bunch of pictures we took during the day.  Of course, we never actually managed to get a picture of the three of us, but next time for sure!

B


Tuesday, April 15, 2014

Chocolate Zucchini Bread


I always have zucchini's in my fridge - Eric loves them so I try to add them anywhere I can in our meals.  I have never really liked zucchini (I will eat it, but it has never really been my thing) - but I LOVE chocolate zucchini bread!  I like regular zucchini bread too, but the chocolate just does it for me.  I even added mini chocolate chips to the recipe, because you know - the zucchini makes it healthy so why not? :).  I didn't have quite enough zucchini, so next time I will make sure I have more.  The only real tip I can say is to make sure you use the smallest grater you have.  The smaller the better because if it is too big you get stringy bites - and that isn't very appetizing.  Plus if you 'hide' it by making it small - most picky people will never know it was in there - this includes kids!  I know this for a fact because I was one of those people until I tried it to be nice since someone made it, and I found a new love.

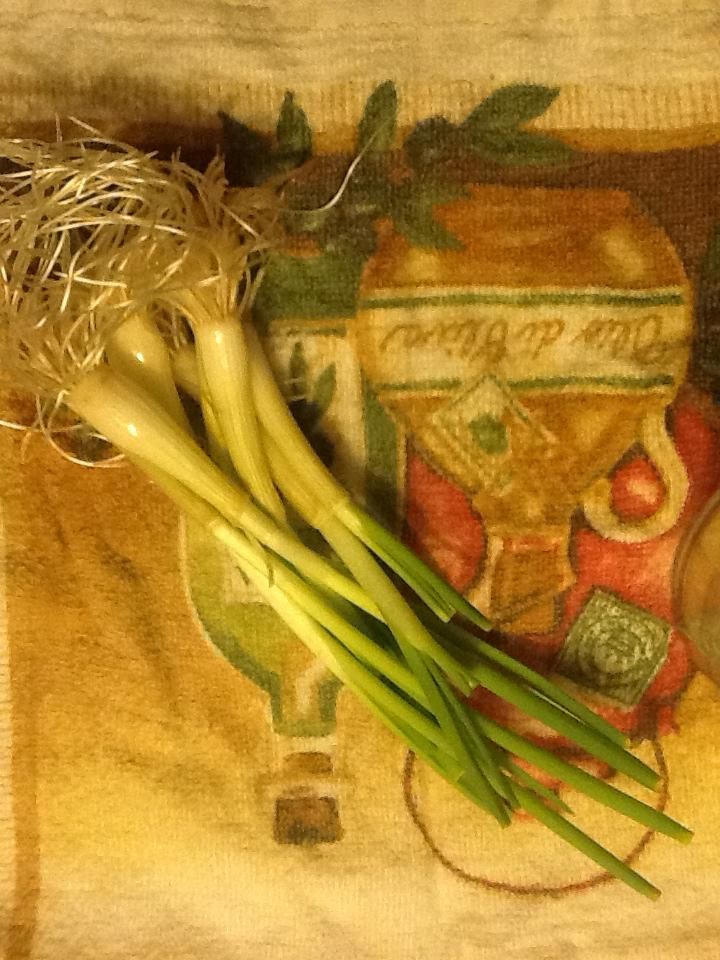
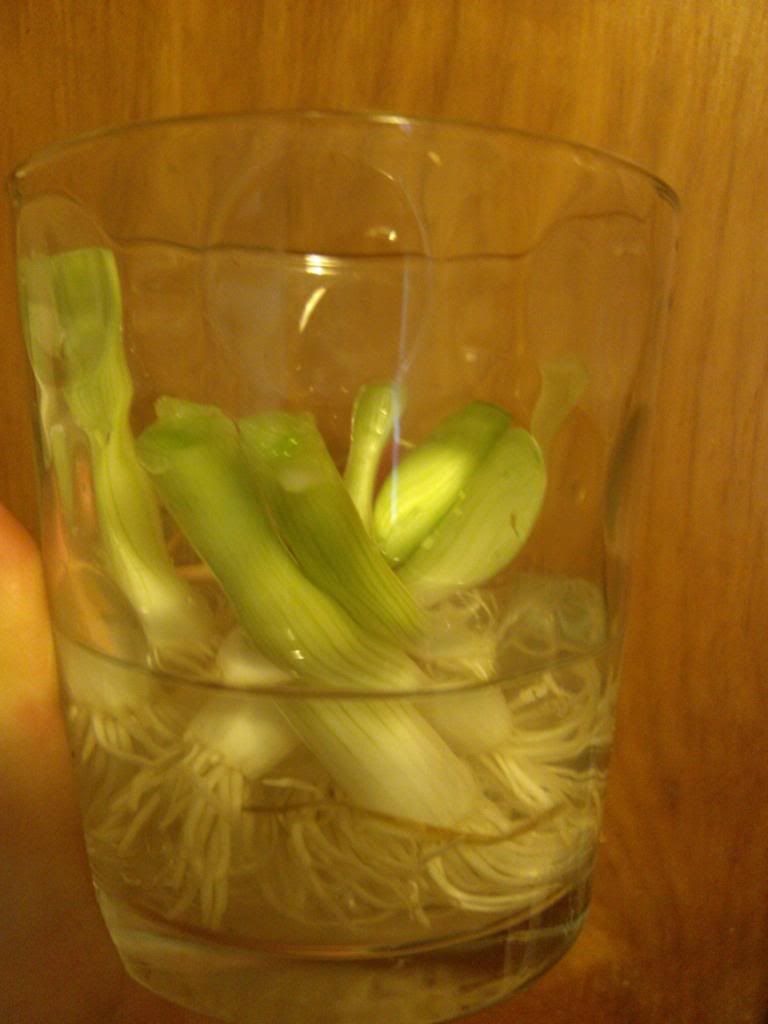
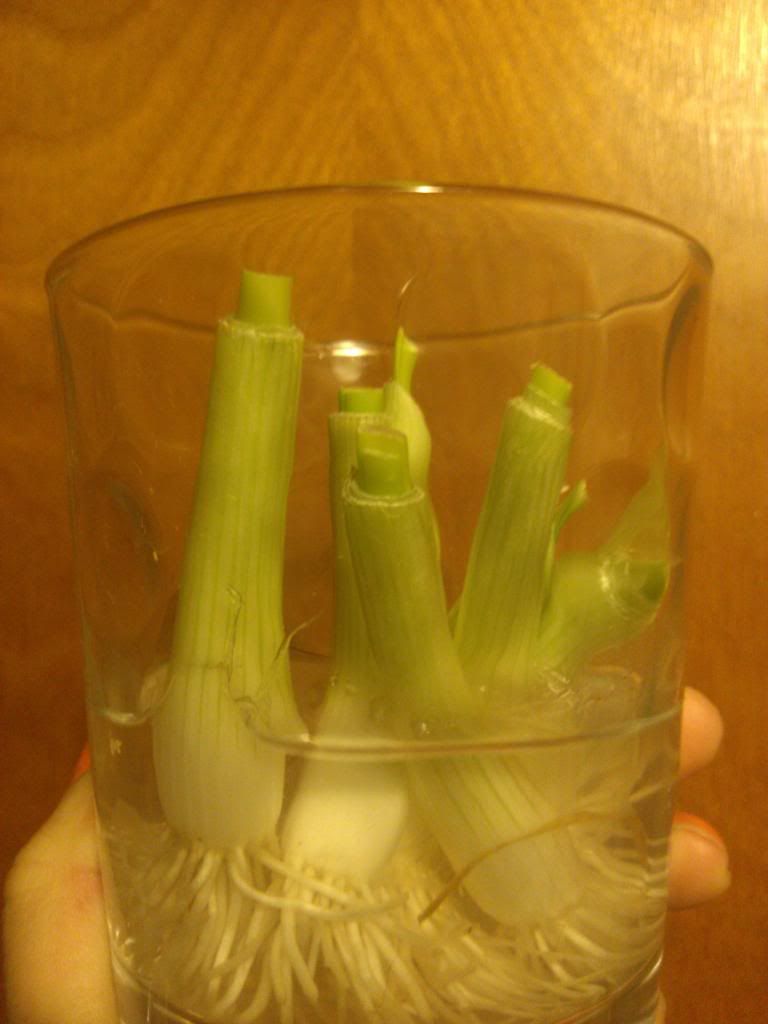
Tiny shredded zucchini
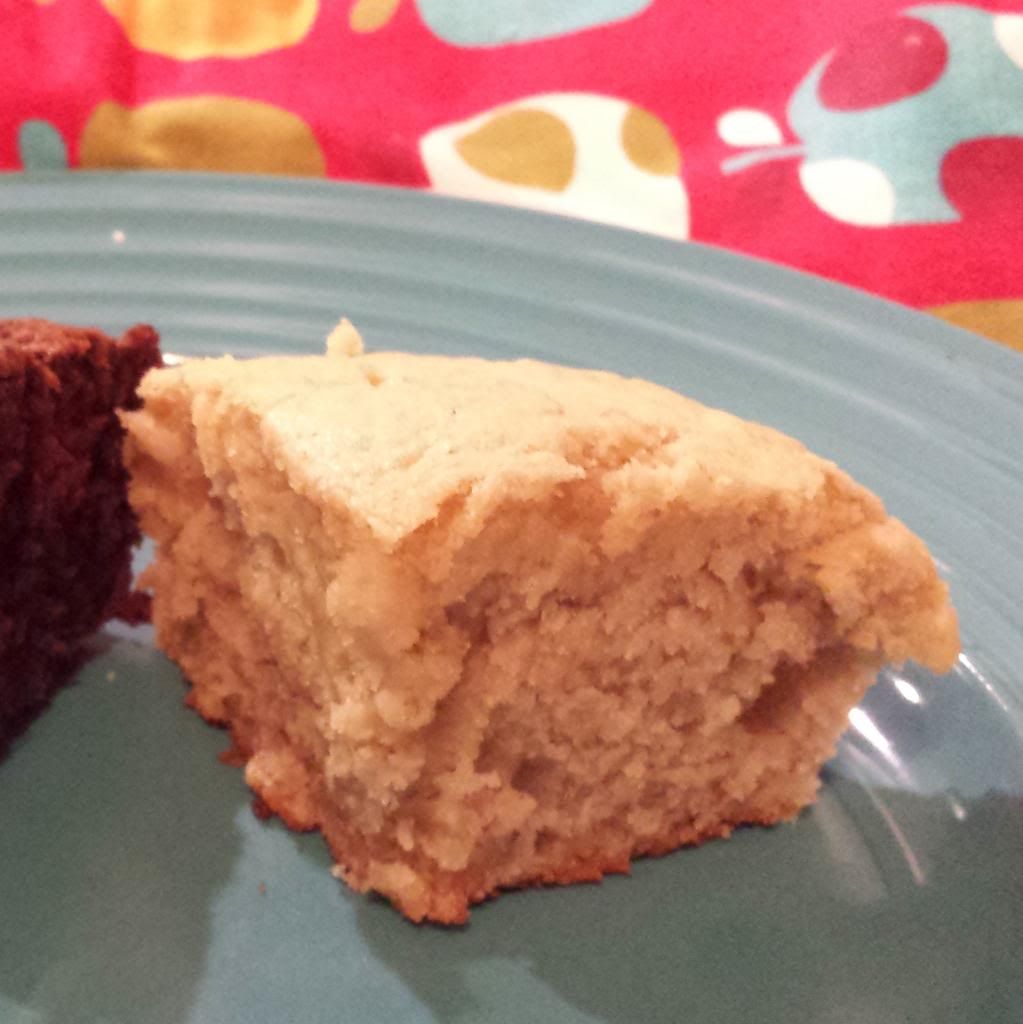
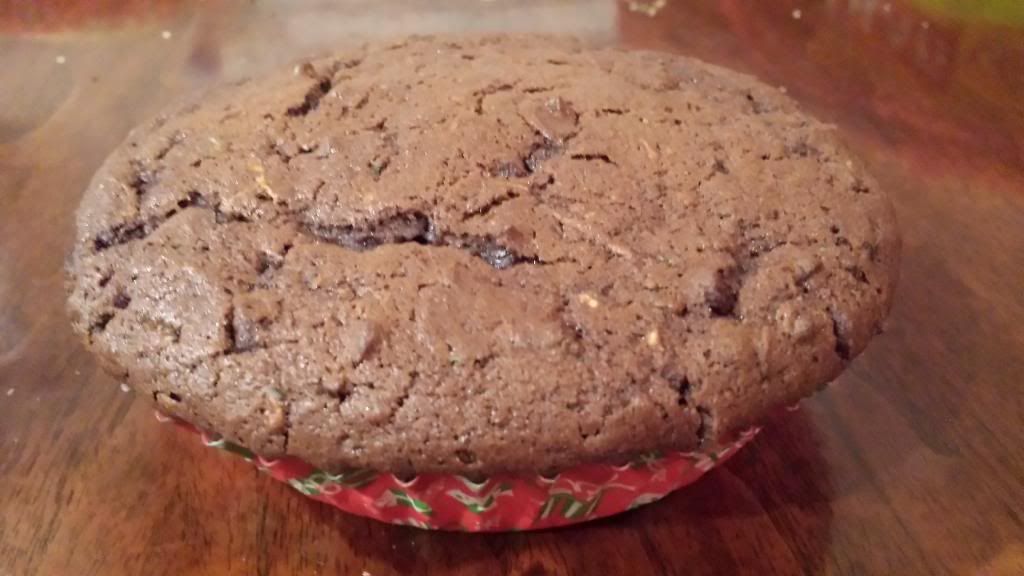
Once you mix the batter, you can put it into any size or shape of pan you want - don't restrict yourself to a bread pan just because it is called bread!  I used tart shaped baking cups leftover from Christmas.  I kind of over filled them - I had that awkward amount of not enough for another one, but too much to waste.


I love using these cups becasue they are great to give out and they are easy to share.  You can even cut them into pieces and leave them in the cups for easy travel (I took some to share at the MS Walk on Sunday).

Now on to the part you want - the recipe!!

Chocolate Zucchini Bread

Ingredients:
2-4 cups grated zucchini 
2 1/2 cups all purpose flour
1/2 cup unsweetened cocoa (I used a mix of regular and dutch cocoa)
2 teaspoons baking soda
1/2 teaspoon salt
1 teaspoon cinnamon
1 1/2 cups granulated white sugar
2 eggs
3/4 cup unsalted butter (12 Tbsp or 1 1/2 sticks), melted
1/2 teaspoon almond extract
1/2 teaspoon vanilla extract
1 cup mini chocolate chips
Optional: 1/2 teaspoon instant coffee granules (I don't like the taste and I have a friend who is allergic to coffee, so I did not include this)

Preheat oven to 350°F.  Choose your pan, grease any pans if you are not using baking cups.

Grate the zucchini and check on how moist it is.  It should be moist but not in a puddle of water, if that makes sense.  If it is too moist, drain before adding - if it is not moist enough, soak for a few minutes to add moisture.

Whisk together the flour, cocoa, baking soda, salt and cinnamon until well blended with no lumps.  Combine sugar and eggs in a stand mixer and beat until smooth.  Add the melted (cooled) butter, both extracts and instant coffee (if using) - mix until smooth.  Add the shredded zucchini and mix to combine.  Add the flour mixture (Full disclosure: every recipe will tell you to combine in 3 equal parts, mixing well between each.  I don't do this - I always add some, mix it a little then add it all because I am impatient.  I have never had any issues with doing it this way, but please do it however you like).  Add the mini chocolate chips.  The batter will almost look like chocolate mousse - very thick and creamy - but with lumps because of the zucchini and chocolate chips. :)

Evenly distribute the batter between your pans and bake for 15-50 minutes.  The size of your pan will determine how long it needs to bake - so if you are using cupcakes or baking cups start checking it at 15 minutes and determine how long it needs to cook.  If you are using 2 bread pans, you can probably go for about 40 minutes before checking it.  It is done when you can pull your tester (or knife) out clean.

You can serve it hot or wait for it to cool.  If you serve it hot it will be a little extra crumbly.  I usually store mine in the fridge, it will be good for about a week or so - if it lasts that long!  You can also freeze it if you want to make it ahead of time, just take it out the night before you serve it.

Enjoy!  

Update:  Oops - I forgot to add the link to the original recipe


Monday, April 14, 2014

Easter Egg Potato Stamps


Easter is almost here, so I thought I would do a fun and easy Easter craft. I used one potato for these three stamps, so it is a very budget friendly project. It only took me about 10 minutes from start to finish, including cutting the potatoes, stamping and taking photos.

Here is what I used:
1 potato
A knife
Paint
Paper
Paint brush (optional) 


I cut the potato in threes and then carved out designs on each one. I also shaved the side of one to make it look more egg like. To get the stamps to sit nicely for the photos I cut the backs off of the two ends ones. You might want to do that too for less mess.


I used the paint brush to paint the stamp with two colors. I also just dipped them into the paint like any other stamp, I liked that way the best.

I think it would be fun to cut the potatoes in different ways with different shapes, to make potato stamps for any occasion not just Easter.
Have fun and get messy!

Friday, April 11, 2014

Budget time and Great News


I haven't had a budget in a very long time. As I talked about on Wednesday, I need to declutter. Part of decluttering is starting a food budget and plan. You know how your eyes get more food than your stomach can eat at a buffet, well mine buy more food than I can make. I found this cool Form that has all the different averages for individuals' cost of food. So I added my family members up, which came to $166.30 a week. Which I think is reasonable, so I'm going to try this out.

I want to start having one day of prep and assembling meals. I'm going to shop on Mondays and do the prep and assemble meals on Tuesdays, while my kiddo is at school. 

Of course, there are always the nights when we would rather eat out or get to go meals, so I need to account for that. Right now I'm listing all the snack and meals we like to eat so that I can I make a grocery list. I like to shop at the bulk stores for a lot of my grocery needs, so a list is essential. 

I think this will be a fun adventure and as a bonus it will make my husband happy...hopefully!

(warning, if you're squeamish I would stop reading)

Exciting news, my son has healed. It's crazy how new bone grows so quickly. 
This morning we went back to the Children's Hospital and had our son's cast removed and checked his progress. We got there and they took his cast off right away. We convinced him to wear head phones so it wouldn't be so loud. I didn't think it would work but luckily it did. My niece lent me her son's sound dampening headphones and now that I know my son will tolerate wearing them, I will be getting him a pair. 

We were waiting to do an x-ray for a little while, I was worrying that he would take the wrap off and see the pins that were sticking out of him. He did very well and so did my husband at keeping him distracted. They came and took him to imaging and moments later the Orthopedic Dr came in and read the X-rays right there with us. There was new bone growth! Yay! That meant that we could remove the pins. Luckily, my husband got our son to lay down so he couldn't see. The doctor took out the first pin, which he said was the tough one, and my son didn't even flinch. However, the second one was attached to a scab so that one hurt. I was amazed, they said it was supposed to feel like popping a zit but the second was more painful than that, he's a tough cookie! Tomorrow he can take a bath, I can't wait! Tonight he will have to settle for a shower.

Here's a picture of the pins, we got to bring them home!


Thursday, April 10, 2014

30 Days of Exercise...I'm exhausted already!

So yesterday I made a decision - No More Excuses!  I have been trying to find motivation to workout for what seems like forever.  I am very easily swayed to not exercise...I need to make dinner, we got home late, I'm sore from doing something else, I don't want to...trust me - my internal list of reasons why I don't want to workout is endless.  There are only 2 main reasons I want to workout so sometimes they get drowned out by the reasons not to...I want to be healthier in general and I want to be healthier when we decide to have kids.  I already have things that work against me and there aren't a lot of things I can do about them, my age (not that I'm old, but I'm not young anymore either) and having fibromyalgia being the two biggest.  Exercising and being healthy is something I can control, so why am I wasting time!? 

To kickstart my new attitude I decided to challenge myself to do something everyday for 30 days.  EVERY. DAY.  Mostly I plan to do P90X, which is surprisingly easier for me to do than I thought it would be.  One of the trickiest things about exercising for me is that I cannot do the same thing every day, I have to do different things or my fibromyalgia will kick in big time.  I also can't do the same thing for an extended period of time (Even folding laundry can kick my ass if I do it for too long).  Taking a walk every day is actually harder for me sometimes than doing P90X because you change what you do for each day of the week.  It also doesn't hurt (haha) that you can go at your own pace - you control how intense your workout is.  So I can build up how hard I work as the weeks go by, instead of jumping into it and doing max intensity right away.  I actually made it 6 weeks into the 12 week program last year, then I went on a trip and totally fell off the wagon lol.  I also plan to do some walking, like this Sunday I am doing the 4 mile MS Walk with Jamie and a bunch of friends.  For the days I am truly too sore to workout (like next Monday after walking 4 miles), I am planning to do some yoga.  It's as hard as everything else, but usually the stretching involved helps...after I am all done, not so much while I am doing it. 

Well that's enough of my rambling.  Has anyone else found motivation to actually workout this year?  I have been trying since New Years (it is one of my resolutions)!!  Wish me luck!          

Wednesday, April 9, 2014

Orange Creamsicle Sugar Body Scrub


This body scrub smells amazing, works great and is made with natural ingredients. You will find that most of the ingredients are already in your kitchen!

I made a lot of Christmas gifts last year and this was one of them. When my aunt opened hers to smell it - she loved the smell so much she tasted it (I am not joking). She then passed it around for every one to try (technically you can eat it, but I have not and do not recommend it). Since she ran out of it she keeps telling me she wants to order it. I made a big batch the other night and thought I would share it here with all of you! :)

Ingredients:

6 to 6 1/2 cups of sugar
(You can use a mix of oils or just 1. You will need 1 1/2 cups of oil total. This is the mix I use because each one of the following oils are good for your skin.)
1/2 cup olive oil
1/2 cup coconut oil
1/2 canola oil
2 tablespoons water
6 teaspoons vanilla extract
1/2 teaspoon or more orange essential oil (I would start there and then add more if you want, I always add more)

Start by measuring out the sugar into a large bowl. In a measuring cup pour in the oils to 1 1/2 cups, then add the rest of the wet ingredients and stair a few times. Combine the oil mixture with the sugar and mix it all together.


Store in a glass container with a lid.


  This batch will make 4 jars this size with some left over.

Enjoy
J

Can you over nest?

My pregnancy was not typical. I had my son at 29 weeks. We went from being in the hospital trying to make my body cooperate to staying in the hospital keeping him alive. Then we went home and needed to keep him safe from sicknesses of any sort. Then we went into therapies and we are still in therapies. Now that he is doing so well, I feel things are leveling out. My son has come so far and I'm beyond proud!

I was just sitting here thinking that I really need to declutter and figure out what I really want to keep. Then I was thinking I might still be trying to nest. I really didn't get to do that. So I think that I'm making up for it now. We live in small house, well I think so, it was perfect when it was just the two of us. We decided on getting a convertible crib for our son, assuming that it would turn into twin size bed. It didn't, it turned into a full size bed, which takes up most of his room. Because of that, most of his toys are out in the living room. I keep trying to reorganize and find new spots for the toys. I think I'm to the point of donating a lot of stuff. I have pushed something against every wall in the living room, there is no more space. So it's time to do a big donation from every room. Now I just need to find a group of people to come help me do this in a couple of hours. Those remodeling TV shows are so awesome and I wish I was on one of them. I hope you have a great rest of the week!

Tuesday, April 8, 2014

Rosemary Woes


As much as I would love to be able to say everything I planted last year has survived - I would be lying.  I do have a pretty good survival rate so far this year, but there is one plant I can't seem to keep alive... Rosemary!  It's not just the most recent plants either - I have lost every single rosemary plant I have ever gotten.  Even the one my mom gave me that was several years old and seemed like a no brainer (Sorry Mom!) - that is definitely the one I feel the worst about even after 5 years.  So what goes wrong?  The only one I know for sure what happened is the original one - I left it on the back deck thinking it was getting plenty of rain, only to discover that the awning covered it the entire Fall and Winter.  So even though it was pouring rain most of the time - the rosemary was never getting enough water.  The latest plants were in two different areas - I had a good sized plant on my porch and I had several plants mixed into one of my front beds as winter interest.  None of them survived...

This guy on the left was one of those little christmas tree shapes - I thought it would be great for year round color on my porch, but I think it didn't get enough sunlight.  I know I watered it so that is the only thing I can think of. 
 
The one on the right is one of 6 plants I put into the garden, and all of them look like dead twigs.  No idea what happened, but I think I will replace them with Lavender.  Maybe that will survive?!

 Also, it wasn't just the Rosemary that didn't survive on my porch - I planted 3 other evergreens and none of them are looking well.  I am moving the other ones to the back porch where they will get more sun and hopefully they will come back.  I think I will try Hostas on the front porch - maybe they will like it there!

Monday, April 7, 2014

Toilet Paper Roll Bumble Bees


This is a cute, fun and easy craft to make using empty toilet paper rolls.


What you will need:

Construction paper (we used black, white and yellow)
Tape or glue stick
Toilet paper rolls (one per bee)
"Shakey" eyes (does anyone know the real names for these?)
Crayons or markers


To make your bee:

Fold a piece of construction paper in half to make your wings. Draw a 'B' on the fold, cut it out and unfold it.

For the face and the antennas you will need to cut out a big circle, 2 very small circles and 2 long skinny rectangles.

For the body cut or rip strips of the paper, you can make them skinny or wide.
You will want to draw your face before gluing it onto your roll.


Glue all your pieces together and don't forget to have fun with it!


Related Posts Plugin for WordPress, Blogger...