Tuesday, November 25, 2014

Centerpiece for Fall


Only 2 more days to Thanksgiving!!  I am excited and a little sad it came up so fast :)  I had some big plans for my table decor this year, but we have had so many things going on this month that I didn't quite make them happen.  I did get the basic components I needed, but I haven't had time to add the extra touches.  I wanted to continue my 'Rustic Glamour' theme from Halloween - so there is some glitter and metallic paint just waiting to be used!  I am still hoping I'll get a big burst of energy and will get them done before the big day, but if not there's always next year!!  I did have a chance to put this centerpiece together - and I like the simplicity (but I miss the glamour).  The extra large jars are awesome.  I was originally planning to have the pillars in them - turns out the opening wasn't quite large enough (really - they were an 1/8" too small!!).  I used a mixture of acorns, cranberries, pumpkins and pinecones to bring in the 'rustic' - as well as the burlap and lace. 
 
Overall I am happy with how my centerpiece turned out. 
 
Tomorrow is our post about the food we made for our luncheon - I can't wait to share!
Have a great day!
Beth


Monday, November 24, 2014

Paper Turkeys


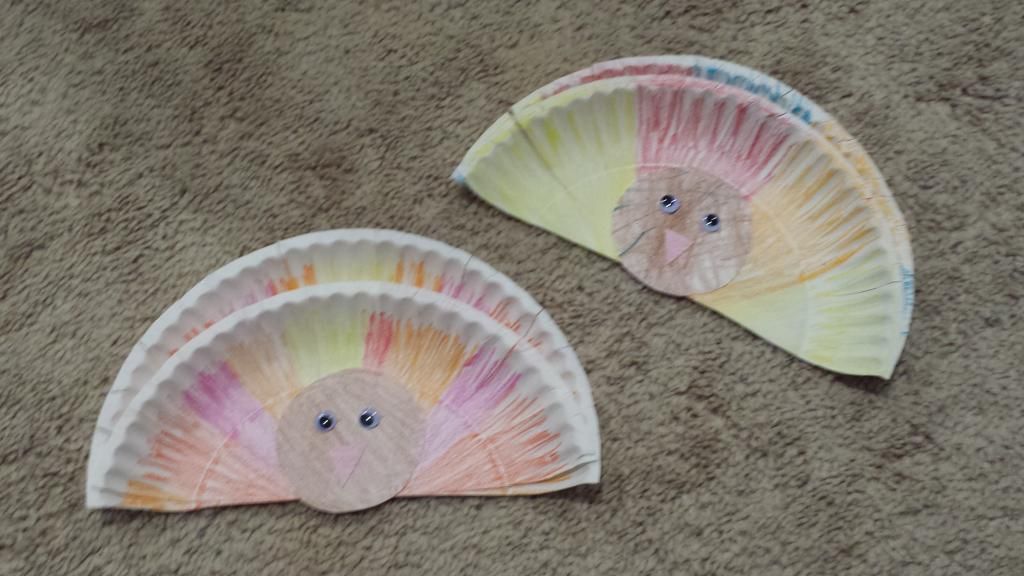
This weekend we had a Thanksgiving Luncheon at my house, which we will post about on Wednesday, and I wanted to have a fun craft for the 3 kids to do.  I loved how simple these paper turkeys were, and I think kids of any age can do them and have fun!  We were a little late eating so we didn't get to sit down with the kids for very long and do this (and when we tried Winda kept trying to give kisses and lay on the crayons), so these are mostly adult made, but they had fun picking colors and playing with them after they were done :)

To make them:
Color your uncoated paper plate with crayons, markers or anything else you would like (I think tissue squares would have been fun, but they went home before we made these).  Color one whole plate for the tail, and a circle or body shape for the face/body.  You can get as detailed as you want - add a body shape, arms/legs, or more face features.  Cut the body parts out and attach together with double-sided tape or glue.  Add googly eyes.  Cut the tail plate in half - but cut it off-centered so they will be different heights.  Attach all three pieces together (2 tail pieces and the body/head).  You can also make cuts to flair the ends (I did this but you can't really tell unless you move them).  Have fun!!

Whose excited for Thanksgiving?  This girl is!!
Have a great day!
Beth

Friday, November 21, 2014

We're Thankful!


I found this handy dandy pumpkin wire frame. I just love any thing chicken wire! I really enjoy the Thanksgiving tradition of saying what we are thankful for. I think it's good to do this through out the year. For now I'm going to start with this to help my son to remember to give thanks. What's great is that he picked it out in the store. So he is already into it!

I picked out everything else that went with it. Got it home and tried to use regular o'l chalk on the sign and it wasn't showing up at all. So today, when I should have been posting, I went back to the craft store and found a wet chalk pen and that worked great!

I'm sorry I'm posting so late. I have a list of things, don't we all, I want to do or start. Every time I would begin something I would figure out I don't have a key component. I really wanted to be sure this was up for a little while so that we add to it as we go.

Next week we will have something special to show you for Thanksgiving. So check back with us. Have a great weekend!

Thursday, November 20, 2014

Kitchen Inspiration

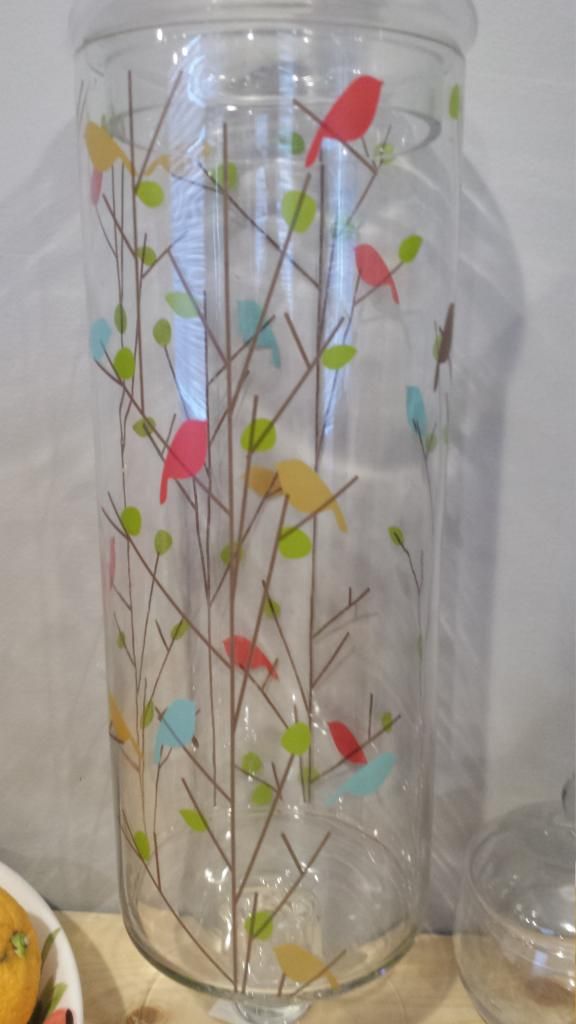
    I found this jar a few months ago and I loved it at first sight.  I almost didn't buy it since I was looking for a wedding shower gift at the time, but I couldn't leave it behind.  Luckily, it was only $15 (at my favorite, can't leave without something home store - HomeGoods) - so I took it out of my lunch money budget so I wouldn't feel guilty lol.  I am sure most of you know I have a "little" bird obsession, and I like how simple this design is.  I also really like the colors used, so I decided to use it as my kitchen inspiration.  I can use all the colors at once, or alternate them how ever I feel like.  I think they look nice with the gray walls behind the jar, and I don't think they will clash with anything I plan to do in the living room.  I still haven't decide if I'm going to incorpoate more birds into the kitchen decor or not, but I think if I do it will be in small doses.  I don't want to known as the bird lady!!  My current plan is to fill the jar with cupcake holders, but it will be a while before I can actually put it in the 'right' spot so that may change.  For now, I am happy with the little smile it brings me every time I see it in my kitchen, and I've already bought a few things to tie in the colors.  I can't wait to finally see a finished kitchen!!
 
Have a great day!
Beth   

Wednesday, November 19, 2014

Out of this world granola bars


I'm in trouble! These are so good! I want to double my batch next time, but I can't eat a double batch by myself...can I? No definitely not. 

My kiddo wanted granola bars. So I set out for a good recipe. I wanted a recipe with crispy rice cereal I finally found this. I'm so glad I found this recipe. I wanted a soft bar. I used dark brown sugar and I didn't have mini chocolate chips. I don't think it really needs it. So I'm going to add some other yummy things like ground flax seed, wheat germ, seeds or nuts. 

Here's my version of the recipe.

Ingredients
1/4 cup unsalted butter
1/4 cup honey (I used wildflower honey)
1/3 cup dark brown sugar
2 cups quick cook oats (I prefer the smaller cuts when it comes to bars)
1 cup crispy rice cereal
1/2 teaspoon vanilla
Handfuls of toppings such as mini chocolate chips or mini candy coated chocolate 

Grease a medium baking pan or sheet pan. In a medium bowl pour in oats and rice cereal. In a small pan over medium heat bring butter, honey and sugar until bubbles form. Then reduce to low and cook for 2 minutes. Add vanilla then pour butter mixture over oat mixture stir until all is combined. Press into prepared pan and let sit for 2 hours. I cheated towards the end and I put them in the refrigerator for a bit. Then I cut them into bars and ate a few!

This is so much better than any store bought bar you can buy. I hope you enjoy it as much as we do!
Related Posts Plugin for WordPress, Blogger...