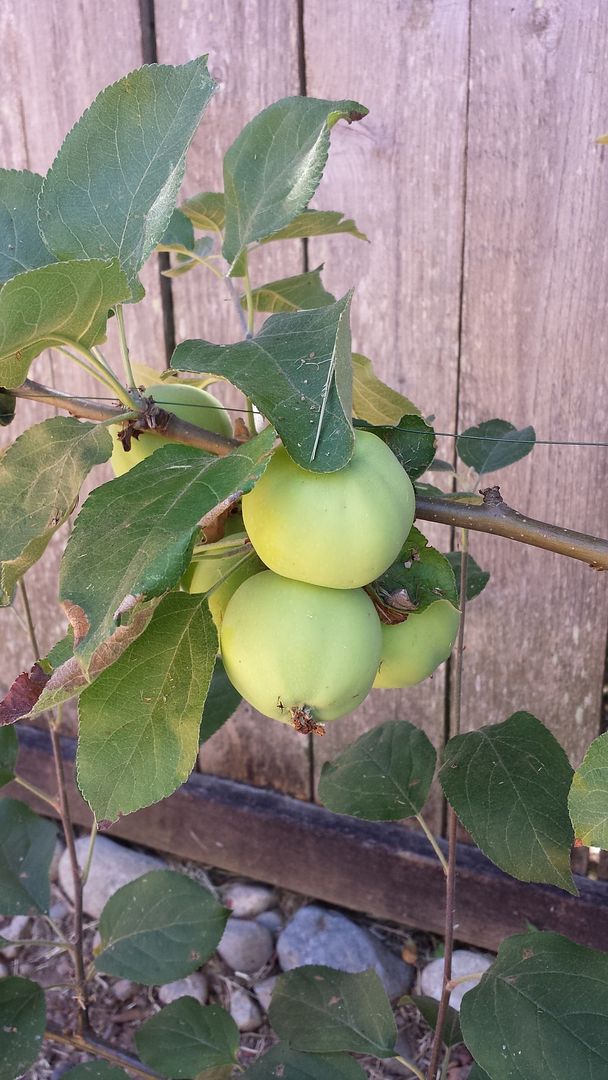
The last few weeks has been hard on my plants - I've lost most of the plants on my front porch and all of my veggies :/ I know it's mostly my fault, I didn't water as often as I should have (or at all in some cases). I will say I was pretty disappointed that I forgot the plants on my front porch - I guess that's what happens when you only use the front door once a week lol. However, I am very happy with my apple tree! I have 10 apples growing - 4 Fuji and 6 Yellow Transparent (the ones in the picture). I will definitely need to step up my watering game for the rest of my plants to stay alive, but at least something is going my way lol!
Have a great day!
Beth
Pages
▼
Monday, June 29, 2015
Wednesday, June 24, 2015
Chocolate Sauce 2
I made a new chocolate sauce recipe. This is better suited for an everyday sauce. In my earlier post I talked about how that recipe was amazing. It was better suited for special occasions. This recipe uses water instead of heavy cream. It pours better so I am able to put it in a squeeze bottle which was my goal. I really like this recipe and so does my son which is great. It's really easy to make and I have the ingredients in my pantry to make it at all times.
Recipe source
Ingredients:
1 1/2 cups sugar
1 cup unsweetened cocoa powder
dash of salt
1 1/2 cups water
1 1/2 teaspoons Vanilla
Combine all in medium pan and place over medium heat. While constantly stirring bring to a boil for 2-5 minutes when sauce has thickened. Let cool and store in refrigerator.
Enjoy!
Tuesday, June 23, 2015
Oven Fried Chicken Tenders
Now that I make all of Eric's food from scratch, I've had a hard time eating healthy food. I don't eat the same things Eric does (and even if I did I couldn't eat it every day the way he does), so usually I eat fast and easy - which means not very good for me :)
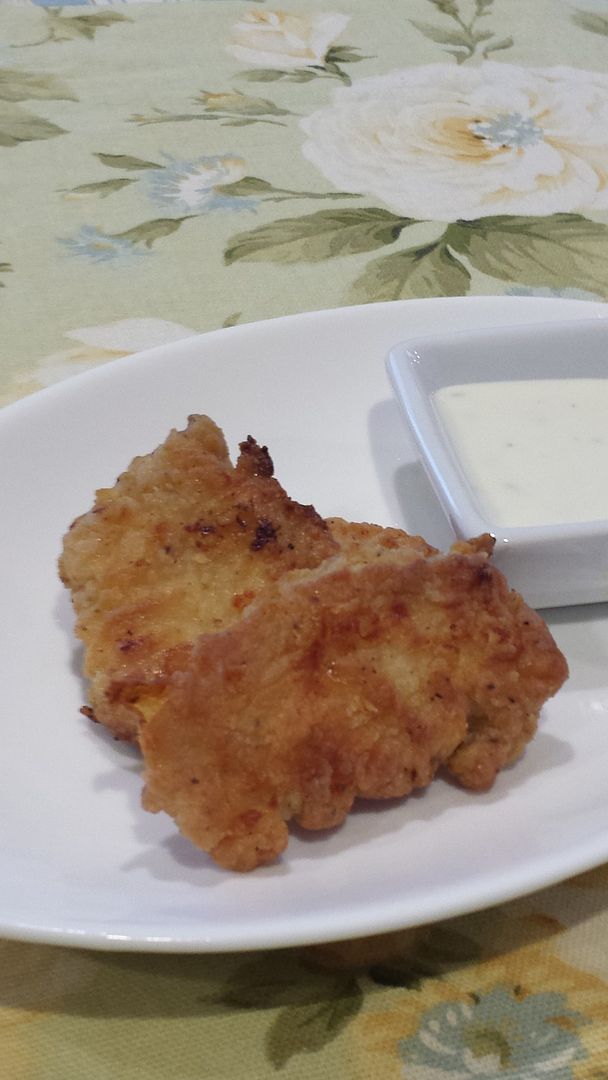
So one of the things I have started doing is to make fast and easy things that are at least made from scratch and with good ingredients. The first thing I started with is Oven Fried Chicken Tenders - they aren't completely healthy since you bake them in butter but at least they are healthier than deep or pan frying with oil (at least that's what I tell myself). I will say that they are so yummy I ate what I was hoping would be enough for at least 4 days worth in less than 24 hours...I ate most for dinner and then had the rest for breakfast...ok and maybe a few when I got up at night for water...so I definitely hope you will try them!
Oven Fried Chicken Tenders
2 chicken breasts
4 Tbsp butter
Flour
Seasonings
Cut the chicken into the size you would like, place into a bowl and cover with water. Add some salt and soak for about an hour. Mix the flour and seasoning in a bag or a bowl with a lid. Place the chicken pieces in the flour and shake to coat thoroughly. Preheat oven to 400° and place a baking sheet or casserole dish into the oven with the butter to melt. Once the butter is melted, place the floured chicken into the butter and cook for 10-12 minutes. Flip the chicken over and cook an additional 10-12 minutes or until golden brown. If there is too much butter left and they aren't browning, place them on a rack over another baking sheet to finish browning.
Eat them hot or let cool and freeze for later meals.
Very easy and definitely better for you than a lot of the store bought or fast food ones!
Have a great day!
Beth
Thursday, June 18, 2015
Who? Me?!
So its been a pretty quiet week for me - which means I really don't have anything fun to share! However I thought it would be funny to share a small problem I have while sewing...that would be Winda's insistence on sitting in my lap while I sew! Seriously, this dog is scared of everything but sitting in my lap with the sewing machine makes her happy lol. That look she is giving is her annoyance at having her picture taken - she hates it Lol. Really it's not a big problem except for the parts where I don't have a very big lap and sometimes my legs fall asleep, but then I just put my legs up on another chair...the things I do for my puppy :)
Just for fun - here's another picture of us while I'm sewing...
Who could resist that cute little face!?!
Have a great day!
Beth
Wednesday, June 17, 2015
Chocolate Sauce
I ran out of my bottled chocolate sauce so I found this and made some quickly. I love it! It does have whipping cream in the ingredients so I will probably reserve this for birthdays, holidays and other special occasions. You definitely need to try this out!
Ingredients
2/3 unsweetened cocoa powder
3/4 heavy whipping cream
1/4 cup milk
1 2/3 cup sugar
1 teaspoon vanilla
In a small sauce pan bring milk, cocoa and sugar to a boil over medium heat. While continually stirring cook until it has reached your desired consistency. Turn off heat and stir in vanilla. Let cool before storing in the refrigerator.
So easy right. I will hopefully find another recipe that uses water. This recipe thickens when it cools. Which I'm not complaining! I just want to be able to put into a squeeze bottle and pour it out easier.
I hope you give it a try, let us know if you like it!
Monday, June 15, 2015
Easy Breakfast Bars
After making graham crackers a few weeks ago, I started thinking about what else I could make with the oh-so-delicious dough. The first thing I came up with was breakfast bars - I love how fast and easy it is to grab a bar and eat it in the morning! It might seem weird that I need a fast breakfast since I stay home, but usually by the time I'm done getting Eric's breakfast and lunch done I am hurting enough to just want something I can eat on the way back to bed...yes, I go back to bed lol. Usually I just read but on really bad mornings (or after a night that I couldn't sleep) I will nap for an hour or so. Then I get up and go workout most mornings so I don't feel too bad about it! Mornings are the hardest part of the day with my fibromyalgia symptoms so I'm a lucky girl to have that extra time - it can really make a huge difference in how I feel for the whole day!
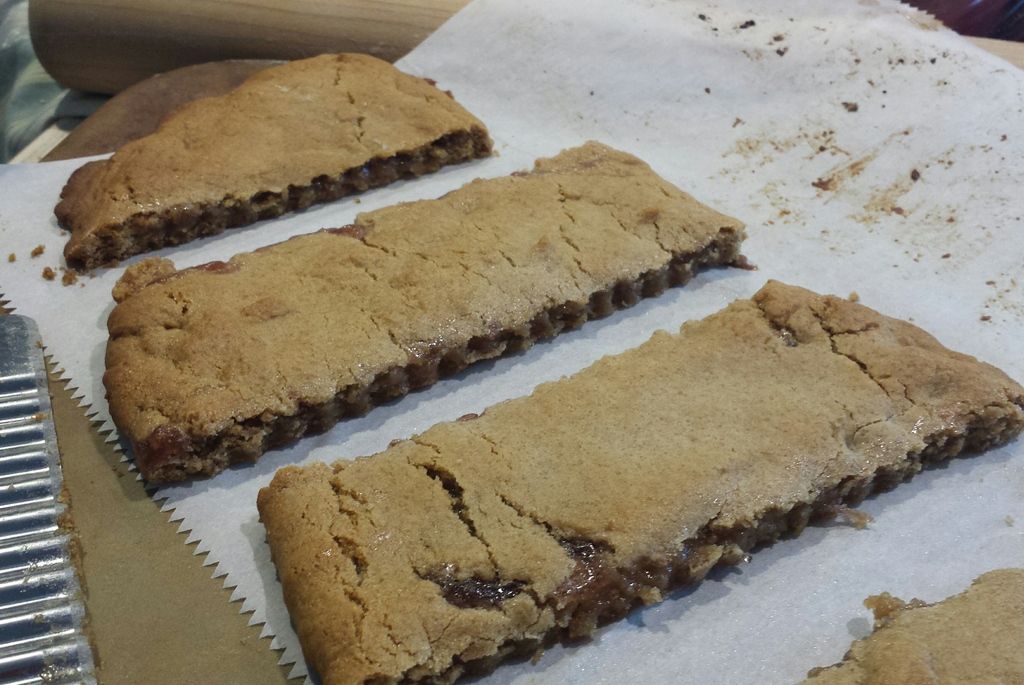
Anyways...back to the breakfast bar idea :) I took the same recipe I used for the graham crackers and changed the regular flour to oat flour and the brown sugar to regular sugar (which I will probably switch back). I really like the flavor the oat flour gave them. After cooling the dough in the fridge I rolled it out, spread strawberry jelly on half of it and folded the other half over to cover. I then pinched the sides and baked it at 350°. I only did about 17 minutes, but I think I'll try for 20 next time. Overall I really like them, but - and I can't believe I'm going to say this - they are really sweet! I will play around with what I use for the filling and see what I like best, but they are definitely looking like a good alternative for me!
Have a great day!
Beth
Wednesday, June 10, 2015
Cranberry Orange Scones
I can't wait for these to come out of the oven. I hope they look pretty too! I will have the picture above so this might sound crazy! I'm typing as they are baking. Woo hoo they're pretty and so yummy!
I adapted the recipe from here, I was searching for a recipe and came across this went to Pin it and I already Pinned it. I think to my self you have good taste, you try to Pin things twice.
I love cranberry orange scones. I feel that even though they can be a fall flavor I think it works for the summer time too. I just happen to pick the juiciest orange, I drank the left over juice and it was yummy.
I like scones because they come together quickly with a small ingredient list of common pantry items.
You need your oven set to 400 degrees, a baking sheet lined if you want. A big bowl and 2 knifes or a biscuit cutter. A workspace to work the dough.
Ingredients
2 1/4 cup flour plus extra for board or counter.
1/3 cup sugar
1 Tablespoon baking powder
1/2 teaspoon salt
12 (1 & 1/2 sticks) cold unsalted butter
1/2 cup heavy whipping cream
2 extra large eggs slightly beaten
1 cup dried orange infused cranberry (these are at Trader Joe's) plain cranberries are great too!
zest and juice from 1 orange *
1/2 cup powdered sugar *
In a large bowl add flour, sugar, baking powder and salt. Cut butter in until the size of peas. Slowly while mixing with a fork or spoon add heavy cream and eggs, mix until almost combined. Fold in cranberries and pour onto floured counter or board. I mounded the dough into a dome and flip over a couple of times while shaping into a rectangle, cut down the middle length wise. Then cut each into triangles. Place on baking sheet and bake for 15-17 minutes. Mine went a little longer, I think I made mine bigger. That's okay it took 21 minutes for me, bake until the edges start to brown. Glaze as soon as you pull them out! Recipe below.
* You know how I said I drank the left over OJ, I shouldn't have. I wanted to cover the tops of the scones completely and that amount above didn't cut it, I should have doubled. Oh well I will just have to make more next time.
Glaze
Mix powder sugar with 4 teaspoons of orange juice add zest
Tuesday, June 9, 2015
Adventure Time Quilt
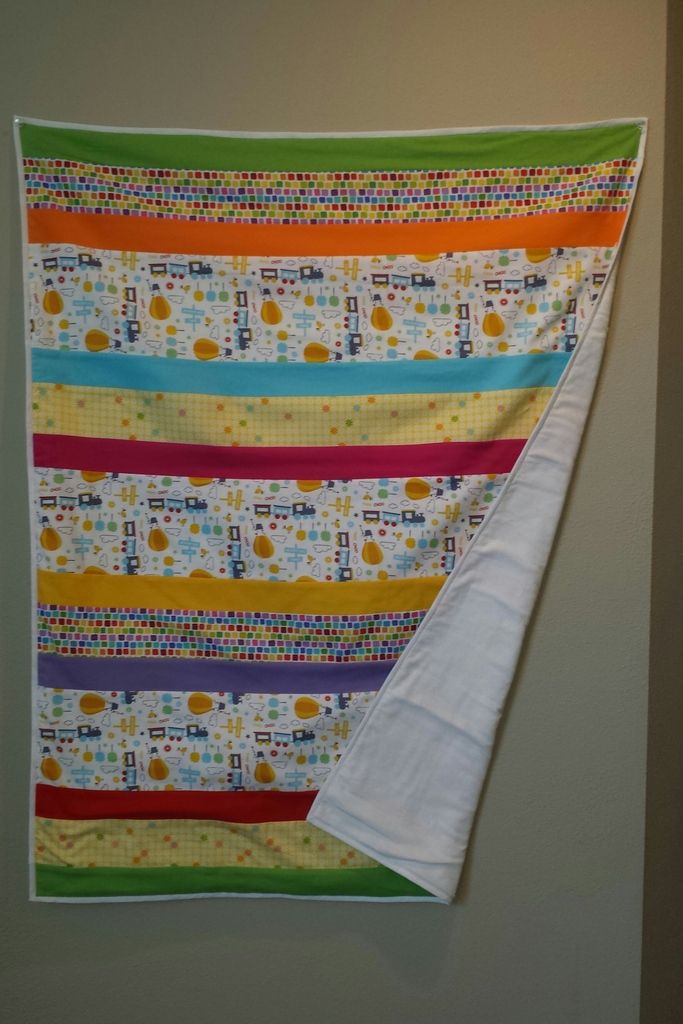
One of my favorite things to sew is baby blankets and quilts. I don't make traditional quilts - there's no fancy quilted design and I have never felt the need to display a quilt I've made (I only hung this so it was easy to see lol). Instead, I make quilts you can use anywhere - on the floor, the lawn, the car...and then throw in the wash and use it again. Don't get me wrong I LOVE "real" quilts, I just don't like to make them for babies. Most of my quilts are made with cotton flannel and quilting cotton fabric. Sometimes I use Minky because it's just...so..soft...but I have a hard time reconciling the whole less chemical lifestyle I want to achieve with the plastic and chemicals that minky is made from. I like to say my quilts are user friendly ;)
So my point is...well nothing really. I just wanted to share the quilt I made with Felicia to donate to a friend's auction. I thought I should have more than "I made a quilt" for you to read ;) We wanted to make a gender neutral quilt so that anyone could enjoy it, but I like to think of it more as gender inclusive. I have always thought gender neutral leans more towards 'boy acceptable' colors - where are the pinks and purples? Why is orange or blue ok for boys and girls, but not pink?? Silliness! So we designed a quilt (well, actually an entire crib set) that has all of the colors represented and it still has a fun theme! I fell in love with it so I may have a half finished crib set for my non-existent nursery lol...(You may or may not know I love trains, so yeah I had to have it). My plan is to make several different crib sets to use eventually - just for fun and because I am an unrepentant collector of adorable baby print fabric!!
Have a great day
Friday, June 5, 2015
Oven Fried Pickles
I was beyond excited to make these. I'm not a huge fan of pickles and I tried fried pickles from a tavern last summer. They were so yummy! I found this yummy looking recipe on Pinterest. I thought I would give it a try.
You will need a sheet pan and a metal cooling rack to fit inside. You want the air to circulate. I used a grill foil pan, I don't have a metal cooling rack big enough. You will need two shallow bowls to dip into.
Ingredients
1 small jar of dill pickles drained
2 eggs
1/3 cup flour
1 tablespoon Worcestershire sauce
1 teaspoon hot sauce
1 teaspoon garlic powder
1 teaspoon cajun seasoning
1 teaspoon black pepper
1 1/2 cup panko bread crumbs
dipping sauces: ranch or hot sauce
In one shallow bowl crack eggs and beat slightly, add flour, Worcestershire sauce, hot sauce, garlic powder, cajun seasoning, and black pepper mix until combined. In the other shallow bowl put the panko bread crumbs.
Turn your broiler on or on High, I have a gas so the flames are just on! Dip the pickles in the egg mixture then the bread crumbs and place on rack or grill pan if you're like me. Fit as many as you can with a little room between each, bake for 3 minutes, flip and bake for 2 minutes and 45 seconds.
Serve with dipping sauces like ranch or hot sauce.
I personally didn't like this recipe. I'm going to try baking this batch. The insides were still cold and I liked the kind from the tavern they were slightly warm. If that doesn't work I will try another recipe and post about. I hope that you enjoy this recipe, like I said above I'm not a huge pickle fan so I think I will need to perfect my own.
Have a great weekend!
Thursday, June 4, 2015
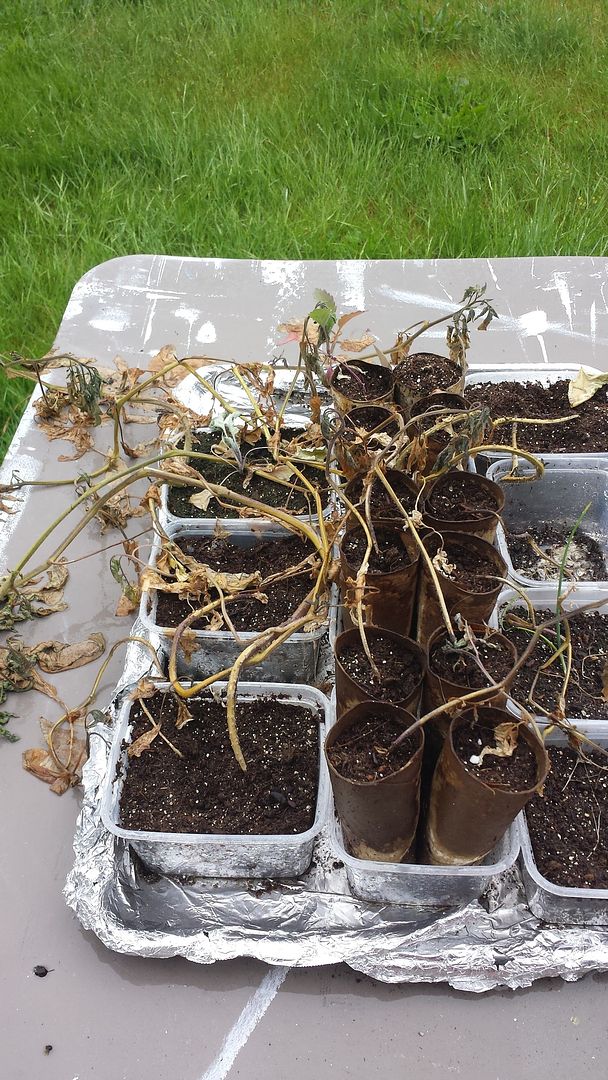
My Poor Starters
So, yeah...this happened :/ I was a little distracted after Eric's surgery and I kind of forgot they were outside and the temperature dropped for a few days...and then it got really hot and I didn't water them...and and now they are #starterfail. Lol.
Oh well, there isn't anything I can do now but start again. I could start new plants outside, but I'm not sure I want to - maybe I'll just start over next year and concentrate on getting other outside projects finished.
Anyone else have an epic fail like mine?? I was so looking forward to those veggies!
Have a great day!
Beth
Wednesday, June 3, 2015
No Bake Cheesecake
I somehow pinned a bunch of cheesecake recipes. I guess that is what sounds good to me right now! I went to the grocery store with out a list, I did fairly well. Except I didn't grabbed lemons. So I didn't add it in, I have a feeling it will be missed. That's ok, I think I will top it with strawberries, I might mix the strawberries with lemon juice.
I think I will make my next one with my son, it was very easy to make and I think he would have a blast making it.
This does need to go in the refrigerator for at least 2 1/2 - 3 hours. What I have seen with most recipes is that overnight is best. I was hoping to find a quicker way to eat cheesecake other than buying one. Oh well, I guess I don't want to mess with perfection anyway.
Let's get started...
You will need a spring form pan and a hand mixer, a large bowl. Space in your freezer for 10 min. You will need plastic wrap to cover the cheesecake as well.
Ingredients
2 packages of graham crackers
11 tablespoon of melted butter
2 - 8oz cream cheese at room temperature
2 Tablespoons Sugar
1 can Sweetened Condensed Milk 14 oz
1/4 cup lemon juice (I did leave this out because I didn't have any at the time)
1 Teaspoon Vanilla
How ever you want to crush the graham crackers is great. You can put them in a gallon resealable bag and crush them with a rolling pin or put them in your food processor. After you have crushed the crackers mix in butter and sugar then press into your springform pan. Place in your freezer for 10 minutes.
While that is setting make the filling. In a large bowl beat cream cheese, add sweetened condensed milk slowly. Add Lemon Juice and Vanilla then pour into prepared crust and cover with plastic wrap and place in refrigerator for 2 1/2 - 3 hours or overnight.
Release collar and slice, you can add your favorite fruit or even a ganache would be wonderful!
Adapted from this pin.

