Pages

Friday, February 28, 2014

Long Nights


We keep getting sick in this house! We are doing our best to keep it out. My husband has switched out our filter on our furnace and he added a filter to each register. We're hoping this really helps. In doing so, we discovered that some of the register's were closed and after we opened them all up I have noticed a better air flow. 

My husband had a standing doctor's appointment and at that appointment he was sick. The doctor said one of the bigger allergens in Washington is Dust Mites. Sometimes the symptoms look similar to a cold, like having a runny nose, cough and watery eyes. 

My husband is a huge tech guy, and because of this we have lots of components in our room. Our room stays very warm, and dust mites love heat. In our bedroom we noticed a quick collection of dust. We are not getting rid of these much needed components, so one of the things that we can do regularly to help witht he dust is vacuum once or twice a week. I have also read that it's best not to use pillows with feathers. We have pillow case covers but I'm thinking of switching out my feather pillows anyway just to be safe. We have a mattress cover that I wash with the bedding. I also have a bedding spray that uses enzymes to clean away body oil and dander, which I spray on the pillows while I'm cleaning the cases. It makes them smell so clean and fresh! Unfortunately, I cannot use it on my mattress because we have memory foam and that will destroy it. 

Tomorrow I will be doing all of this cleaning in our bedroom. I will also be getting a lot of stuff off of the floor so that we can do a carpet cleaning soon. We did a lot of dusting and I want the carpet cleaner to get what the vacuum couldn't pick up.

I'm off to start prepping for tomorrow. I hope you all have a wonderful weekend!

Thursday, February 27, 2014

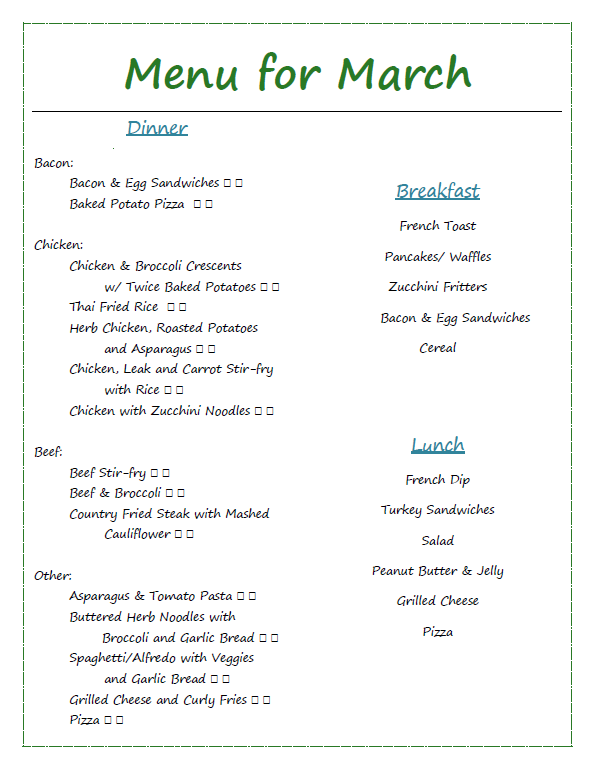
March Menu


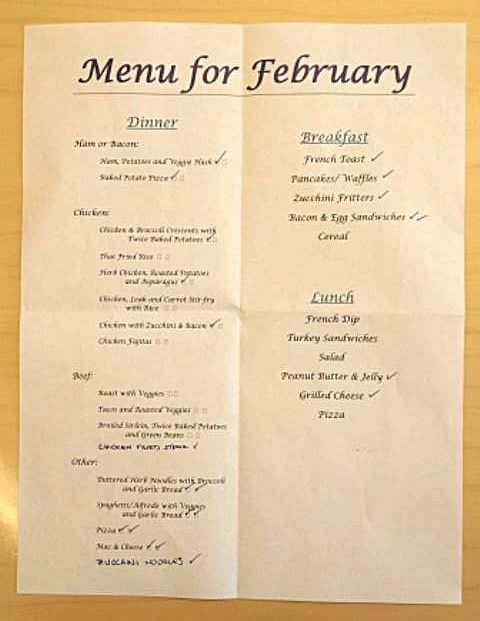
It's that time again - meal planning time!  First let's review how last month's menu went...

I do have to confess that this is not the copy from my kitchen - it has been sitting in my desk.  I totally
forgot that March Starts in 2 days!  Luckily, I had this one so I could check it off and use it for next months menu.  I know you can't read it, but you can at least see that I still have a ton of things not marked.  This is pretty normal actually, sometimes we decide to get dinner out or pick it up to take home, or we just decide we aren't really hungry for a meal and we will just snack (I know - it is soo bad!)  We get home pretty late some nights and if we had a late lunch or a snack later in the day...well, toast is yummy LOL.  It isn't as bad as it looks - there are 22 check marks and we have only 27 days so far this month, so that's only 5 days I didn't make dinner.  And Yes - we did have PB&J for dinner one night!  I didn't feel good and it was fast, easy and tasty.


The nice part about having so many meals unmarked - most of my menu is done and I have very little shopping left to do.  I did make some changes for March, but really only enough to add some variety. 
  
 The changes:
   
      1.   I took ham off the menu - we have been using up the left overs from Thanksgiving and Christmas
                and they are finally gone! 
      2.   The Chicken Fajitas, Roast and Mac & Cheese are gone.  I am a little sad that Mac & Cheese
                came off, but it is one of the biggest processed foods that we eat (yeah - we still eat Kraft).  I
                would love to make homemade mac & cheese but Eric is lactose intollerant, and it just has
                too many milk produces for really good homemade mac & cheese.  Also, I am making the 
                roast tomorrow night to use in sandwiches this weekend - so it wont go to waste :)
      3.   Zucchini Noodles, Beef Stir-fry, Beef & Broccoli, Country Fried Steak & Mashed Cauliflower
               and Asparagus & Tomato Pasta are all new this month.  In fact, except for the Country Fried
               Steak and Zucchini Noodles, everything is new.
  
So, there is our March Menu.  Has anyone else tried new recipes for dinner recently?  I am always on the look out for something tasty to try.

Wednesday, February 26, 2014

Muffin time

I think I found the perfect muffin recipe!

I made these beautiful muffins today while my son and I stayed home after school.

They are not stiff, this is a huge accomplishment for me. I consider myself a baker. Muffins how ever are difficult for me, as are scones. I like to over mix. I have been working on "incorporating" and not "beating."

I decided to try this recipe because I have bananas that were ready to be used.  I also wanted to make something good for a breakfast treat.

When I find recipes that call for brown sugar, I always use dark. Dark brown sugar adds a caramel taste to my baked goods. I switched to dark brown sugar in my Christmas Banana breads about 4 or 5 years back and it really kicked it up a notch. When you try these out if you have light brown sugar in your cupboard by all means use it. If you want to make some with out having to buy a whole bag, it's 1 cup granulated sugar and 2 tablespoons of molasses.

So here's the recipe


In a large bowl add 1/2 cup (1 stick) of butter and 3 very ripe bananas.


Mash the bananas and butter together


Yum! It already smells good! Turn your oven on to 350 F


Add 2 eggs and 1/2 cup of light or dark brown sugar. I used dark here


add 1/2 teaspoon of salt, 1 teaspoon of baking soda, and 2 teaspoon of baking powder


Add 3/4 cup of quick oats and 1 1/2 cups of flour and fold all together


This is what it looks like incorporated, I folded in 1 cup (I weighed 4oz) of mini dark chocolate chunks, you can also finely chop a dark chocolate baking bar. Which looks amazing in the batter. I'm lazy and I just used already formed chocolate pieces. I think mini morsels would look great too.

I forgot to take a picture after I folded in the chocolate. You can see what it looks like in the baking cups below.


I read once that if you want bakery looking muffins fill with batter to the top of the muffin pan or cups.

After you fill the cups bake in oven for 20 minutes. I started watching the muffins at 9 min, the originally recipe was for mini muffins so large muffins take a bit longer. By the end it took about 20 min. you can probably safely start watching at about 15 min and add from there if needed, you want the edges to be brown.


These look amazing. I wonder if they taste good...

When I took these out and let them rest for about 5 min and then placed one a plate. My son shouted "it's muffin time"


I always add a bit of butter to my muffins before eating them, right down the middle. Oh my they were delicious! My son asked for more, my son is not a picky eater but I like to think he knows quality food.  He fell asleep right afterwards, poor guy is not feeling well.

The chocolate is not overpowering in this recipe, it compliments the banana wonderfully. I really like the oats in here, it add a hearty texture instead of a soft texture like banana bread.

I hope you enjoy this recipe, I found and adapted the recipe from here which is from you guessed it...Pinterest.

Here's the ingredients and instructions all in one spot.

Preheat oven 350 F prepare muffin pan with baking spray or baking cups

1/2 cup (1 stick) of butter
3 very ripe bananas
1/2 cup of light or dark brown sugar
2 large eggs
1/2 teaspoon of salt
1 teaspoon of baking soda
2 teaspoon of baking powder
3/4 cup of quick oats
1 1/2 cups of flour
4 oz (1 cup) dark chocolate chunks or finely chopped from a bar

Mash butter and bananas well in a large bowl.  Add sugar and eggs, mix well. Fold in salt, baking soda, baking powder, oats, and flour. Then gently fold in chocolate. Scoop into baking pan and bake for about 20 min.

For me it made 12 muffins.

Happy Wednesday!

A Piece of Me


I wasn't sure when or if I was going to get this personal on our blog. I can be very outgoing and am usually an open book, but putting this out there on the internet where millions (I dream big) of people could possibly read it makes me very shy.


It all started almost 9 years ago. I started getting sick with symptoms like headaches, extreme fatigue, nausea, vomiting and severe weight gain. I went to the doctor a few times, but every time they would do some blood tests and say I was fine. As time went on the symptoms got worse, but I got better with dealing with them.

About 4 years after that my husband and I went to an infertility specialist. We had been trying to have a baby for around 3 years with no luck. The doctor ordered a lot of tests (I don't know how many, but they took 26 vials of blood that day) to get a feel about what was going on. When the tests came back they showed that a bunch of my hormones were all over the board (a lot being high and some being very low). They sent me to have some of the same tests done again, when they came back saying the same thing I was sent for an MRI. A few days later I received a call (yes, a call) saying I have a brain tumor.  The first picture above shows where my brain tumor is located (the picture is from here).

Fast forward 4 years from there, I went in for my yearly check-up to see how much the tumor (we call it Fred) had grown - the first year it doubled in size, every year after that it has just grown some. I got a call the next day from my doctor (what is it with doctors and devastating news on the phone?) and I knew something was coming, because it was her day off, but I was not expecting this. In addition to my tumor - I also have MS (Multiple Sclerosis).

When going to the MS Center and looking at my MRIs from the past we can see that I have had it all along. Someone please tell me why no one thought to diagnose this earlier (I mean it's right there all over my brain)?!  The second picture shows the scar tissue caused by MS (this picture is from here).

That brings us to now and the third photo (from here). Did anyone notice I was gone on Monday? :) Thank you Beth for filling in on such short notice!! Over a week ago I came down with a little cold. Not a big deal right?..... So wrong. When I get sick, no matter how minor a bug, it turns into Defcon 5. My body just cannot handle anything else and completely shuts down (I'm sure the fact that I do not slow down has nothing to do with it). I have been extremely sick, so I have not been working on any projects, but maybe that's not such a bad thing because it brought me to share a part of my personal life with all of you.

As you can see I have a lot of health challenges to get through, but I am lucky to have an amazing husband, loving family and awesome friends to help me through. Thank you to all who read this for letting me share (not so easy) pieces of myself with you!

J

Tuesday, February 25, 2014

Is it a Yard or a Garden?


I have always wanted to say "Come see my Garden", but sadly I have always called it my yard.  I don't feel like I can truly call it a Garden until it looks as beautiful as these, or like the Home Depot commercial where she rolls out the garden full of color; that commercial always makes me equally depressed and ambitious.  I barely have the skills to create a nice flower bed, almost 25% of the plants I buy end up not surviving, and I am too cheap to buy the full grown plants that will give me instant gratification (you know - because of all the plants that don't survive because if I lose a $5 plant it's ok but killing a $30 plant is no good).  But I am learning, so I may have a yard with flower beds now, but some day it will be my Garden!!

With Spring just around the corner it is time to start planning the clean-up from Winter and figuring out what needs to be planted/pruned in the coming months.  It seems crazy to start thinking about planting things when it has been so icky out, but early planning is a real time (and pocket) saver.  I will usually wait to plant anything until I see my current plants start to grow.  I do this for 2 reasons: It tells me the area around them is getting enough sun and that the temperature is finally warming up, and it lets me see what has died since last season (and then I know what I need to replace).  This is not how most garden experts tell you to start planting - so don't listen to me, find what works best for you!  As soon as I see plants start going on sale I start looking.  Every time I go to Fred Meyer I have to walk through the garden center...Every Single Time - what if something new went on sale?!? LOL  I would love to have the time and money to go to all of the really awesome nurseries in my area, but I don't have enough of either so I mainly get plants at Home Depot, Fred Meyer and the Johnson's Home & Garden store by my house.  Johnson's has a really great garden center, and they often have things I can't find anywhere else so I go there when I am looking for a special plant.  Just because I can't plant anything yet doesn't mean I don't have a ton of things to do.  Mostly weeding and pruning - but they still need to be done before anything else.  I only have a week or so before I have to head out and get it done, so right now I am making my list of things to do. 

Here's my Front Yard Spring Plan:   
     
The first thing I did was make a list of all of the "Areas" we needed to conquer in our front yard.  This way I can work on one or two beds each weekend.  We decided it was too much to do all of the necessary yard work in the front and back this year, along with the other projects we have planned to finish this year (Office, Bedroom, Kitchen Cabinets, Fence), so we are doing the front yard this year and the back yard next year.  I have big plans for the backyard, which I talked a little about yesterday.


 Area #1 - Side Bed  6'x20'  

1.   Weed (WHY do weeds still grow in winter - it's so unfair)
2.   Prune small tree
3.   Trim any remaining dead foliage from last year (There were a 
       few things still blooming/green when I did my last clean-up
       before winter)
4.   Prune the roses (umm...and learn to prune roses) 
5.   Plant new spring bulbs and plants
6.   Add plant food
7.   Finish border edge 
8.   Put in mulch/bark 


      Area #2 - Window Bed  6'x8'
  1. Weed 
  2. Prune Weeping Japanese    Maple & Lilac
  3. Design a new support system for the Dahlias
  4. Plant new spring bulbs and plants
  5. Continue the border edge
  6. Put in mulch/bark

Area #3 - Sidewalk Bed  5'x10'

1.   Weed
2.   Prune Rhododendrons & 
      Lilacs
3.   Possibly move Rhodies to the
      garage bed - Still undecided
4.   Plant new spring bulbs and    
      plants
5.   Add a Water Feature -Maybe
      We still haven't decided
6.   Put in mulch/bark

Area #4 - Garage Bed  4'x8'

1.   Weed
2.   Plant the 3 Rhododendrons - 
      Maybe
3.   Put new soil in with plant food
4.   Put in mulch/bark

It seems like sooo much, but breaking it down really helps me focus and stay on schedule.  I am planning to start the first weekend of March - which is only 4 days away!  Unless there is really bad weather - then I am totally waiting for nicer weather!!  I am hoping to get all of these areas done in a reasonable time frame -maybe by the end of March if the weather holds. 

We do have one last area to complete in the front yard - our Island Bed, which I did not take a picture of.  It will be undergoing a huge transformation this year.  We are still trying to figure out what we want to do with it, so keep an eye out for that post.

Once it is all done we are going to have new sod put in - I am so tired of my moss lawn...

Bring on Spring!!


Monday, February 24, 2014

Let's grow it!

This last weekend I was lucky enough to spend a whole day with my two best friends, Jamie and Felicia.  It was mostly to celebrate Jamie's birthday, but also because we so rarely get to spend an entire day together.  One of the best things about having things in common is we can have a day that includes shopping, doughnuts, Thai food, cake and movies and we are all happy (Anyone notice how much food was involved?).  It was a great day!

Every time we get together we have an unintentional tradition - someone always goes home with at least one book we've borrowed from someone else.  Usually it is coobooks, we all have an obsession with cookbooks - some more than others - but we exchange every type of book.  This weekend I went home with this book:


I am obsessed with this book!  I am already a quarter of the way through and I told Eric last night that I was going to buy it.  I have not been able to set up a garden since we moved into our new house, but I used to have one.  I loved being able to use veggies I grew myself in our meals.  When I first started telling Eric about wanting to grow our own veggies (around 6 years ago), he was fine with it but not interested in helping.  Over the last two years he has really started looking at what we eat - which is great but can be hard when a ton of your favorite foods have caramel color in them and you have to change every shopping habit you have overnight.  We have slowly started cutting things out of our diet and have now gotten rid of almost all processed foods, most of our junk food, high fructose corn syrup, caramel & artificial colors,  partially hydrogenated oils, ect...What it boils down to is I look at labels - a lot!  I would estimate that 80-90% of our food is all natural or organic.  I just don't want to give up Funyuns!  I try to be realistic when I am shopping - sometimes buying all organic veggies and fruits is out of my price range, but regular chips and 'better for you' chips are about the same price.  I have also started making and freezing a ton of different things that we used to buy - like chicken tenders and fries.  (Although I do still buy curly fries that are all natural - my homemade ones just aren't the same yet).
  
So anyways, back to the book...Not only has Eric started looking at what we are buying, he wants to grow and make more things to avoid the chemicals used.  Over the last year we have discussed rain water barrels and watering systems, compost options, and a largish vegetable and fruit garden.  That is why I am so excited about this book - It has a lot of great tips about how to set things up, what to grow and how, plus lots of things I haven't even gotten to read about yet.  I can definitely say that I will not be raising chickens or pigs in my backyard, but figuring out how to grow and save enough produce for year round use is definitely on my how-to list!!!  What's funny is I know I should buy two books because my mom will want one as well - only she would totally raise chickens and pigs if she had the space!  I got my love of gardening from my mom - as well as a lot of the other crafts I like to do (she is a very creative person).  Although gardening  was a latent love - when I was growing up I did not like it at all - I can say it is in my top 3 favorite things to do (except the weeding part)!!  

Too bad I have to wait until next year for my actual garden, but planters are definitely being used this year.  Now I just have to figure out what I want to grow - strawberries, tomatoes, peppers and lettuce are already on the list.  I wonder how much room I have... 
    

Friday, February 21, 2014

Born in the wrong region...

I'm beginning to think I was born in the wrong region. I really like southern food. This is was one of my first cookbook's that I bought. 


It has so many recipes that are traditional southern fare. I'm going to share my favorite recipe from this book. 

"Virginia's Vidalia Onion Dip"

These simple ingredients turn into a creamy dip. I like to make it the traditional way, but I thought I would spice it up a bit and to my surprise it's delicious too!

Here are the traditional ingredients:

2 Vidalia sweet onions (or any sweet onions)
1 cup of parmesan cheese
1/2 cup of mayonnaise 

Since I would be the only one eating it I made a small amount.

I diced up a half of a sweet onion and put it in a small bowl


Then I sprinkled paprika and garlic and pepper blend seasoning. You can add whatever spices you really like here. If you make a big batch I would suggest measuring maybe a 1/2-1 teaspoon depending on taste. I was just thinking a little hot spice or sauce would give it a nice kick.

Add a spoonful of mayonnaise just to wet the onions


Then finely grate parmesan cheese and stir everything together.

Put into a small baking dish


Bake at 350 F until bubbly. I baked for about 30 min. I would put it in for 25 and then start checking on it every 10 min or so. 

Here it is after 25 min. I heard bubbling and I thought it was done but the onions still had a bit of crunch. So I put it back in at 12 more min. 


Here it is and it's perfect


I really like dips. I think I would eat appetizers all day long if I could. My favorite kinds are hot and bubbly. 

Well I hope you enjoy this recipe, let us know how it turned out or what works for you!

Thursday, February 20, 2014

They call me...Snickerdoodle Apple Pie


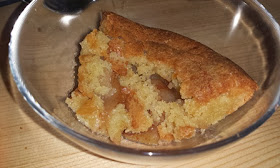
What it really is - Apple Cobbler!  I made it one night and Eric thought it should be called Snickerdoodle Apple Pie - so that's what we call it now. 

This recipe was super easy to throw together at the last minute.  The hardest part is waiting for it to cook since it takes about 45 min to 1 hour.  I didn't have enough apples to make a full size 9x9 baking dish, so I pulled out my 6" Longeberger pie plates.  They worked great - I had about 1 1/2 apples per dish, which was good but I think I would use 2 apples per dish if I had enough.  The cobbler portion was thicker than a typical cobbler because the dishes were so much smaller than the original, but I actually liked it a lot.  It was kind of like eating an upside down cake - but it tasted just like snickerdoodle cookies!  


Recipe:

     Apples, peeled, cored, and sliced (enough to half-fill a 9x9 baking dish)
     2 tsp. vanilla (divided)
     1 1/2 cup sugar (divided)
     1/2 tsp. cinnamon
     2/3 cup butter, melted and cooled
     1 egg
     1 cup flour
     1/4 tsp. baking powder
     Pinch of salt
     1/2 cup nuts (optional)

Preheat the oven to 350 degrees.

Melt the 2/3 cup of butter and let cool before you start (I always forget to do this then I have to wait for it to cool halfway through the recipe so I thought I'd help you out).

Butter the pan you will be using.  Slice your apples and fill the pan about halfway.  Sprinkle 1 tsp of vanilla, 1/2 cup sugar and 1/2 tsp cinnamon onto apple slices. Mix to coat the apples as evenly as possible (it always clumps up but no worries it still tastes great). 

Combine the melted butter, egg, 1 tsp vanilla, cup of sugar, flour, baking powder and salt.  Mix until smooth.  Add the nuts (it's optional so I usually don't).  Pour the batter over the apple slices.

Bake 45 min to 1 hour, depending on the size of your pan. 

I accidentally overcooked the ones in the pictures, but Eric thought it was better that way since they were crunchy on the outside but soft on the inside.  I made two so we had one that night and the second the next night.  Eric actually thought it was even better cold from the refrigerator and has requested I make them the night before his birthday so he can eat it cold for his birthday - he cracks me up : )

I got this recipe from searching on the internet and looking for something I had all the ingredients for.  This one seemed like the easiest and had the least amount of ingredients.  I would have to agree that it is the Best Apple Cobbler Ever.


So, did anyone get my Ron White reference in the title??  


Wednesday, February 19, 2014

The Best Frosting Ever!!!


My husband and I are very lucky to have a very special young lady in our lives. Tyka really came into ours lives when she was about 7 and I do not think we could love her any more if she was biologically ours. Thursday is her 19th birthday and yesterday she come over to have a little double celebration (Saturday is my birthday). We went to get pedicures (her gift to me) and come back to my house for her favorite dinner, cupcakes, and gifts (for her).
 When I was was making the cupcakes I couldn't decide what kind of frosting to make. I didn't want a butter cream, whipped cream, or cream cheese frosting, I just wanted something different. So I decided to start throwing things in the mixer and the best frosting ever was born!

Ingredients:
1 8 oz block of cold cream cheese
3 sticks (1 1/2cups) of unsalted butter at room temperature
3 cups of powdered sugar
2 teaspoons of almond extract
1 1/2  teaspoons of pure vanilla extract

Start by running hot water over the sides of the cream cheese package for a few seconds. You don't want to warm the cream cheese, it just makes it easier to get out of the package.
Place the cream cheese and butter into the bowl of a mixer and mix with the paddle attachment for 1 minute and a half on high.


Add in powder sugar one cup at a time mixing well in between each cup. While mixing, add both extracts.

Frost your cake or cupcakes.


I think this frosting would also be yummy if you switched out the almond extract for coconut, lemon, or any other extract you would like.
Tyka

Parties parties parties...


March will be a fun month of parties for me, I'll be attending some and others I'll be hosting. I have a baby shower for a dear friend. I have finally set the theme and I can't wait to see how it all turns out! She's having a boy and I pinned a bunch of cute ideas on baby deer. I wasn't sure if I would find much outside of John Deer, but there are a lot of cute ideas. I love hosting parties! You'll be seeing more on the shower in the weeks to come.

At the end of the month my baby boy turns 4! I don't know where the time went! We have had quite the intense upbringing with our son. He was born early. We spent nearly 3 1/2 months in the NICU with the help of the amazing nurses and pediatricians. Once we were home we began a birth to three program. We wouldn't be where we are today with out our SLP, she was with us from the moment we brought him home. Of course we have our PT and OT - every time we would have them come help it would just align him in the right direction. Once he turned three, we moved to pediatric therapy which has been wonderful for him as well! Since we had a late start, my son was diagnosed early on with late development; we also had an Autism evaluation and he is Autistic as well, but with unspecified areas. We are currently doing sessions for that too. He has blossomed so much from his therapy it's mind blowing! I keep thinking of where we are today vs when we brought him home. It really takes a village in our case to raise our son. We couldn't have done it without our family, friends and all those caring professionals we worked with. Now to the fun part! I'm going with a Lego theme for his birthday! I have everything all planned out! I'm going to make his cake look like a big Lego piece. I think the older he gets the more fun I have planning them! I really can't wait for sleep over parties, but that is a long ways away.

I'm also helping out with a 30th birthday with my close family friends, I'm actually unofficially adopted in to their family. It will be so much fun. Every time it get together with them we have such a great time.

I'm sure I will be invited to more celebrations, March has a lot of celebrating in my family! I know several people with the birthday of March 16th! On St. Patrick's Day, my mom would make me rice and milk for breakfast but she would dye it green for me. I would love to hear about your family tradition's.

Have a great Wednesday!

Tuesday, February 18, 2014

Turn on the Light

We had a very productive weekend, but one of my favorite projects that we did was replacing our entry light.  This has been on the To-Do list since we moved in almost 3 years ago - but always seemed to get pushed to the bottom of the list.  At first it was just ugly - which I can live with for a while as long as it works well.  However, over the last 4 months this light has stopped working well.  We have had to replace the light bulb at least once a month - and the last time it was less than 2 weeks.  Not Good.  So we decided it was time to get it done - now it is a safety issue, not just a looks issue.


The light on the right was our old light (hopefully that was obvious, but just in case).  It was brass/gold at some point, but it was definitely not looking so hot anymore.  We found the one on the left at Home Depot, which is probably my second home at this point - we go there at least every other weekend.  I found a ton of lights online that I loved - but most were in the $200-$300 range, which is more than I want to spend at this moment.  Some day I would love to get a whole set for the entry and garage doors that are metal and LED and will bulk up the entry one to 3 or 4 times the current size, but that's even more out of the budget.  So, we decided we liked this enough to use it for a few years while we save up and get a really fancy set some time down the road.  At around $54 it was way more budget friendly, so we were able to get an LED light bulb and a new timer switch and keep it under $90.


We were lucky that the rain and wind stopped for about a few hours on Monday so we could get the lights changed out, but it was so worth dropping everything else and running outside to get it done.  Which is why my pictures are a little worse than usual (not that I usually have very good pictures) - I was trying to take pictures and help before the rain came back.  Also, I realised that I wasn't going to be able to get a shot of the light on since Eric was still working on changing out the light switch and it was almost dark  So I grabbed the really blurry one below - of course I didn't know it was blurry until it was too late - so sorry about that!!  I really just wanted to show how we went from a regular bulb that looks yellow, to a new LED bulb that looks white and is supposed to last 10 years - let's hope it really does!
 

So a small change - really, it took less than an hour - made a big difference, and it was so satisfying to check it off as done.  Anyone else make a change that took forever to get to, but was done in minutes? 

Monday, February 17, 2014

1 Hour Baby Blankets


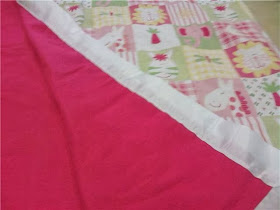
Homemade baby blankets are a lovely new baby gift and they can be super easy to make.

To make one of these baby blankets
you will need:

A Sewing Machine
Pins
Scissors
1 yard of flannel fabric for the front of the blanket
1 yard of flannel/minky fabric for the back of the blanket
1 blanket ribbon
Thread


To start the blanket you will want to take your two pieces of fabric flip them so they are both right side out and place together. Line up the fabric and pin it all around your blanket to hold it in place. Trim any extra fabric off with the scissors. Then sew all the way around the blanket. You want the seem to be about a 1/4 inch from the edge, so you might need to trim off some more of the lose fabric before starting the ribbon if you didn't sew close enough to the edge.

The next step is the ribbon. Pin the ribbon around the first edge of the blanket with about a 1/2 inch overlapping the blanket edge. Sew the ribbon into place, sewing from the edge to the edge. Then fold the ribbon to create a corner and pin it in place.  Pin the ribbon to the next side and repeat until all four sides are complete.  For the last corner, continue around the corner and over the starting place by 3-6 inches.  Then fold the ribbon under and sew in place.  This will give the ribbon a finished edge.  Sometimes I will also sew along that seem, so no fingers or toes can get caught.


Now you have cute homemade gift in about an hour.

Friday, February 14, 2014

Healthier thumb print treat..

I love holiday's! Valentines day for me has been about bringing smiles to those we work with, love or who are close to us. My parents always did this wonderful thing on Valentines day, my dad was a real estate broker, my mom was a real estate agent, she was also a business woman. She would get a bunch of long stem red roses and my dad would go around and deliver a rose to each female real estate agent. I just thought that was so special. I learned a lot of things like that from my parents. 

We have been enjoying quite a few tasty treats these last few days so I thought I would make a treat that's better for us. 

I made a 5 ingredient thumb print treat (it's not truly a cookie so I thought treat would suit it better.)


First mash 2 banana's


Add 2 1/2 tablespoons of peanut butter


Mix it up


Add 1 1/2 cups of Oats and 1 tablespoon of Wheat Germ (optional)


I scooped 2 teaspoon which made 15


Make round indentations for the jam (here you should go straight to the oven, I didn't follow the golden rule, read recipe entirely first then make it, and I added the jam before baking)


I filled the centers with about 1/4-1/2 teaspoon of Jam


They baked at 350 F for 17 1/2 minutes

These would have looked prettier had I added the jam afterwards, I don't think they changed the flavor. I tried them warm. I'm looking forward to trying them cold. They stay together just like cookies do.

Here are the ingredients and instructions:

2 very ripe banana's
2 1/2 tablespoons of peanut butter*
1 cup of Quick cooking Oats not instant
1 tablespoon of Wheat Germ (optional)
about 4 teaspoons of jam

Preheat oven to 350 F grease or line a baking sheet with parchment paper.

In a medium bowl mash banana's add peanut butter and mix. Add oats and wheat germ if using. Scoop mixture onto to baking sheet and then make rounded indentations for the jam.
 Bake for 15-18 minutes
Add small amount of jam in the center of the treats and let cool.

*Try using chunky peanut butter for added crunch

Enjoy!

I found this, and adapted, recipe on Pinterest, shocking I know!